After many years of working with old houses, I know that floorboards twist and warp over time and are regularly lifted to install new cabling or to fix plumbing leaks.
This wear and tear leaves an uneven base that needs rectifying before fitting new flooring, so in this guide, I show you how to level a wood floor like a professional.
Levelling Wood Floors
When renovating my bathroom many years ago, I decided to ditch the old vinyl flooring and go for a tiled finish. The first thing I saw when I stripped out the covering was a mish-mash of old and new(ish) floorboards of all shapes and sizes.
They’d been lifted at various times to install new pipes and not fixed back in place properly. It was clear that I couldn’t just tile over this mess — I first had to level the floor to provide a flat surface for the tiles to bed onto.
In newer homes, floorboards often work loose or warp. As I discovered in my house, this issue can also occur after removing boards for plumbing or electrical work. If you have the same problems, follow the instructions in Step 3a.
In older homes, you may be dealing with an uneven floor with a few loose floorboards AND a sloping floor, possibly due to subsidence or settlement. You may also have sagging joists due to the age of the building. For this issue, you need a different approach.
First, find out why the floor’s sloping. If it’s due to subsidence, you may need to hire a structural engineer to ensure the movement has stopped. Note: Damp or insect infestation (e.g. woodworm) may also cause the floor to sag.
Once you’ve discovered the cause and resolved the underlying issue, proceed to Step 3b.
Tools and Materials
This list covers all possibilities, so go to Step 3 — a or b, depending on your circumstances — before buying any materials.
Tools
- Pipe/cable detector
- 1.2m spirit level (a 1.2m straightedge with a shorter level will do)
- A stiff brush and/or wet & dry vac
- Claw hammer
- Drill driver, impact driver or combi drill
- Screwdriver
Materials
- 38mm decking screws
- 20mm wood screws
- Boarding of your choice (see step 3)
- 50mm wide battens for sloping floors, depth to suit (see step 3b)
Health and Safety Measures
When working on floors, always wear knee pads. You should also wear gloves, but wearing a face mask or goggles shouldn’t be necessary unless you’re producing plenty of dust when removing the floor covering.
How To Level A Wood Floor — Step-by-Step Instructions
Step 1: Remove Existing Floor Covering
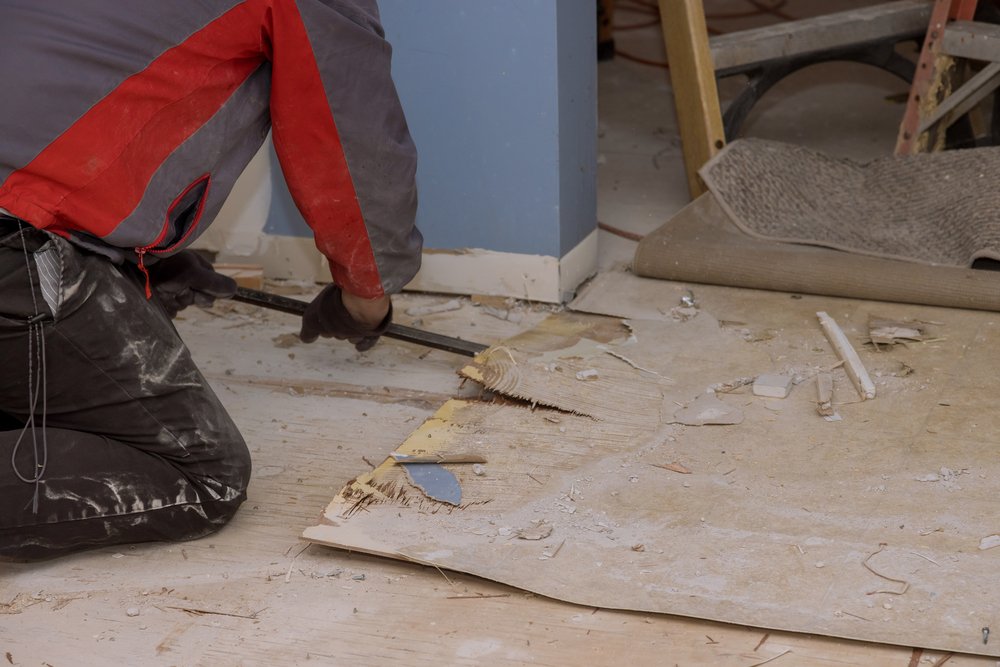
Removing all traces of the original floor covering, whether laminate, tiles, sheet vinyl or carpet, is vital.
Leaving a bit of adhesive isn’t a problem, but you must scrape off cement and any other substances that create undulations.
Levelling the floor will likely increase the overall thickness of the floor finish, so I advise removing the skirting boards if practicable.
You must remove any doors opening into the room and possibly reduce their height.
To prepare the floor, follow this process:
- Remove the covering. Follow our guide to removing laminate if applicable.
- Remove any underlay, including scraping off any bits stuck to the floor. If removing carpet, remove the gripper rods.
- Sweep and vacuum the floor to provide a clean base to work from.
- Knock in any protruding nails and screw down loose floorboards (having checked for pipes and cables — see Step 2).
Step 2: Locate Pipes and Cables
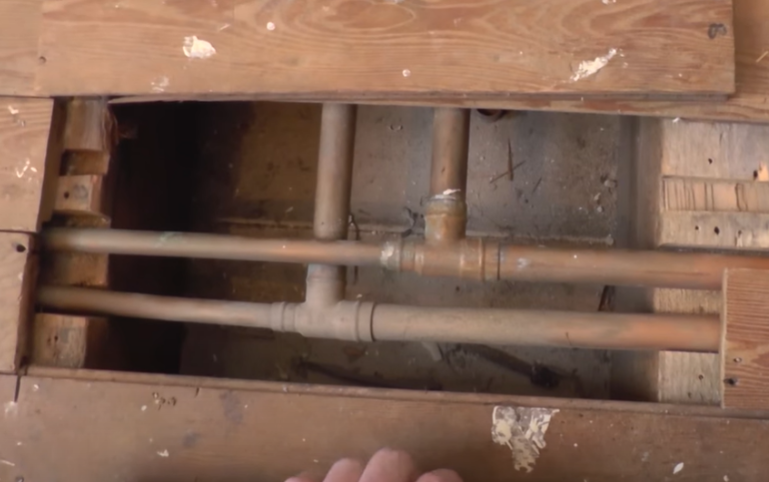
Once you’ve removed the floor covering, you may be surprised to see the state of the floorboards underneath. Older houses, in particular, have many pipes and cables buried beneath the floorboards, usually loosely fitted.
- Use a pipe/cable detector to find pipes and cables below the floor surface.
- Lift any loose boards to investigate why they were left unfixed. The illustration above is typical of what you’re likely to find.
- Mark the position of pipes and cables on the floorboards to avoid these areas when fixing the new over-boarding (Steps 3a or 3b).
- Take pictures. Having a photographic record of the location of pipes and cables can save you plenty of time and expense in future.
- Screw down any loose floorboards (no nails) and replace boards that show signs of rot or are badly damaged.
- Remove or hammer down any protruding nails to provide a flat surface to work from.
Pro Tip: If you find any stop taps, I advise relocating them to somewhere more convenient. The purpose of a stop tap is to turn off the water supply in an emergency or when making alterations to your plumbing system, so they must be accessible.
Step 3a: Levelling A Flat Floor

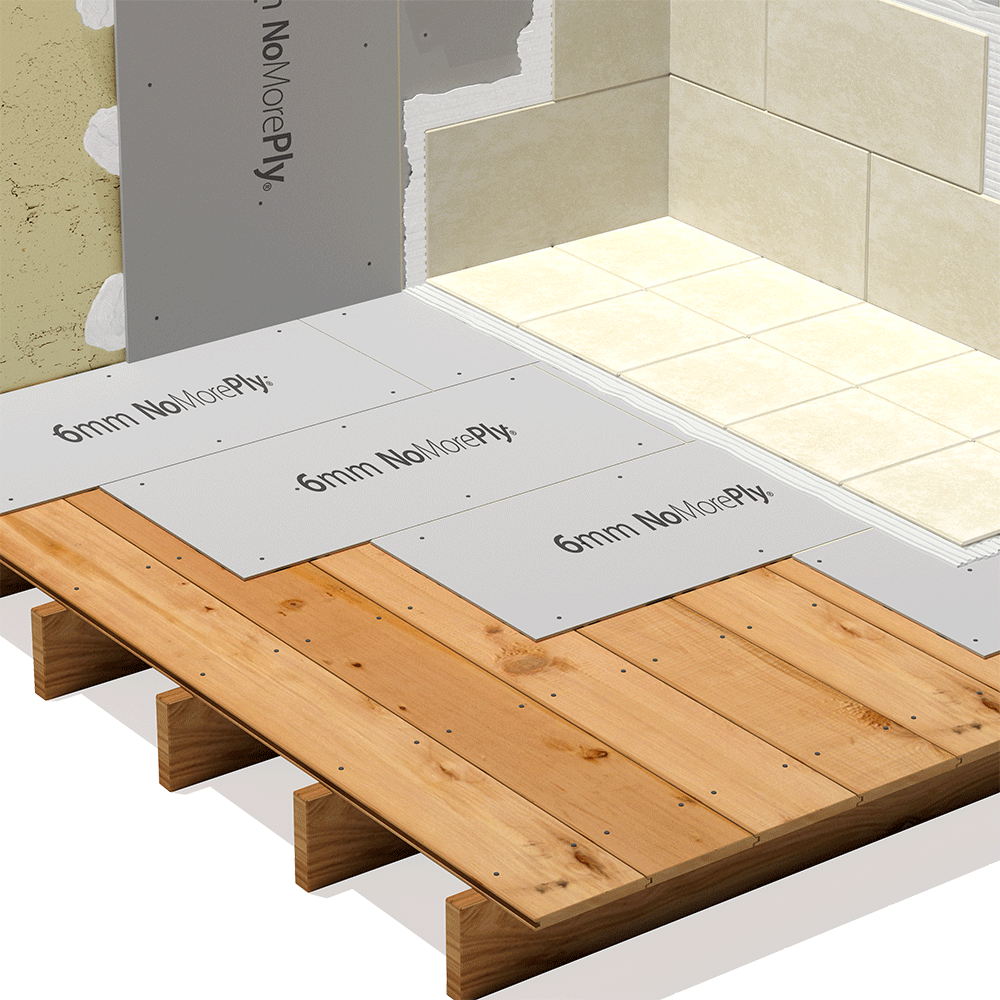
If your floor is generally flat with no significant slope in any direction, the simplest way to level it is to use a thin board such as plywood or hardboard.
Another type of boarding gaining popularity is the tile backer board called NoMorePly. This fibre cement board is completely waterproof and easy to cut with a utility knife.
- Choose your board. Below are four standard choices.
| Material | Thickness | Cost* | Pros | Cons |
|---|---|---|---|---|
| Plywood Non-structural hardwood | 5.5mm | £7 | Dimensionally stable | May need waterproofing unless using WBS plywood |
| OSB board | 9mm | £6 | Dimensionally stable Impervious to moisture | May need waterproofing. Thickness may be a problem |
| Hardboard | 3mm | £2.5 | Least impact on room height Easy to cut | Needs to be pre-soaked and dried |
| Fibre cement board (e.g. NoMorePly) | 6mm | £10 | Impervious to moisture Dimensionally stable Good thermal and acoustic properties Easy to cut. | Expensive |
*Cost is based on a 1.2 x 0.6m sheet
To determine how many boards you’ll need, measure the floor area and divide this by the area of the chosen board.
I’m going with hardboard for this guide because it’s cheap and easy to cut. The standard sheet size is approximately 2.4m x 1.2m, but smaller sizes are available in 600mm increments.
Note: smaller sizes are easier to transport and handle, but there will be more joints.
Pro-Tip: In areas prone to water penetration, such as bathrooms, WBP plywood or water-resistant chipboard is a better option.
- Condition the boards by brushing them on the rough side with water and leaving them to dry in the room where you will lay them.
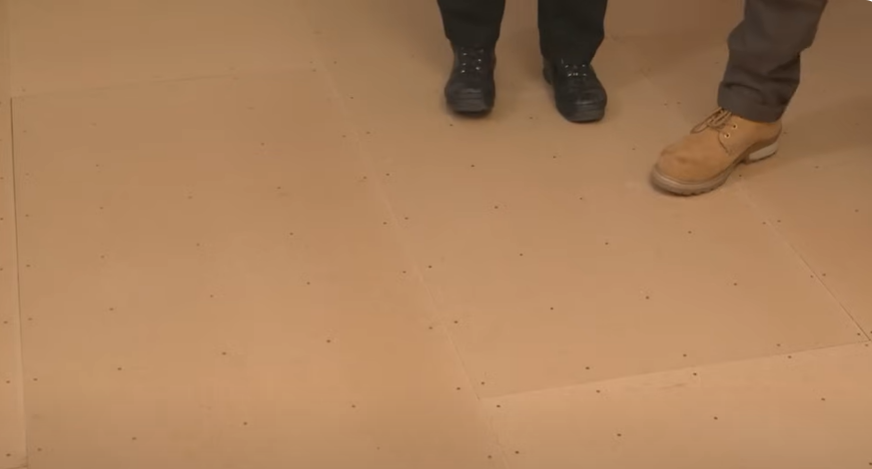
- Starting at the wall furthest from the door, lay the first board across (at 90 degrees to) the floorboard joints (see Fig. 1 below). For finishes that will be glued or cemented, the board should be rough side up. For loose-laid finishes such as carpet, lay it smooth side up.
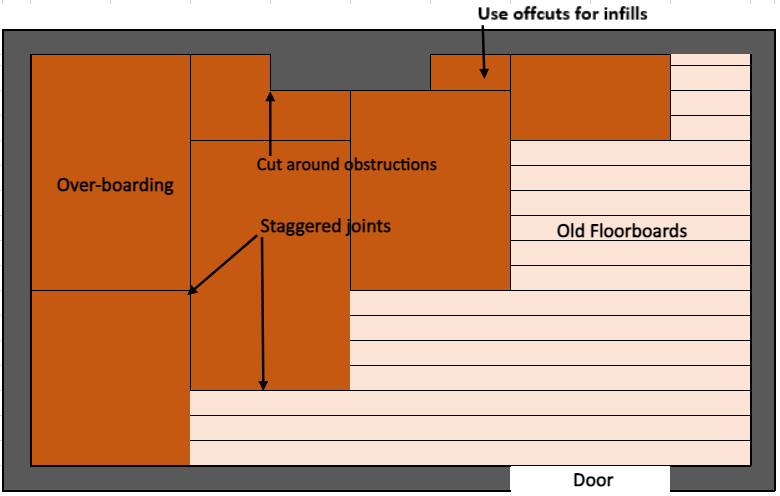
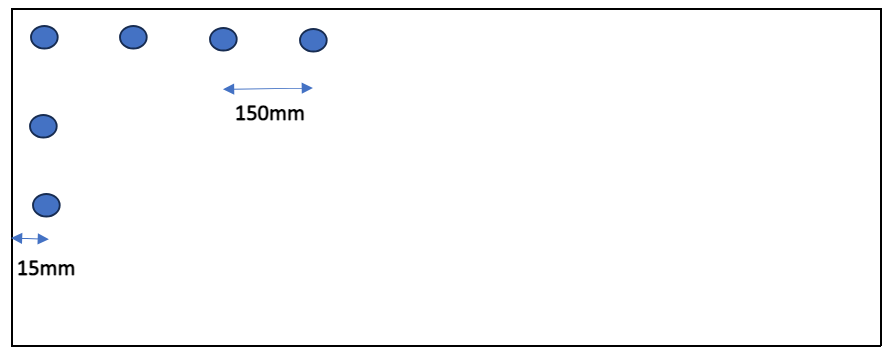
- Screw the boards 15mm in from the edges and then at 150mm centres, as shown in the diagram below. Continue screwing across the whole board using the same spacing in each direction.
- Stagger the next board a minimum of a quarter length.
- Cut around obstructions such as radiator pipes, a chimney breast or a WC.
Pro Tip: It’s easier to cut a short piece of boarding than a full-length sheet, so stop the boarding short of the obstruction and use an offcut (see Figure 1 above).
Note: An alternative approach for irregularly shaped rooms is to start in the centre of the room and work out from there.
Step 3b: Levelling A Sloping Floor
If the floor slopes or you need to level it with an adjacent room, I recommend a different approach. This technique requires much more effort but should be within the limitations of a keen DIYer.
For this step, you’ll need a 1.2m spirit level, a box of decking screws and a drill driver. If you have an impact driver, you may find this better for driving into the boards repetitively.
The reason I chose decking screws is that they’re self-drilling and are easy to adjust when it comes to setting the level.
When we talk about a floor being level, we mean relative to a specific point in a room, and that’s usually the highest point. It can also be the level of an adjoining room, which you can set at the doorway.
For sloping floors, we need a new subfloor instead of over-boarding. So, we must use something stronger like 18mm plywood or chipboard for this job.
Engineered wood is also an option with this type of construction, which doesn’t require any applied finish other than wax or varnish.
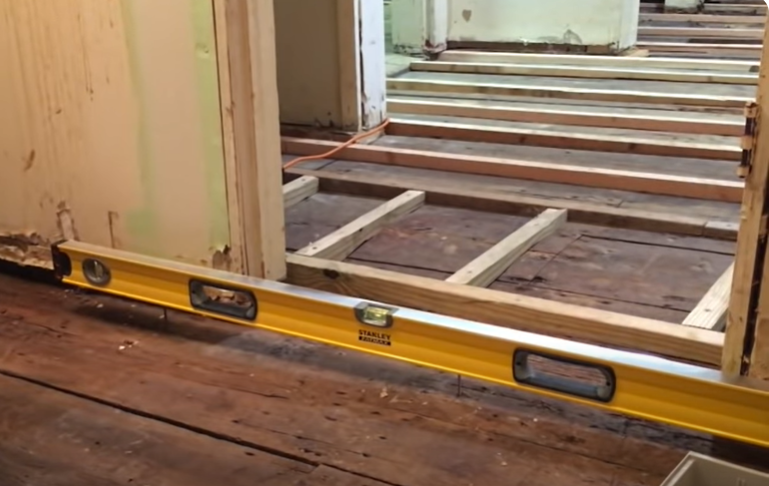
- Set up your reference point within the room. To do this, place your spirit level on the floor’s high point or the adjoining room level, depending on what level you want to achieve.
- Insert a decking screw into the floorboards towards the end of the spirit level. Don’t screw too far into the wood — at this stage, we’re only positioning the reference point.
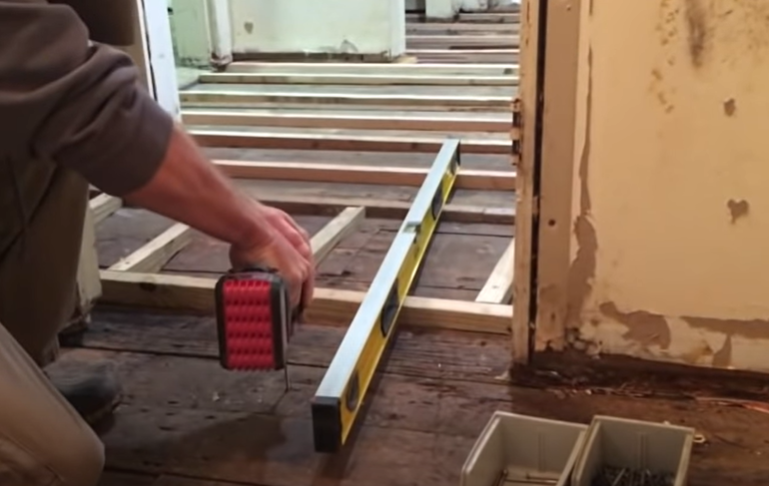
- Slowly drive the screw into the floorboard and place the spirit level on top. When the bubble is dead centre, the screw head is at the desired level.
- With the first screw head as the reference point, use the spirit level to set up points of equal height in any direction. To begin with, run parallel with the floorboards.
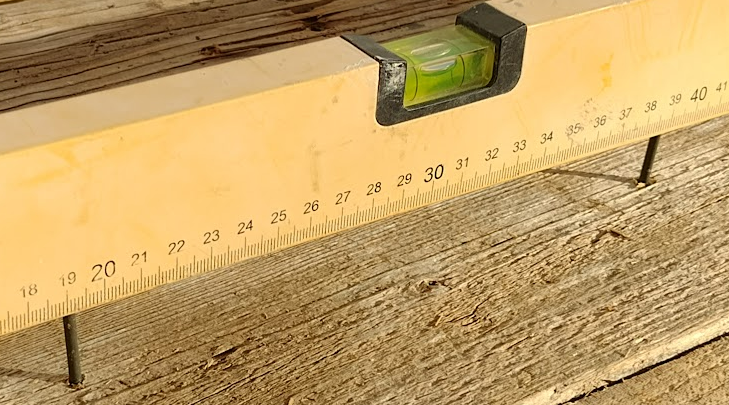
- Drive in more screws at around 600mm centres, checking the head height with the spirit level each time. These must be in a straight line, following the floorboards.
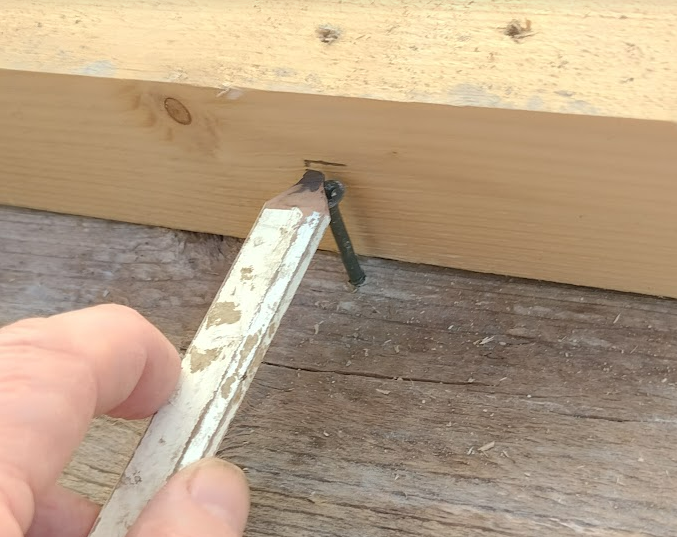
- Place a timber batten on top of the screw heads. The depth of this batten will depend on how much the floor slopes because you will cut it to the floor’s profile. The batten width should be a minimum of 38mm.
- Using whichever method you prefer, scribe the batten to the floor below. Use a scribing tool or a carpenter’s pencil with a wood block for this job.
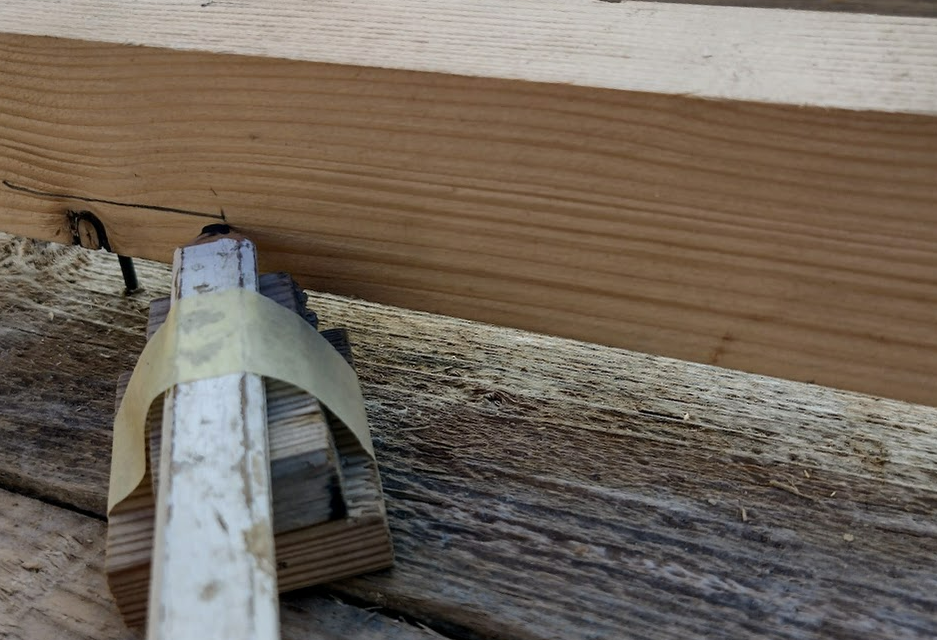
- Use a circular saw to cut along this line. If the slope is slight, you may get away with using a jack plane or an electric plane.
- Lay the cut batten on the floor alongside the screws — it should now follow the floor profile, but it may need some localised planing to get it right.
- Mark the position of the screw heads on the side of the batten.
- Draw a line joining up all these marks. This line should be parallel with the top edge of the batten.
- Cut along this line as you did in #8.
- Screw the batten to the floor along the line of the decking screws.
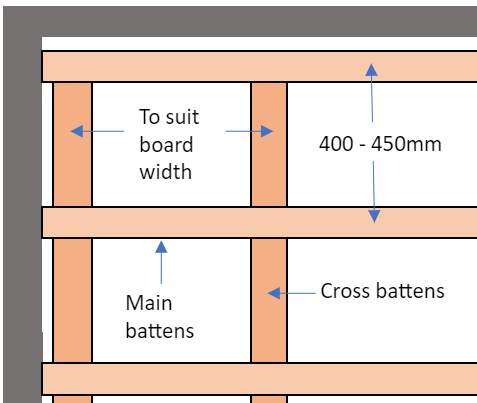
- Repeat the process across the floor so the battens are at 400–450mm centres.
- Cut and fix cross battens at the board joints.
- Fix the new boarding onto the battens. For chipboard, follow our guide.
Step 4: Prepare For New Floor Covering
- If you removed the skirting boards, it’s time to refit them. This step is an excellent opportunity to fit new skirtings if the old ones are damaged or outdated.
- Refit any removed doors after adjusting the height.
- Check the floor for any protruding screw heads and tighten up to provide a smooth, flat surface.
- Carry out one final floor sweep to remove dust and debris.
Final Thoughts
If you prefer a more visual guide to levelling a flat but uneven floor, check out this B&Q video.
You may be better off hiring a professional for sloping or sunken floors, as these issues are more difficult to rectify. However, if you feel confident about doing it yourself, the video below provides a visual guide.
