When is a door, not a door? When it’s yet to be hung.
An often-underrated aspect of interior décor and design, doors require a couple of hours’ installation in exchange for decades of uncomplaining service.
In this comprehensive guide on hanging a door, we cover handle and latch installation, planing and drilling. We also provide expert advice on obtaining the precise measurements required to ensure a door fits perfectly.
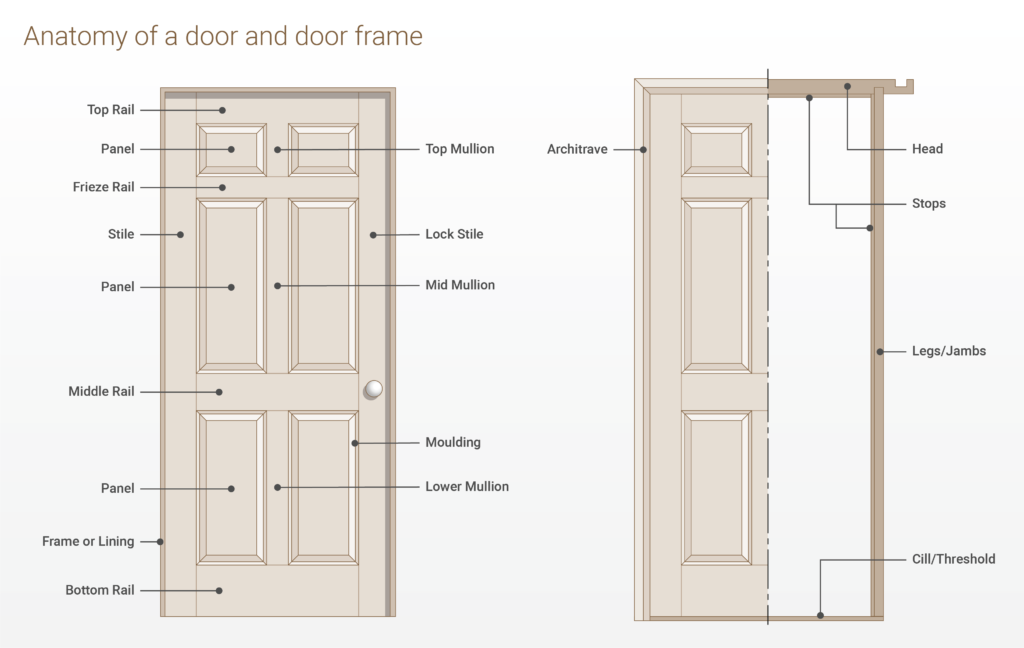
Door Anatomy
Before we start, it’s essential to understand the various parts of a door. The image below from Salisbury Joinery illustrates the anatomy of a door and door frame:
Tools & Materials
These are all the tools needed to hang a door like a pro.
Note: We’ve also outlined how to install a new door jamb before hanging the door itself. If you want to do this, you’ll need a nail gun.
Tools
- Drill and bit set
- Hand saw
- Plane or power sander
- Sandpaper
- Screwdriver
- Thin-bladed chisel (we recommend a 25mm chisel)
- Mallet or hammer
- Spirit level
- Tape measure
- Workbench (if you don’t have someone to hold the door in place)
- Wedges or air wedges (screwdrivers can suffice in an emergency)
Materials
- Strong gloves
- Goggles
- Ready-mixed wood filler
- Sharp pencil
- Hinges and screws
- Doorhandle (if required)
How To Hang A Door — Step-by-Step Instructions
We’ve made a couple of assumptions here; you’ve already chosen your door, and it’ll be hinged rather than sliding.
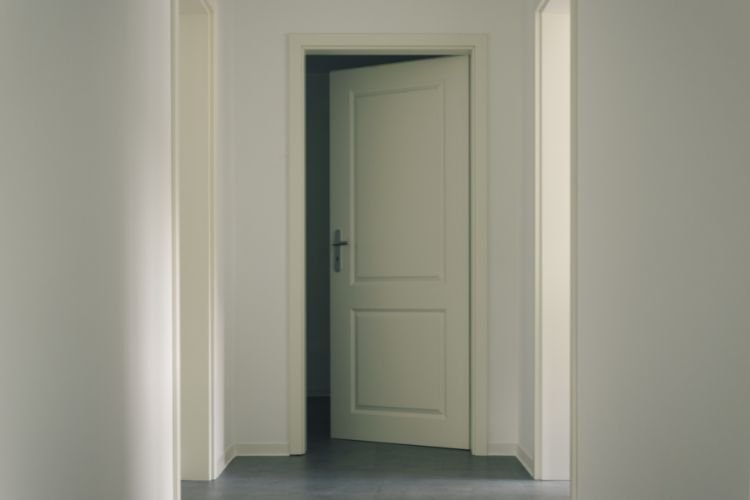
If you haven’t chosen your door yet, consider whether glazed panels will assist with light distribution and if you prefer a panelled design (often known as colonial) over a plain door.
Pro Tip: Always ensure a new door has at least 72 hours to acclimatise to the house before installing it. Otherwise, it might expand or contract as it adapts to the ambient temperature, which is a problem if you’ve already hung it with tight tolerances.
The Measure of Success
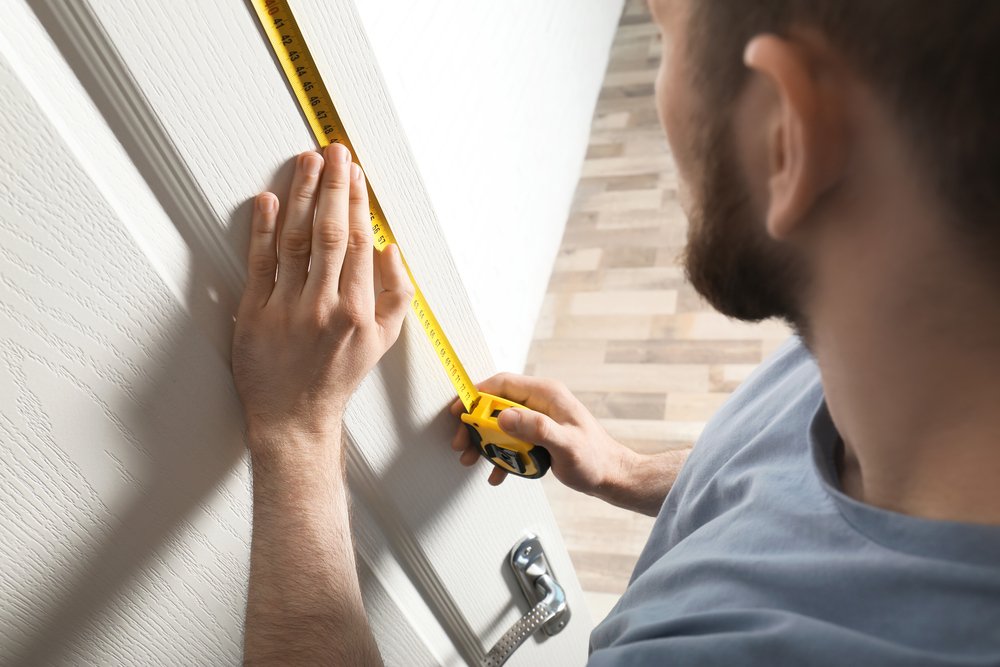
Measurements are critically important if you want to know how to hang a door like a pro.
The door fit and operation depend almost entirely on how accurately you measure the hinge positions and how much trimming is required to fit inside the jamb — a space known as the opening.
Keep a notepad and pen handy to write down your measurements, and always double-check them. Mark proposed drilling points with a pencil, which you can rub out if you need to modify them.
Tape measures tend to have a slightly protruding metal tongue at their ends, to stop the measure from disappearing inside the housing. Ensure this is flat to every surface you measure — resting the tape measure on the tongue might distort your measurements by critical millimetres.
That’s My Jamb
In most instances, hanging a door involves fitting it to an existing door lining.
Always check an existing lining has neat 90-degree angles — subsidence and settlement can cause one side to move out of alignment. It may still be possible to hang a door in this scenario, but it’s always better to have neat right angles at each corner of the doorframe.
If you’re happy with your existing lining, jump to step 1 below. Otherwise, read on.
A new lining will require two vertical timber pieces (jambs), one horizontal head section across the top, and a compact door stop on one jamb.
This B&Q video explains how to remove an existing door frame, though, in our experience, a complete removal is rarely necessary.
Pro Tip: If you’re not using a tongue-and-groove door lining kit, you must make precise 45-degree cuts at both sides of the head section and at the top of both jambs to ensure the three elements dovetail together. A measuring square or angle scribe will be helpful here.
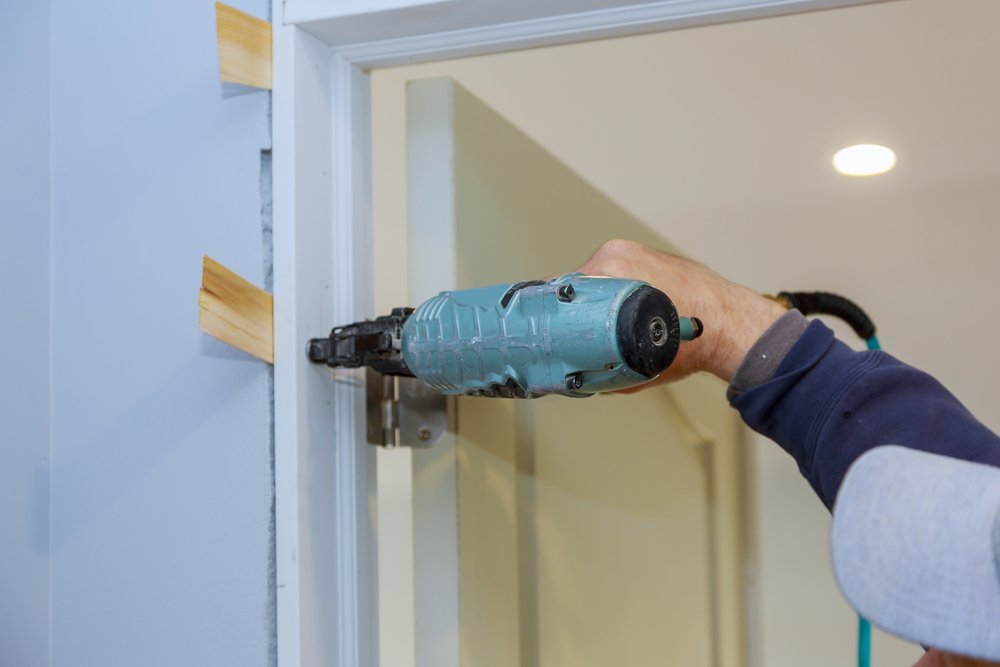
Use a nail gun to secure the timber joists together before nailing them in situ. Ensure you don’t insert any nails where hinges, latches or locks may subsequently end up.
If you’re trying to reverse-engineer the jamb to be the right size for the door (rather than vice versa), you may need to shave the wood with a plane.
Use a spirit level to ensure the vertical jambs and horizontal head section are perfectly straight, sitting at neat right angles. If they’re not, the door won’t fit inside them.
You’ll also have to insert a door stop along the opening side of the jamb, ensuring the door comes to rest flush with the jamb. To do this, follow the steps below:
- Measure the thickness of the door.
- Mark a line inside the jamb on the opposite side of the hinges. The depth of this line must match the measurement above and is where the stop will sit.
- Nail a piece of timber (the stop) around 1cm deep into place along the full height of the jamb.
- Check the door closes and rests flush with the frame against the stop.
1. Remove Old Door
Unless you’re undertaking a full refurb of an older property, there will probably be an existing door in situ.
Remove the screws from the bottom hinge first, then tackle the top hinge. You might need to scrape the paint off before accessing the screw heads.
It may be possible in some instances to reuse the existing door hinges for the new door. If you’re happy to do this, jump to step 2.
If the new door needs differently sized/shaped/numbered/smarter-looking hinges, we recommend filling in the holes left behind after removing the old ones with ready-mixed wood filler. Once that’s dried (usually within two hours), sand off any excess to leave a smooth surface.
Address any resulting colour disparity by repainting the entire jamb — this is always easier when there isn’t a door in the way!
Pro Tip: We recommend matt or satin paint over gloss because it doesn’t discolour as quickly.
2. Check the Door’s Measurements Relative to the Jamb
This measurement allows you to see whether the door needs adjustment. Doors and frames tend to be standard sizes nowadays, but you may have to do some trimming on your new door.
If the old door fits neatly, lay the new one on top, and check whether they’re the same size. If they are, no trimming is needed. If you’re reusing previous hinges, you can use the old door to indicate where to position the hinges on the new door.
If you need to trim the door, mark the cutting depth at both ends and in the middle. Draw a pencil line from end to end through these three points using a steel ruler or straight edge.
Some factory-fresh doors have hinges and latch sides preordained. If your new door doesn’t, decide which way around you want to hang it and mark the sides accordingly.
Pro Tip: Part-inserting a few nails into the middle of the door jamb can prevent the door from falling straight through when attempting to see whether it fits!
3. Trim Off Excess Timber

New doors often come with horns — protective edgings to prevent corner damage in transit.
You can usually remove these horns with a saw, but always ensure you don’t accidentally damage the door itself in the process.
If the opening’s measurements indicate the door needs to be shortened or thinned out, secure it in place (either ask someone to hold it or wedge it firmly) and cut off the excess with a saw, a manual plane or an electric planer. The latter is far quicker but dangerous — always keep your hands above it, and ensure children and pets aren’t around for this stage.
Panel doors are often symmetrical at the top and bottom. If you need to remove 2cm of timber, take one centimetre off each end to maintain that symmetry. This Wickes video explains how to repeat this trick when reducing a door’s width.
Use sandpaper to smooth off the cuts until you can run your hand along the surface without encountering bumps or splinters. Work from the edges towards the centre to avoid creating more splinters at the edges.
Pro Tip: You ideally want a 2mm gap between the door and frame on every side, which is the width of a two-pence coin. Aim for a gap of around 5mm between the door and the flooring.
Our step-by-step guide to planing a door is full of practical advice on trimming timber.
4. Position Hinges

If you used the old door to pre-mark hinge locations, skip this step. Otherwise, locate the upper hinge 175mm down from the door’s top edge, with the lower hinge 250mm up from the bottom. From a standing position, these two gaps will look the same size from the door’s extremities.
Doors over 15kg, or more than 1.5 metres tall, need three hinges. When hanging a door 2.3 metres tall, four hinges are required, and remember to space intermediate hinges evenly between the top and bottom hinges.
Rest the door on the ground with its hinge side facing up. Use a pencil to mark each screw hole through the plate, ensuring the side of the hinge is flush with the door edge.
If you’re not reusing existing hinges, repeat your measurements on the door jamb. Add the 2mm gap by wedging a two-pence piece into position, and mark the other screw holes. You’ll also need to trace around the hinge’s outline because it needs to be recessed into both the door and jamb.
Pro Tip: Don’t just trace around the hinge plate’s periphery because the resulting hole will be slightly too large. Draw the top line, then slide up the plate until it covers the pencil line before tracing the other sides.
5. Create Hinge Holes
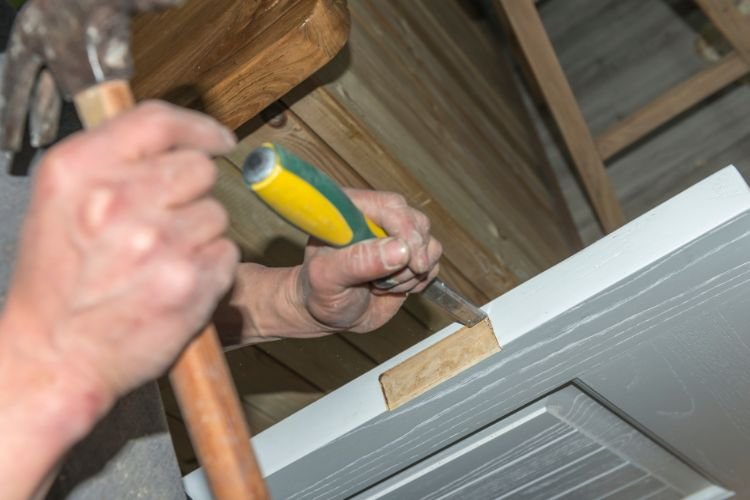
Having marked the hinge’s thickness on the door and jamb, start chiselling out this depth of timber with light mallet taps. Work slowly to ensure you don’t stray beyond the required depth.
Insert the chisel to the requisite depth around the pencil markings that indicate where the edges of the hinge will go. Next, working away from your body, create a series of 45-degree shallow cuts with the chisel to the appropriate depth, as shown in this B&Q video from 1:25 onwards. These can easily be knocked out horizontally and tidied up around the edges.
Once you’ve removed all the wedges, use sandpaper to create a smooth base inside the indentation and around the pencil-marked edges. Next, drill pilot holes into each pencil mark, as these will reduce the likelihood of the timber splitting once you insert the screws.
In his recent video below, starting at 1:19, Charlie DIYte explains how a trim router can standardise and simplify the job of creating consistently deep holes in timber.

Once you’ve finished, put each hinge into place and ensure it’s flush and fits snugly, with only the hinge pivots sticking out. If you’ve accidentally removed too much wood, fill any gaps with wood filler.
6. Test Measurements
Put a screw into each hinge’s middle bottom hole, lightly tightening it. Lift the door into place and put another screw into the other side of the hinge, pulling it towards the jamb at a 90-degree angle.
You’ll ideally want someone to take the door’s weight during this process because a handful of screws may not be enough to hold it in situ. If you don’t have a glamorous assistant, use wedges to prop the door up or deploy an air wedge as a high-tech alternative.
7. Add Remaining Screws

If you’re satisfied that the door can open and close smoothly, it’s time to insert the remaining screws.
Once all the screws are inserted, ensure the door continues to open and close without issue. There shouldn’t be any creaks or squeaks, but a squirt of WD-40 will eliminate any graunching from the hinges.
Pro Tip: If the door isn’t hanging perfectly, try adjusting the screws that fix the hinge to the doorframe. Even tiny adjustments may be enough to ensure smoother movement.
8. Paint or Varnish

If your door comes ready-painted, as many are, skip this step.
If the bare wood needs treating, you might wonder why we recommend this as the eighth stage rather than the first, but it’s easier to paint or treat a door when all six sides are fully accessible. Trying to do this while one side is resting on the ground is more complex, and the same is true if it’s clamped in a heavy-duty vice.
If there are any large knots, apply a knotting solution to prevent resin from seeping into the new paint. Let this dry, apply a primer and/or undercoat if required, and then give the door as many coats of satin paint or varnish/lacquer as needed.
You’ll find expert advice in our eight-step guide on painting a door.
Getting A Handle On Things

If your doors come with handles already fitted, jump to our Final Thoughts section below. Otherwise, you’ll need to choose a suitable handle in the material and design of your choice.
Note: The Latch is the piece of metal that slots into the door frame, while the latch plate is its housing.
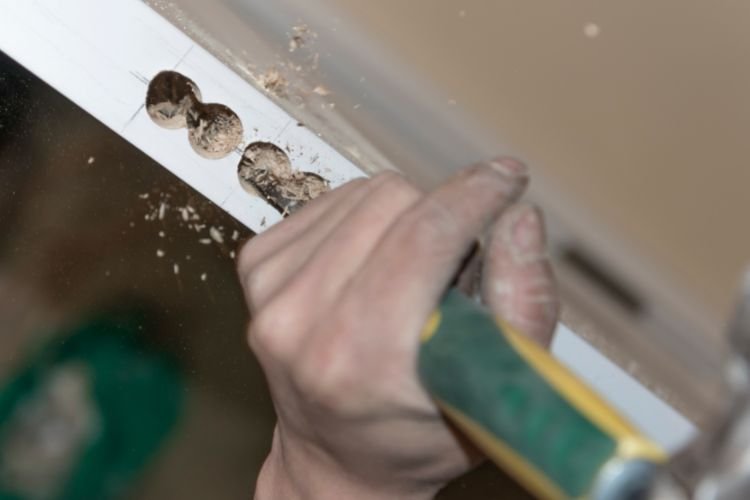
9. Create A Latch Hole
Unless the door is exceptionally tall, fit the latch around a metre off the ground, and ensure it’s equidistant from either side panel and on the opposite side to the hinges.
Repeat the hinge marking technique by tracing a pencil line around the latch plate and indicating where the screws go. As before, move the plate up to the top pencil line before drawing the bottom line, and do the same along the second vertical.
If your chisel is small enough, use it to hollow out a hole in the side of the door for the latch mechanism. Use a large flat-headed screwdriver or break out a trim router if it’s too big. A recent B&Q video offers advice on suitable tools and installation techniques.
As with the hinges, ensure you don’t go too far into the wood. Try to work against the grain to prevent splintering.
Pro Tip: Put a dab of permanent marker pen along the outermost edge of the latch and push it into the door lining. It will leave traces as it opens and closes, showing where the corresponding latch plate needs to be installed to hold the latch in position once the door is shut. Repeat this installation process for the plate.
10. Create Spindle Hole

Once the latch plate fits flush with the door, you must create a hole for the handle’s spindle.
Mark the door where it needs to be mounted to slot into the latch by holding the latter to the door and pencil marking the latch hole.
Use your drill to punch through the door, blowing any fragments and debris out to ensure a clear hole for the spindle. Ensure you go through horizontally rather than at an angle — the hole on the other side should be the same distance from the door edge.
11. Mount Handles Onto The Spindle

Slide or insert a handle over the spindle once it’s through the door and in the latch hole. Using your free hand, hold the handle in place while drilling in screws to support the handle plate.
Repeat this process on the opposite side, following specific instructions in the handle kit. Ensure the handle plate is completely vertical on both sides before installing it.
If there’s a locking mechanism, repeat step 10, ensuring the distance from the latch to the lock barrel is correctly measured and marked on the side of the door in pencil.
Always ensure each handle is the right way up and the right way around before fitting the screws. You wouldn’t be the first DIYer to mount the handle the wrong way, leaving it sticking out beyond the door and preventing it from closing!
You can find more tips on how to add handles in this video from The Carpenter’s Daughter, starting at 5:27.

Final Thoughts
Knowing how to hang a door like a pro might sound complicated, but it’s relatively straightforward if you follow a systematic approach.
If you want to see the whole process in action, watch the video below by Charlie DIYte. As you’ll see, he goes into considerable detail about the various stages.

On the other hand, if you’re short on time or lack the confidence to do this job, use Rated People to find top-rated carpenters in your local area.