Most of the time, you might not give the doors in your home a second thought. That is, until they start sticking, scratching your floor or otherwise giving you grief. Then they can quickly have you on the threshold of madness.
If you have a door needing attention, it’s generally easier to resolve than you might think.
Rather than hiring a carpenter, our guide on how to plane a door will show you how easy it is to do it yourself. If you follow our simple steps, it’ll be plane sailing.
Tools & Materials
Tools:
- Carpenter’s pencil
- Doorstop or wedge (optional)
- Screwdriver or drill (for taking down the door)
- Large workbench or sawhorses
- Clamps or straps
- Hand planer or electric planer
Materials:
- A thin piece of cardboard
- Sandpaper
- Wood stain or paint (to refinish)
- Patience!
How To Plane a Door — Step-by-Step Instructions
If one of your doors starts sticking or scraping along the floor, you have a couple of options. First, tighten the hinge screws in case that’s your issue.
If that doesn’t fix it, your next step is to plane the door’s edges. It’s one of those classic jobs that sounds tough but is surprisingly simple if you follow these steps…
1. Finding where to Plane
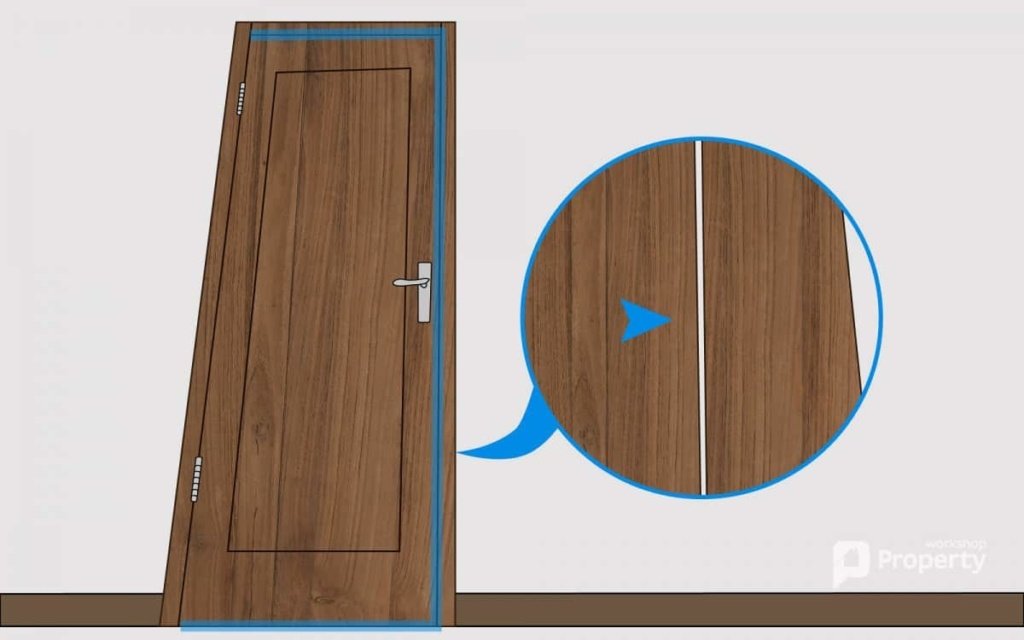
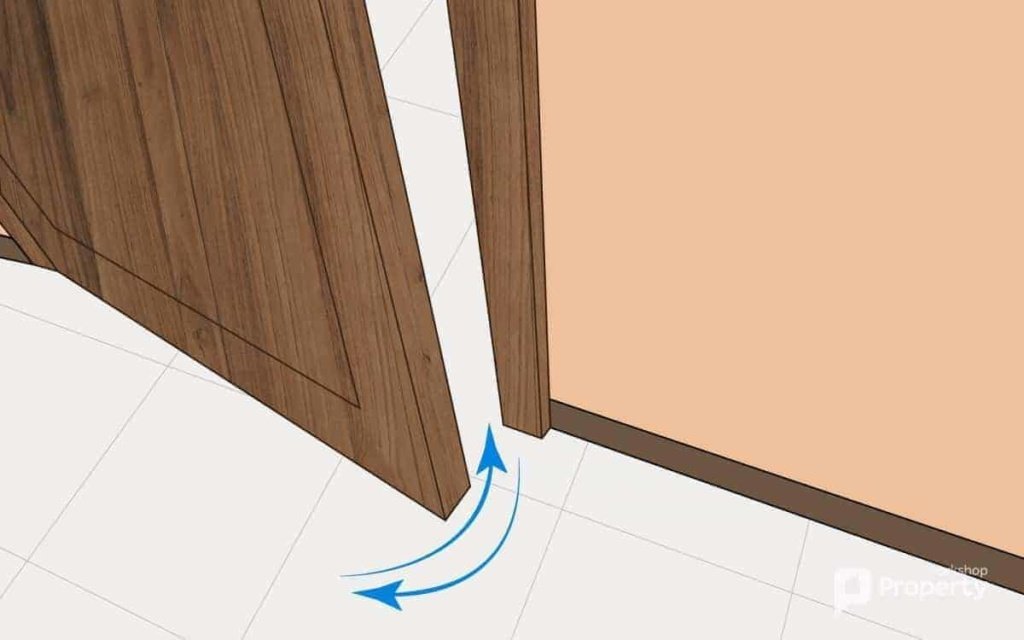
Your first job is to locate the areas on your door’s edges where you need to plane. I.e. find the door parts sticking, rubbing or scraping on the jamb or the floor.
Start with any areas where the paint is discoloured or has been removed. Also, run a thin piece of cardboard between the door and the jamb, then between the door and the floor. If it gets stuck anywhere, you need to plane the door.
2. Marking the Door
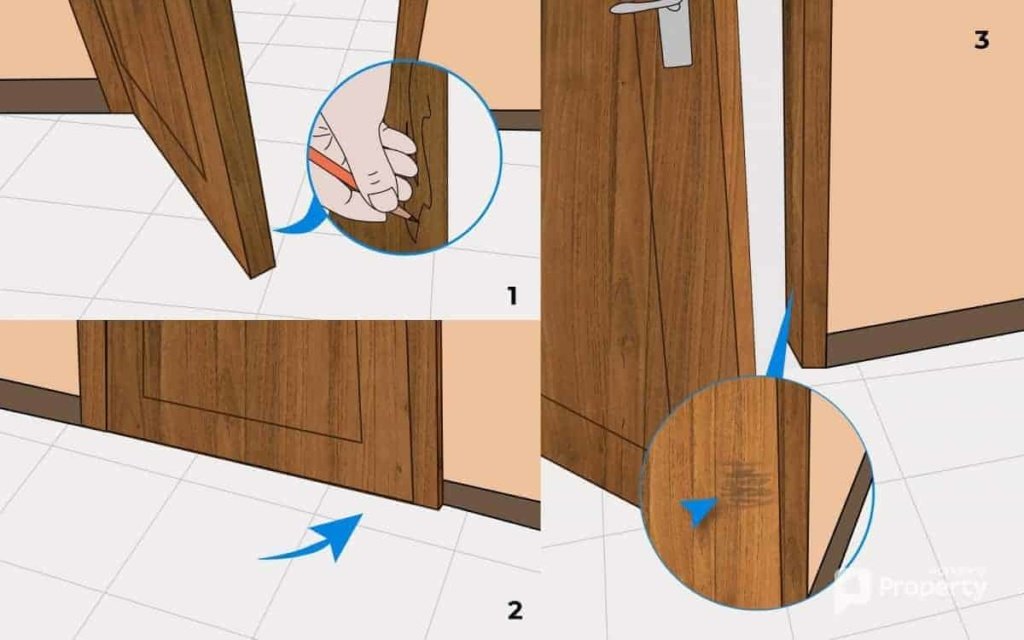
Once you’ve located areas that need trimming, mark them with a carpenter’s pencil. Ensure the marks are clear enough to see after you’ve moved the door.
Also, mark the door faces, not the edges, since the planer will remove any marks on the edges!
3. Preparing to Plane
You’re now ready to take the door down to plane it. Don’t worry about having to re-hang it afterwards, as this guide from The Carpenter’s Daughter has you covered.
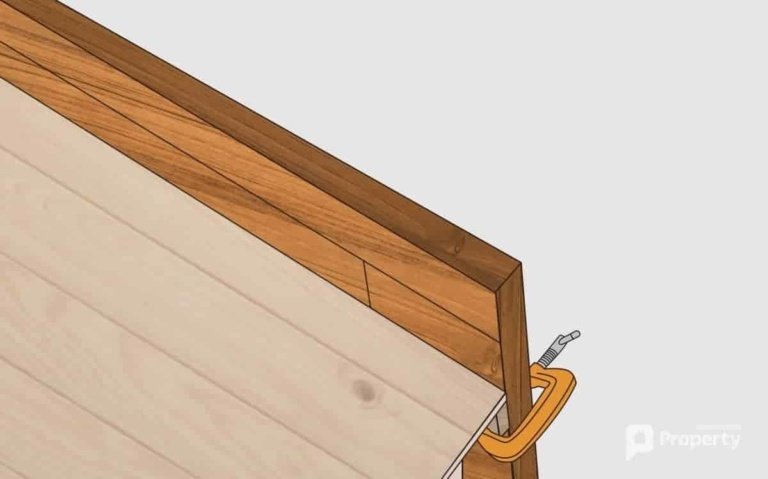
When you’ve got the door down, lay it on a stable surface like a large workbench or a pair of sawhorses. Clamp the door down, or secure it with straps so it doesn’t wobble or slip when you start to plane it.
Pro Tip: If only one small area on the door edge needs trimming, you might not have to take it down. Place the door where you have the best access to the edge and immobilise it with a doorstop. You can then trim the door in situ.
4. Planing the Door
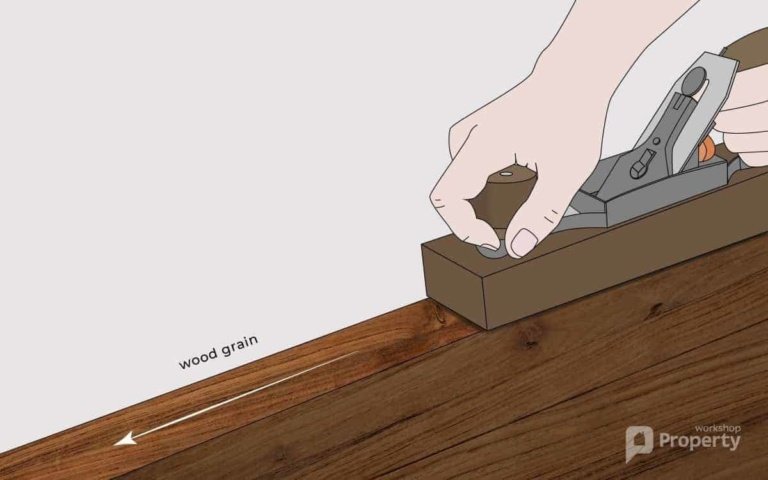
If you haven’t used a hand planer before, you might want to check out DIY Doctor’s in-depth guide. When you plane the vertical edges of the door, follow the wood grain.
Pro Tip: To speed up the process, use an electric planer.
For the horizontal edges, plane toward the centre from the outside edge. Always apply a steady but light pressure to avoid gouging the wood, helping to plane off a consistent amount with each stroke.
5. Check, Plane and Check Again
As soon as you think you’ve trimmed enough off the door, rehang it and check how it swings. Avoid taking off more wood than you have to. You can always plane more, but you can’t get any back once it’s been shaved off!
If the door sticks or scrapes, take it back down and plane a little more, repeating the process until it opens and closes perfectly.
6. Refinish the Door
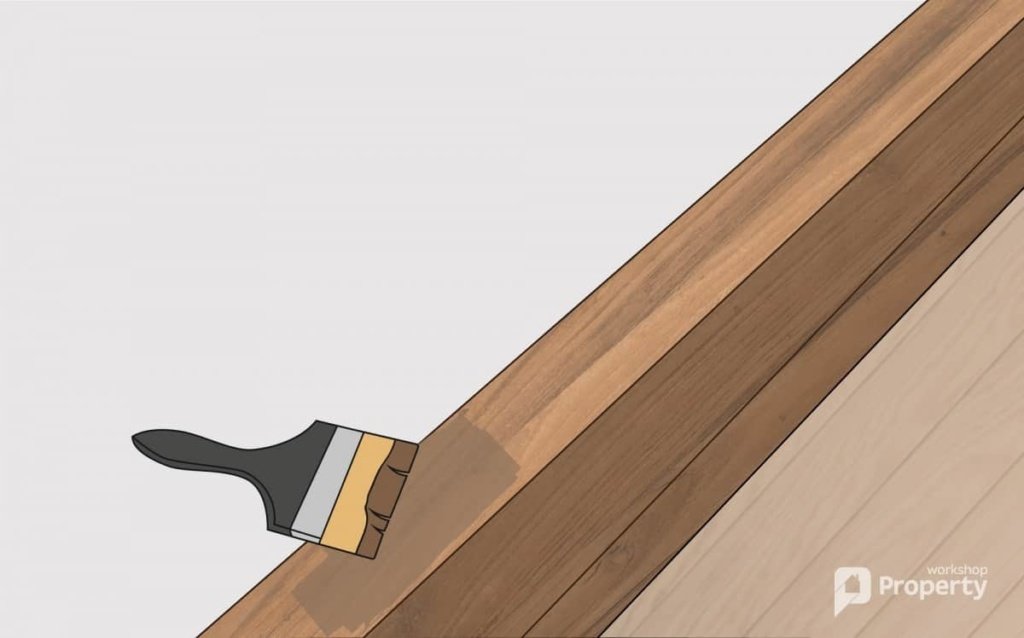
Once you’ve made the adjustments, lightly sand the trimmed areas until they’re smooth. Smoothness is all you’re aiming for, so don’t go overboard.
When the edges are smooth, reapply the same stain or paint you’ve used on the rest of the door.
You may also want to think about repainting the door in its entirety. There’s rarely a better opportunity to get it done easily than while it’s off its hinges. Then, rehang the finished door.
Pro Tip: As well as repainting the door, you can freshen it up in other ways while you’ve got it off its hinges. Kezzabeth has written a great guide on removing and restoring old door furniture.
Final Thoughts
You can achieve results a professional carpenter would be proud of by following the steps above. You’ll also save yourself a fair chunk of change.