
When drilling into tiled walls, I prefer going through the joints rather than the tiles themselves. However, that’s not always possible, so I’ll show you how to drill tiles without damaging them.
I use the same process for all materials, whether you have glazed ceramic, porcelain, or marble tiles.
Spoiler alert — the trick is to use the right drill bit!
Tools and Materials
Below are all the tools and materials you’ll need to drill tiles like a pro.
Tools
- Electric drill (battery powered). Combi drills are ideal for this, but drill drivers are just as good for a small number of holes
- 6mm tile drill bit
- 6mm masonry drill bit
- Plastic tub or bowl for water
- Something to catch the dust (see my tip below)
- Pencil and marker pen
- Spirit level
- Tape measure
Materials
- 6mm masonry or plasterboard rawlplugs
- Masking tape
- Water for cooling the drill bit
Health and Safety Measures
Tiles usually mean water is nearby, so avoid using mains electric powered tools.
Also, wear goggles to protect your eyes from flying tile fragments, although the chances of that are low when using this method.
How To Drill Tiles — Step-by-Step Instructions
In the steps below, I explain how to drill small holes through tiles fixed to a wall.
For drilling larger holes, like the ones used for pipes, you must use a particular hole-saw drill bit. In this case, still use the steps below, but only for the pilot hole.
Step 1: Mark Tiles
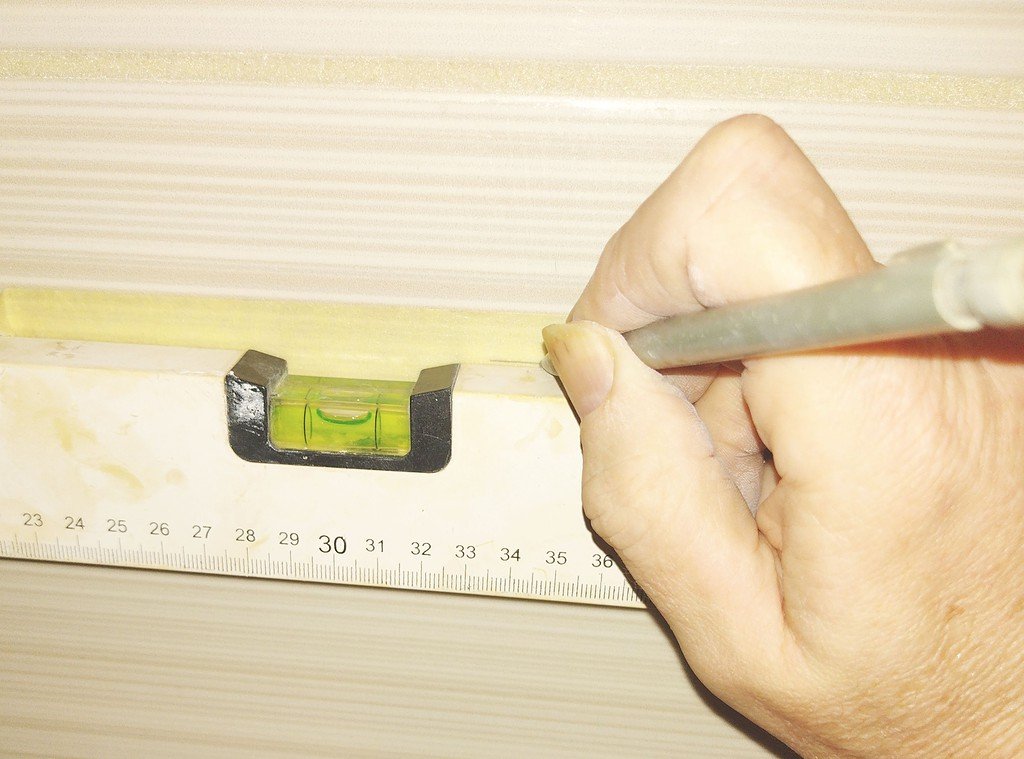
Be precise with your markings and read the instructions for the product you’re fixing to the tiles. If the manufacturer provides a template, make use of it.
- Stick a strip of masking tape over the tiles to be drilled. This strip makes it easier to draw pencil lines, especially on dark tiles.
- If you have two or more holes to drill, ensure they’re perfectly horizontal/vertical using a spirit level and pencil.
- Use a marker pen to mark the exact spot when you have the correct positioning.
- If you suspect there might be wiring or pipes where you’re drilling, use a stud detector to check before you move on to Step 2.
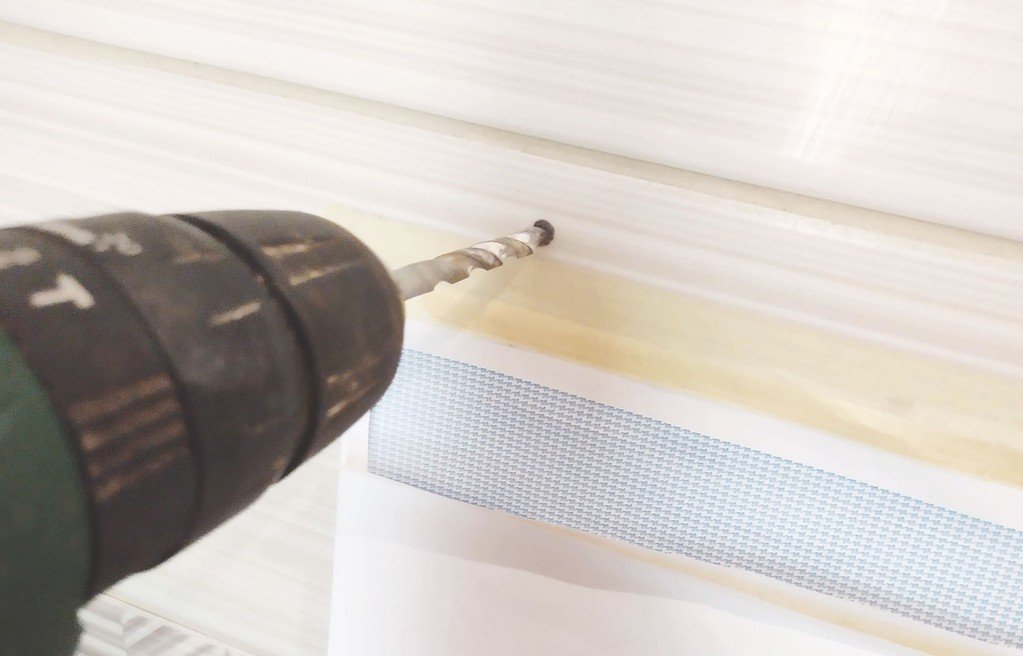
Step 2: Drill Into Tiles

Tile drill bits have special arrowhead tips designed not to wander when drilling into tiles. This feature is essential with glazed surfaces.
Pro Tip: Before drilling, you may want to use something to collect the dust. An ordinary handheld dustpan will do, but to free up your hand to steady the drill, tape a paper envelope to the tile just below the hole position (see image above). A small polythene bag works just as well.
- If you’re using a combi drill, set it to ‘drill’ mode, ensuring ‘hammer’ mode is off.
- Insert the tile drill bit and ensure it’s fitted tight.
- Start drilling using firm pressure but not too hard. You only want to break through the tape to leave a mark on the tile.
- Remove the tape; otherwise, it will clog the drill bit’s cutting edges.
- Drill through the tile where you’ve left your mark, gradually increasing speed to around 900 RPM.
- Once you’ve fully broken the surface, stop and dip the drill bit tip into cold water. Do this every few seconds — you mustn’t let the bit get too hot, or it will damage the tip and potentially crack the tile.
- Continue drilling until you’ve reached the other side of the tile. Don’t drill into concrete or masonry with your tile bit, as this will damage the cutting edge.
Pro Tip: This method works well for all kinds of tile, but if you’re drilling into porcelain or marble, you may be tempted to use a diamond-tipped drill bit. A word of caution: these drill bits tend to wander, so you’ll need a guide for precision.
Step 3: Drill Into Wall
- Change your drill bit to a masonry bit before drilling into the wall behind the tiles. This bit works for plaster, brick, concrete block, and plasterboard.
- Hold the drill perpendicular to the surface. Note: If using a combi drill, be careful with ‘hammer’ mode when drilling into masonry or concrete because you could crack the tile.
- Using firm pressure, drill into the surface far enough so that the wall plug will be completely buried.
Step 4: Insert Wall Plug

- Clean the surface of the tile and insert the wall plug.
- Tap the wall plug with a hammer or mallet using short, soft blows. Avoid bending the plug, as this will render it useless.
- The plug must sit flush with the tile surface so that the expanding section is in the substrate, not the tile.
- To avoid damaging the tile, place a block of wood over the wall plug for the final blows.
Note: Whatever fixing you attach to the tiles, ensure you don’t overtighten the screws as this could crack the tile.
Final Thoughts
Drilling into wall tiles can be challenging, but by following this guide and using our recommended tools and materials, you should get a neat hole without damaging the tiles.
I recommend the video below by Charlie DIYte if you prefer a visual guide on drilling tiles. There are 3 videos in the series, but this one covers most aspects.

I mentioned in this guide that you can blunt your tile drill bit if you drill into masonry or dense plaster. If this happens to you, follow our guide on how to sharpen a drill bit.