Modern houses use tongue and groove chipboard flooring instead of traditional wooden boards. While it’s quick and convenient, it poses challenges when lifting the flooring for repair and replacement.
Experience tells me that lifting the flooring without breaking it is tricky because some are nailed down while others are screwed. In this DIY guide, I’ll demonstrate how to lift chipboard flooring without my expensive mistakes.
Tools and Materials
Before we get into the nitty-gritty of how to lift a chipboard floor, we must gather the right tools and materials. As Benjamin Franklin once said, “By failing to prepare, you are preparing to fail”.”
Tools
- Pry bar
- Claw hammer
- Power drill
- Jigsaw
- Tenon saw
- Cold chisel
- Lump hammer
- Safety goggles
- Safety gloves
- Face mask
- Metal ruler
- Pencil
Materials
- Screws (60mm)
- Nails
- New chipboard sheets
How To Lift Chipboard — Step-by-Step Instructions
There are several methods you can use to remove chipboard flooring. Some are better at lifting cleanly, while others make light work of the panels but cause damage.
1. Using a Pry Bar
A pry bar is a handy tool, especially for lifting chipboard flooring.
The technique is simple enough: insert the pry bar under the edge of the chipboard and push it down on the opposite end. The pressure lifts the board, enabling you to get the board up without too much fuss.
If you want the panels up in one piece, always start in the corners near the nails. Once you’ve lifted one end, you can concentrate on the other edge of the panel. This technique only works cleanly with nailed chipboard. Screwed panels will split and crack.
Don your safety gear before you start. Removing chipboard flooring is dirty work, creating dust and debris that can easily cause injury.
2. Using a Claw Hammer
The easiest way to lift flooring with a claw hammer is to pull the nails up first and then pry the sheets with the claw. Removing the nails ensures that the boards sustain minimal damage.
The other alternative is to use the claw hammer to lift the boards without removing the nails. Using this method, you’re more likely to damage the panels, but it gets the floor up quickly without buying specialist tools.
3. Using a Power Drill
Power drills are versatile tools, and with the correct screwdriver bit, you can remove the screws in your chipboard flooring to lift the floor.
Pro Tip: Ensure your drill has a reverse feature.
Alternatively, you could go old-school and use a screwdriver, but that would take forever, assuming fatigue doesn’t set in before you complete the task.
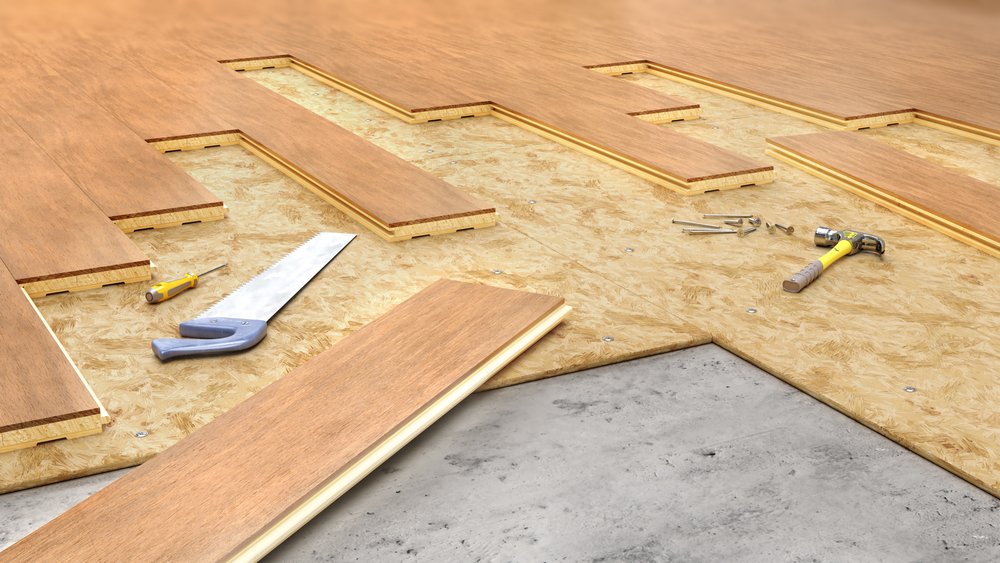
4. Using a Jigsaw
Using a jigsaw (you can also use a circular saw or hand saw) makes light work of chipboard flooring. You will damage the panels by cutting them, but it doesn’t matter if you have new chipboard sheets to lay down.
Use a metal ruler to gauge the distance from the edge of the flooring panel to the joist. The last thing you want is to slice through a ceiling joist and weaken the structure. Once you’ve measured the distance, mark it with a pencil line.
Fire up the jigsaw and work along the pencil mark from one end to the other. Repeat the process on the other sides, and the panel will lift out. You’ll need a claw hammer or pry bar to lever the anchored sections still attached to the wooden joist.
Pro Tip: To avoid cutting through live electrical cables, use a stud finder like this Bosch model.
5. Using a Tenon Saw/Circular Saw
The easiest way to cut tongue and groove chipboard flooring is to use a tenon saw (or a cordless circular saw) and cut along the tongue on each edge. You can now lift the boards free.
If you have lots of chipboard to lift, using a cordless circular saw might be better, but be aware of joists, wires and hidden cables.
6. Using a Cold Chisel
Cold chisels are the go-to tool for heavy construction or demolition. They work on masonry, concrete, and chipboard flooring, especially square-edged boards.
You’ll need a club hammer, like this one from Stanley, because your claw hammer lacks the weight needed to drive the chisel under the chipboard.
Pro Tip: Using a cold chisel is hard on your hands, so always wear safety gloves. If you can buy a pair with impact resistance, like these Vgo Safety Gloves, you could save yourself a world of pain.
Place the tapered edge of the chisel against the chipboard seam, holding it at a 45-degree angle and strike the other end with the lump hammer. The force pushes the chisel under the board, lifting it.
It’s always better to start in the corners, where the nails or screws sit. You may also benefit from sliding a length of wood under the raised board to help pry it up.
Why Does Chipboard Flooring Squeak?
Your new chipboard flooring may be silent when first laid, but it lifts and makes an annoying squeaking sound over time. Nailed or glued chipboard sheets are the worst offenders because they expand, pushing against the nearest boards, causing them to bow.
As this happens, the nails release their grip, and the floor has a bouncy quality, making it creak and groan.
Moisture and temperature changes are your worst enemy. Chipboard sucks up moisture more eagerly than a vampire at a blood bank, causing it to expand.
You could ignore the issue because it bears no reflection on the structural integrity of your floor, but try going to the toilet in the middle of the night without waking the entire house!
The video below gives you some handy methods to cure a squeaky chipboard floor:
How To Stop Chipboard Flooring from Squeaking
While it’s cheaper to nail your chipboard panels, it isn’t the best way to avoid a squeaking floor further down the line.
Screwing the flooring down is slower and more expensive, but it anchors it to the joists. No matter the temperature or moisture content, your floor will stay put with minimal expansion.
So, if I could give you one tip, it would be to use screws rather than nails. Also, once you’ve factored in the carpet fitting cost, you won’t want to rip it up to cure a squeaky floor.
Why Do Modern Houses Use Chipboard Flooring?
Chipboard flooring makes sense because it covers the joist quickly, is easy to install, and is affordable. You can see the savings by comparing the price of wooden floorboards to chipboards.
Couple that with the money saved on installation, and it’s a no-brainer. Plus, chipboard flooring is perfect when boarding a loft, especially if you are converting it into a usable room.
Final Thoughts
So, you can lift your chipboard flooring quickly, which causes damage, or cleanly, which takes longer. Which camp you fall into depends on personal choice.
However, if ripping out your chipboard flooring fills you with dread, find a trusted tradesperson on Rated People. It might cost you more, but the pros will do the work quickly and professionally.
FAQs
Below are answers to frequently asked questions about lifting chipboard.
How do you remove nailed chipboard flooring?
Removing nailed chipboard flooring is faster and easier than screwed panels. A pry bar is the best tool because it enables you to work quickly with minimal effort.
Insert the pry bar and push down, and the board will lift, hopefully with the nail still attached.
How do you lift floorboards without breaking them?
The best way to lift floorboards without damaging them is to remove the screws or nails first, and the boards should lift out easily for reuse later.
How do you pull up tongue and groove flooring?
The best method is to cut along the tongue of each board with a circular saw. Alternatively, you can use a tenon saw if you fancy a bit of manual labour.
How do you replace chipboard panels?
Once you’ve removed the old panels, start on one wall and work towards the opposite wall.
Leave an expansion gap between the wall and floor using shims. You can conceal it with skirting boards when you finish.
The boards should lay the opposite way to the joists. Flooring joists typically span the shortest distance for rigidity and structural integrity.
Work in strips, completing one entire row at a time before moving on to the next line of chipboard.