
Many people have chosen laminate flooring as their default choice, yet it’s surprisingly easy to spoil its aesthetic with a lousy finish. Poor edging, where the floor meets a skirting board or doorframe, is often to blame.
Although it’s not always practical, removing skirting boards and laying laminate flooring underneath is one option. A popular alternative is beading.
This guide explains how to finish laminate flooring edges in six simple steps, which any semi-competent DIYer can follow.
Note: We’re focusing specifically on edges rather than laying laminate flooring.
Tools and Materials
Because laminate flooring’s edges are hidden from view by beading, there’s no need to invest much time tidying up the floor’s extremities. The challenge in this method of installation centres on the edging itself (beading) and ensuring an attractive finish.
Below are the tools and materials required to hide the gap between laminate flooring and a wall or skirting board.
Tools
- Nail gun. You can use glue, but it tends to cause beading to splinter and fragment when removed. Nails provide secure positioning and are far easier to remove.
- Tape measure.
- Pencil.
- Fine-toothed saw.
- A damp cloth or sponge.
- Power saw (optional)
- Workbench (optional)
Materials
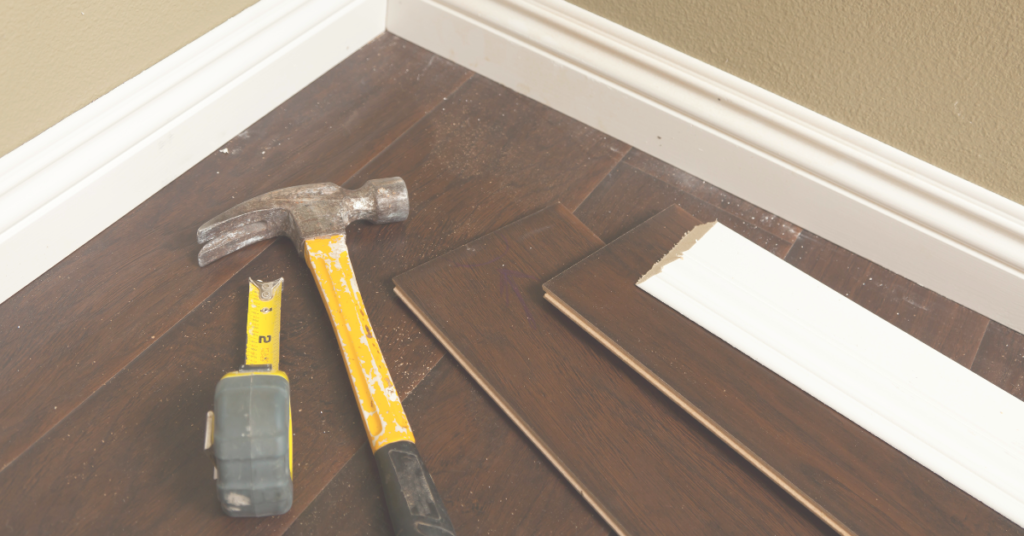
- Beading. Also known as Scotia, you lay these triangular or quarter-circular strips right up to the skirting boards before glueing or nailing them.
- Transition strips come in various forms, such as T-sections for moving between laminate and tile (or two forms of laminate). Your choice depends on the materials and any transition peculiarities (e.g., a step or ramp).
- Adhesive. While beading can be secured using nails, transition strips often require some form of glue or adhesive to fix them in place across heavy-tread areas.
- Decorators filler. Hopefully, you won’t need this in large quantities, but slight fluctuations in floor height could create gaps requiring some filler or sealant.
- Paint. If you’re buying uncoated softwood beading, you only need to paint. Staining is another option.
The Alternative Approach
If the prospect of ripping off skirting boards is too intimidating, beading is the main alternative to finish laminate flooring edges.
We’ve published a detailed guide on the merits of beading and skirting. In summary, removing and refitting skirting boards in newer properties is usually easier than in older ones. Taking them off allows you to extend the flooring below them with no visible signs of edging once you reinstall them.
This neater method of edging laminate flooring is easier to clean and maintain, but it can damage wallpaper, paintwork, or plasterboard when prising off skirting boards.
In summary, beading is a safer edging option unless you’re willing to redecorate or replaster the whole room.
Note: Remember that laminate below the beading needs a 6mm gap between it and the skirting board edge to support expansion in higher temperatures.
How To Finish Laminate Flooring Edges — Step-by-Step Instructions
Having established that beading is the more time-saving and convenient method of finishing laminate flooring, these are the sequential stages you’ll need to follow once you’ve laid all your laminate planks:
1. Measure every space where edging is required
To ensure accuracy, always measure twice — ideally from opposite directions — with a steel tape measure.
Mark cut lines on the beading with a pencil.
2. Cut the beading to size
You can use a hacksaw, though your arms might ache after a while, so a power saw is handy. A workbench is also helpful for holding the beading in place.
You need to cut each piece at a 45-degrees for right angles.
Like laminate flooring, edging needs 48 hours to acclimate to its environment. Installing it straight from a cold warehouse or lorry could cause it to expand or contract, potentially popping its fixings or leaving gaps from one piece of beading to the next.
3. Position the beading in its final resting place
Ensure you’ve vacuumed any dust, debris or loose material surrounding the beading’s final position. This cleaning is good housekeeping and ensures the beading won’t sit proud of the skirting board/wall and the laminate.
4. Nail the beading onto the skirting board or wall
We recommend a nail gun for this repetitive task as it reduces fatigue and the risk of splintering the beading. Still, you could use the old-fashioned technique of a hammer and nails, with one nail inserted every six to twelve inches.
Hold the beading firmly as the first nail is applied to the skirting — never to the floor itself.
Pro Tip: If you’re not keen on pinned fixings, use wood adhesive glue — it’ll be easier to remove than traditional glue when replacing the flooring. However, it’s not as dependable as nails and may work loose.
5. Fill any gaps with decorators filler
A caulk gun is helpful here, but DIYers with steady hands may prefer to apply any necessary filler with small hand tools. The idea is to prevent gaps that permit draughts, insects, or shadows.
6. Wipe down the edging with a damp cloth
This cleaning erases any filler, dust, nail fragments and other impurities before being set in.
Final Thoughts
Beading is not an attractive addition to a floor, mainly because it collects dust while simultaneously repelling the advances of a vacuum cleaner.
However, choosing an identical shade to the floor helps diminish its visual impact, and beading is considerably quicker and easier to install than removing and reinstating skirting boards. Furthermore, you can buy lengthy beading strips for just a few pounds each.
FAQ
Below are answers to frequently asked questions about finishing laminate flooring edges.
I don’t want to use nails to secure my beading. What glue should I use?
Eventually, you must remove the beading, so we don’t recommend composite adhesives like Araldite. We favour a dedicated laminate adhesive sealant from a reputable brand like EVO-STIK, Everbuild or Force.
I can’t find an exact colour match for my laminate. What should I do?
If your laminate is an unusual colour, don’t settle for an approximate match — it’ll always look like a failed attempt at cohesion. Instead, choose brilliant white beading, which ties into the skirting board once freshly glossed. This YouTube video covers issues like colour-matching and installation.