
Electric planers are essential in any tool kit, but many DIYers dismiss them for various reasons.
Some prefer a bench plane, such as a jack or smoothing plane, to get a better feel for the wood. Others don’t like the noise of an electric plane!
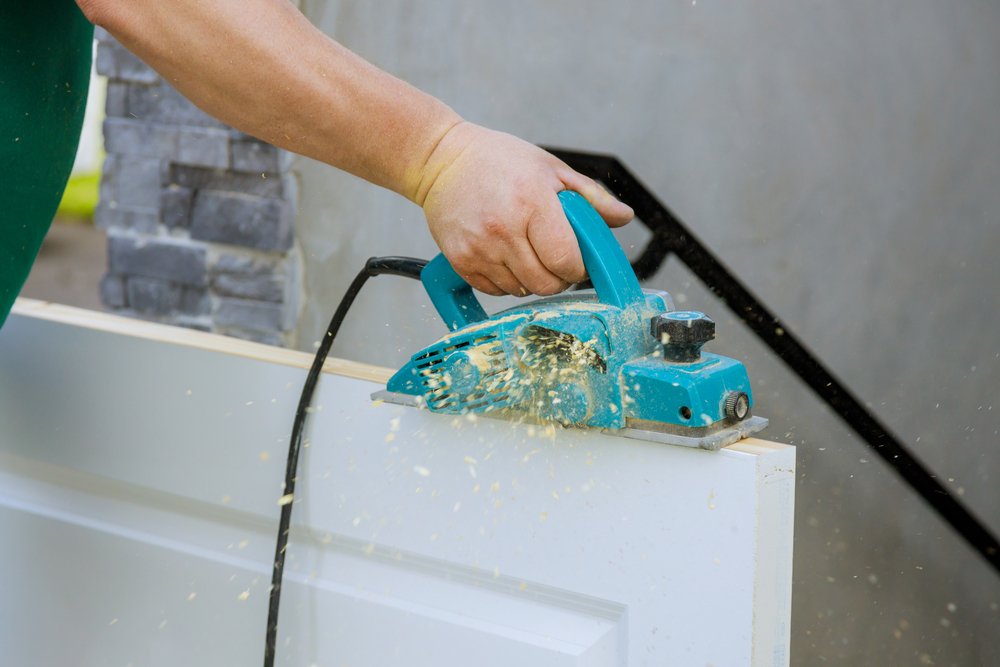
I was sceptical initially, but I was hooked when I learned how quickly I could shave 20mm off a door.
So, read on to learn how to use an electric planer like a pro.
Electric Planers — The Basics
The first time I used an electric planer, I had to take about 20mm off the bottom of a door. Unfortunately, I made a bit of a hash of it but quickly learned from my mistakes.
Pro Tip: when planing the bottom of a door, mark the edge to be cut to ensure you’re not planing the top when you take the door off, as I once did!
The thing that first struck me was the tool’s power — the cutting blades spin at around 15,000 RPM! Note: If you set the blades too low, the plane can kick back.
The other thing I learnt from this experience was to ensure I have enough free cable to get to the end of the piece you’re planing. You don’t want to get to within an inch or two of the end only to find you can’t go any further without pulling the plug out of the socket!
Before going into the step-by-step guide, let’s look at what makes an electric planer such a powerful tool.
Get To Know Your Electric Planer
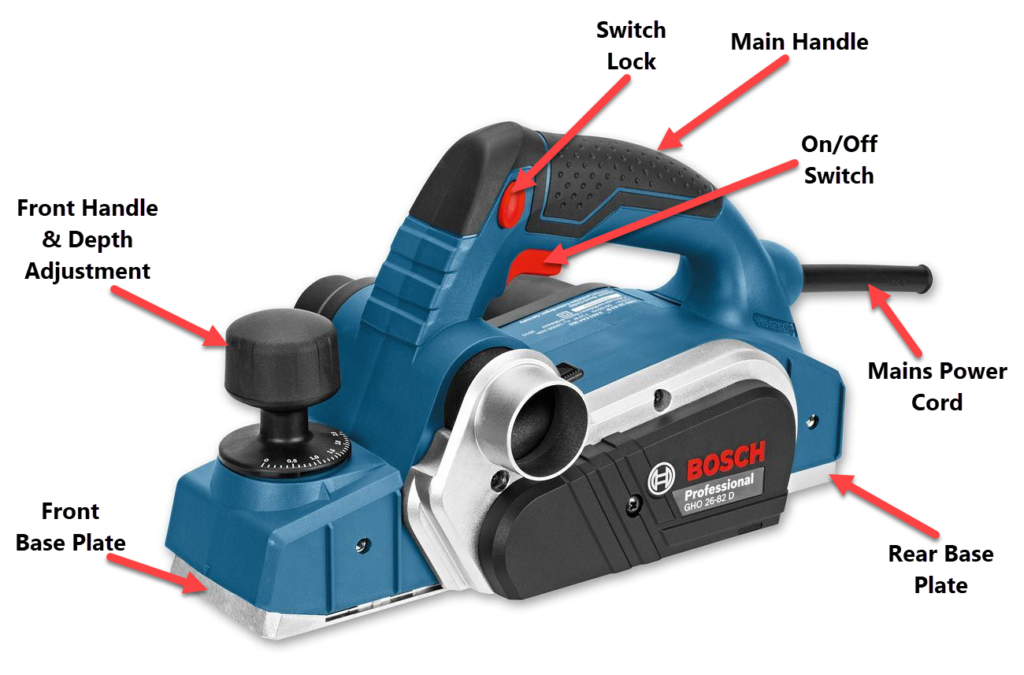
An electric planer is similar to a jack plane, but rather than a flat blade fixed at an angle to the sole plate, it has a double-rotating blade driven by a powerful motor.
Unlike their manual counterparts, the blade on an electric planer is slightly wider than the sole plate. This extra width allows you to cut rebates to form a door frame.
Tools and Materials
Let’s look at a typical project — reducing the size of a door. Maybe you bought a blank door or a replacement door that is a little oversized.
Note: This guide isn’t intended as a tutorial on how to fit a door. If you want more information on fitting a door, check out our guide on how to plane a door using a bench plane.
Another good resource for hanging a door is this guide from The Carpenter’s Daughter.
Tools
- Tape measure
- Sliding bevel
- Straight edge (as long as possible)
- Pencil
- Electric planer
- Dust extractor or bag
Materials
- The door
Health and Safety Measures
The three primary hazards associated with electric planers are noise, dust and moving sharp objects. PPE such as a face mask, goggles and ear defenders will help with the first two hazards.
Pro Tip: Attach a dust bag to the extraction port to prevent dust and shavings from blowing everywhere. Don’t use a household vacuum cleaner because the hose is too short, and this will restrict your movement.
As for the third hazard, common sense tells you to keep your hands clear of the rotating blades. Most planers have a small spring-loaded kickstand that sits in the heel, which raises the planer’s back end enough to allow the blades to rotate and come to a halt without making contact with the work surface.
Pro Tip: If your planer doesn’t have a kickstand, rest the planer against a wooden block on the work surface. This block will protect the blades and prevent them from becoming dull.
How To Use an Electric Planer — Step-by-Step Instructions
Follow the steps below to plane like a pro!
Step 1: Preparation
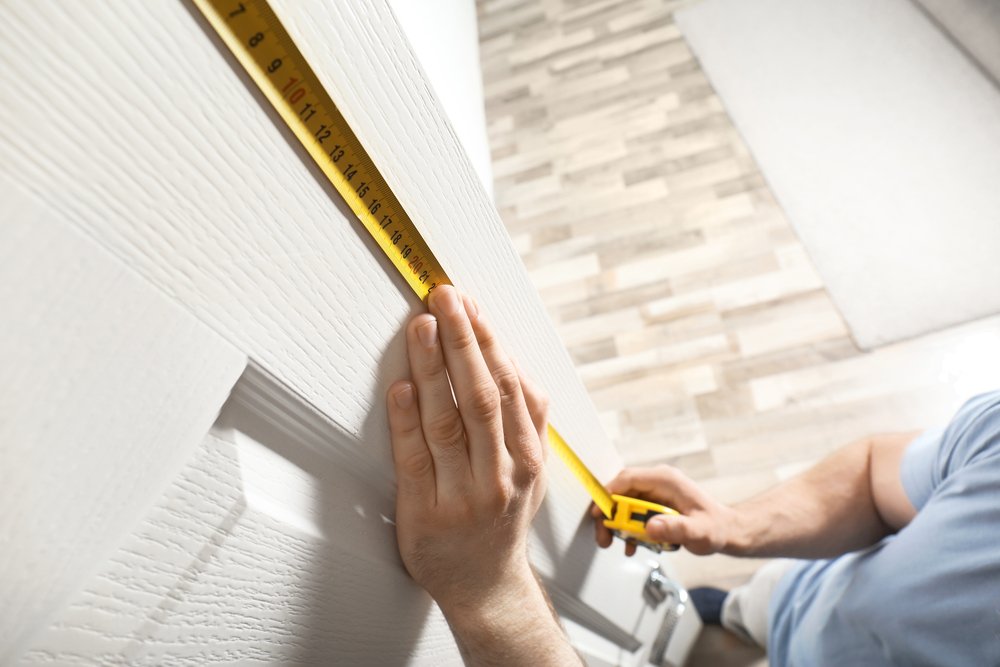
Measure the door opening width at the top, middle and bottom. Measure the height at each side.
Use the sliding bevel to check the squareness of the frame and transfer these measurements to the door. The video below explains how to do this.

The door needs to be 3mm less than the inside of the frame at the top and sides, and the bottom gap should be no more than 10mm, depending on the floor finish.
Pro Tip: You can always plane more off but can’t add it back, so err on the tight side. An undersized door can lead to draughts.
Remove any nails or screws and any hardware that might damage the blade. Firmly secure the door by clamping it to a workbench or tabletop because you’ll be applying pressure as you progress and won’t want it to move.
Step 2: Set Up the Planer
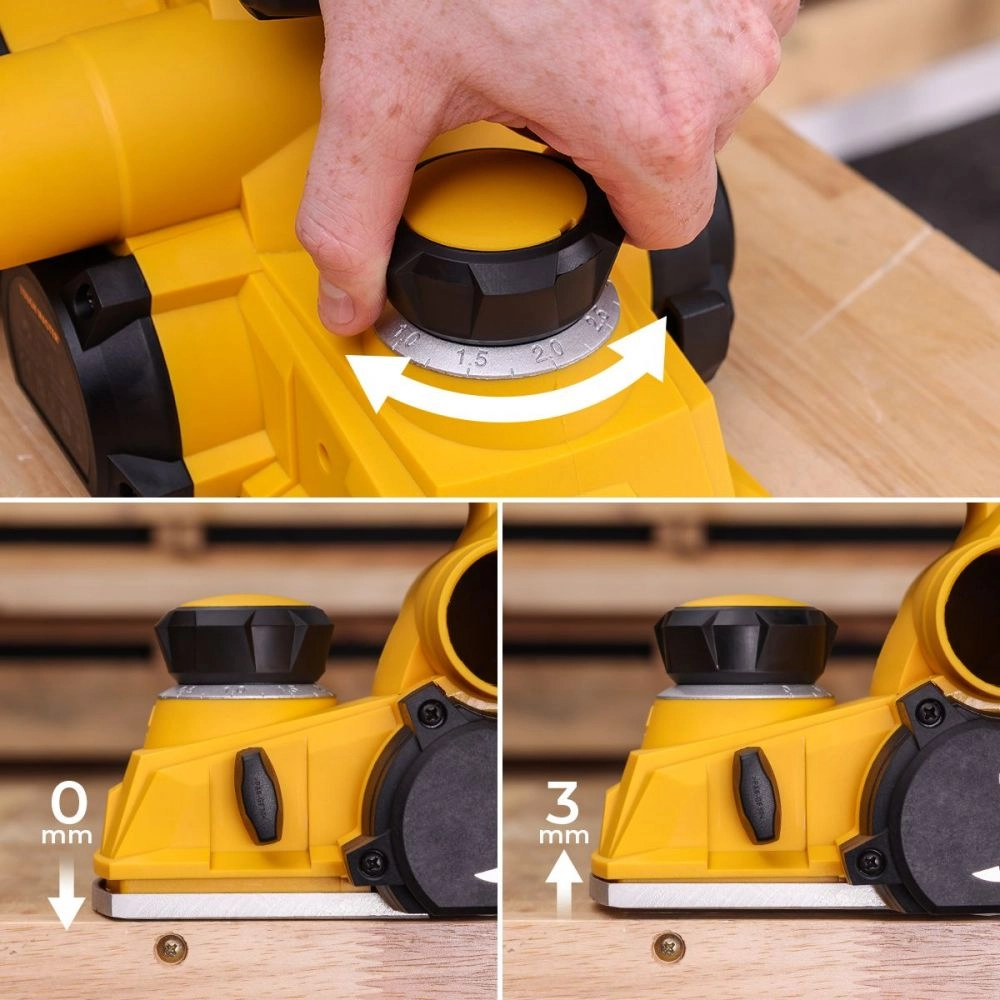
Adjust the planing depth using the dial at the front end. This adjustment raises the toe of the sole plate in increments of 0.25mm (other models may vary).
To avoid the planer kicking back as it engages with the wood, set the blades to the minimum (0.25mm) to begin with, so they won’t bite too much into the wood.
Once you get a feel for it, set the blades to cut deeper in subsequent passes until you get close to the required thickness and then reduce the depth for a smooth finish.
Step 3: Attach the Dust Extractor or Bag
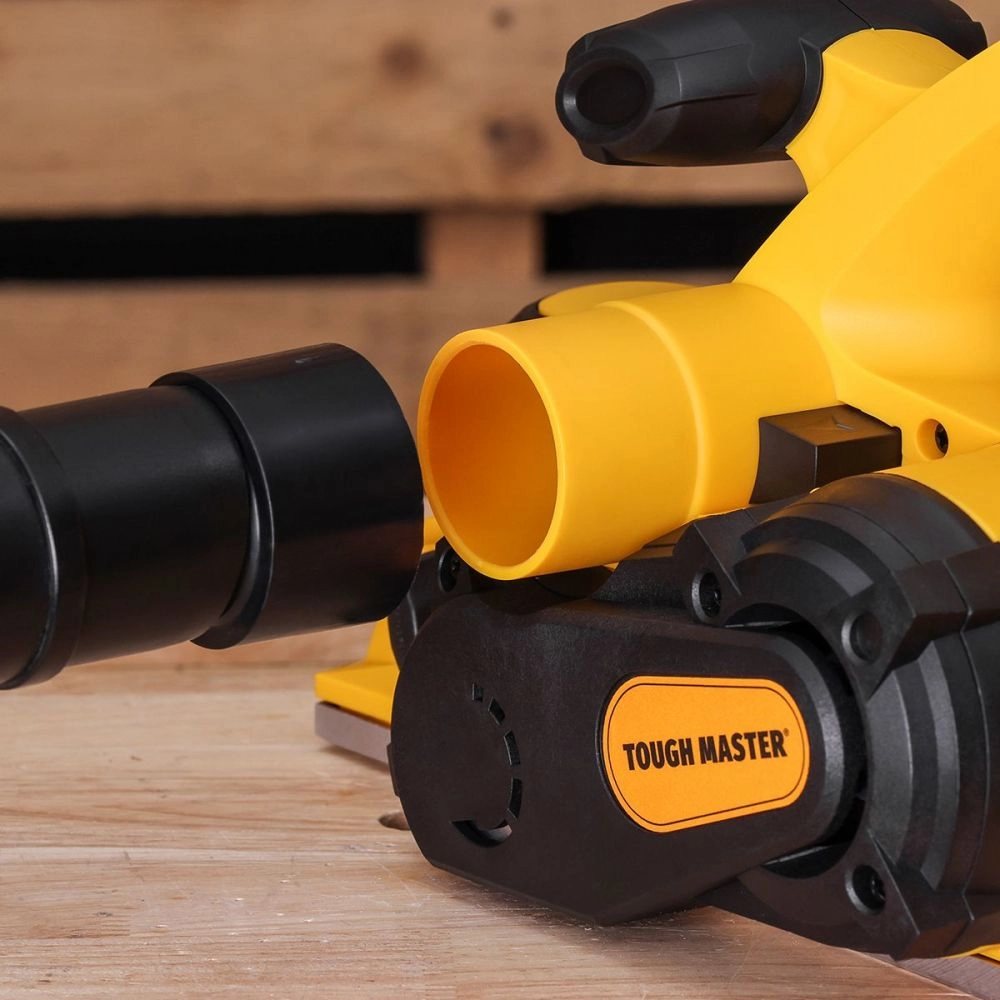
Most planers have two dust extraction ports for left and right-handed use. Use a wet & dry dust extractor with a long flexible hose to allow for movement. Failing that, use a dust bag — ordinary vacuum cleaners aren’t suitable.
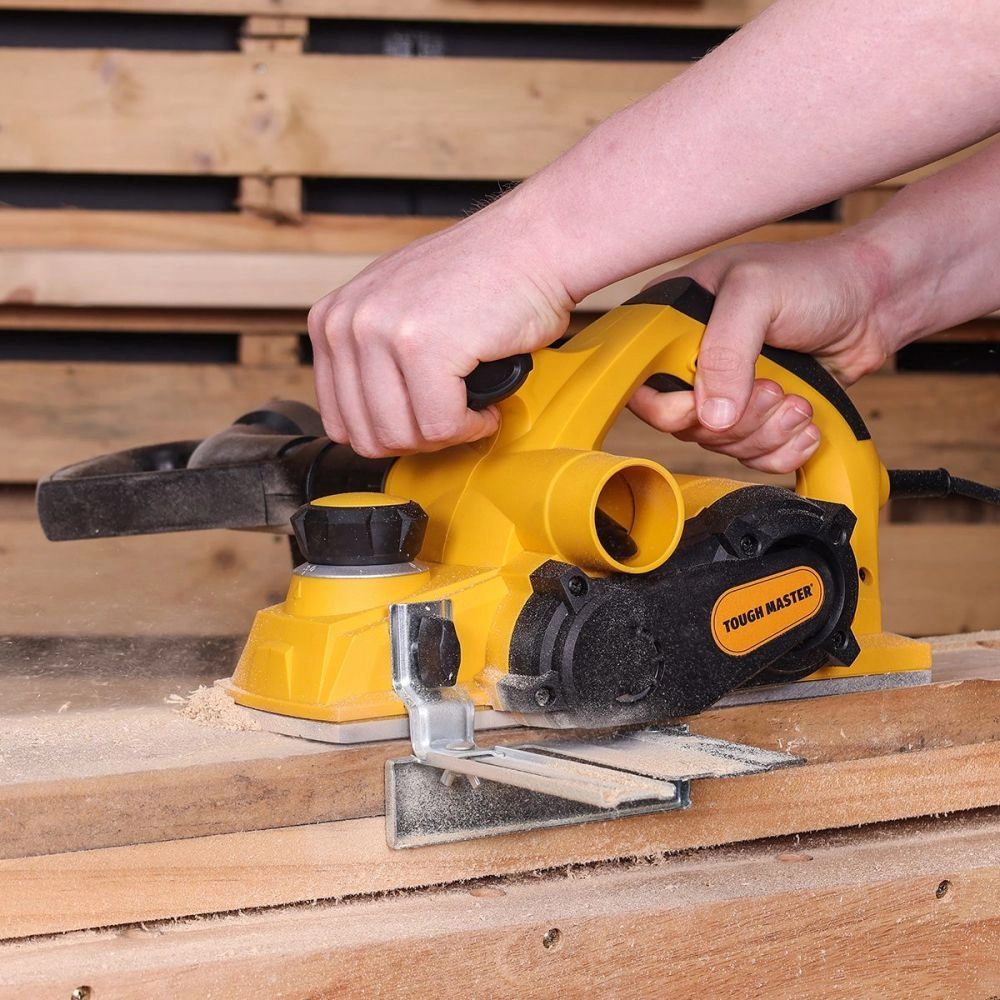
Step 4: Start Planing
Take a comfortable, well-balanced stance, and remember you’ll have to move when planing a long piece like a door.
Ensure the cord is long enough to run the entire length in one go. The same goes for any hose attachment to the dust extraction system if you have one. It’s worth doing a practice run to ensure you have enough length.
Pro Tip: Whatever you’re planing, it’s always advisable to work with the grain, never against it.
Place the toe of the planer on the piece you’re working on, keeping the blades away from the wood, then squeeze the trigger.
Advance the planer in a continuous movement, applying pressure on the toe. Keep the plane flat against the piece as the cutters engage the wood.
As you approach the end of the piece, apply pressure to the heel, and lift once the cutter has cleared the wood.
Step 5: Forming Rebates and Bevels
Now that you’ve got the hang of wood planing, try something more adventurous, like rebates and bevels.
Rebates
Use the parallel guide or fence to set the width of the rebate. Some planers come with a rebate depth adjuster, but if yours doesn’t, set the depth in the usual way to 1.5mm. The short video below shows you how to do this.

Pro Tip: The depth of the rebate is limited by the motor housing to 9–12mm, depending on the model. Note: Using a router is better if you want a deeper rebate.
Bevels
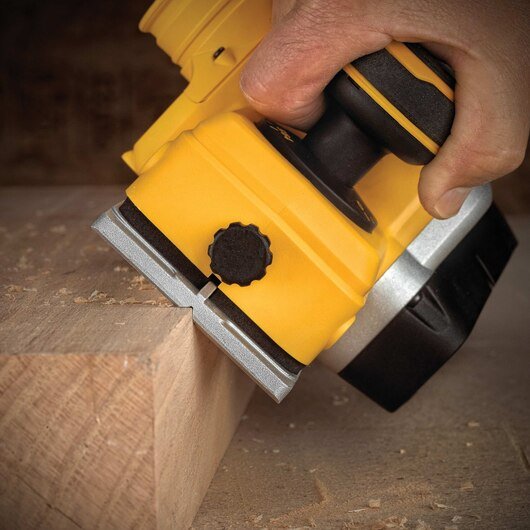
Use the v-groove in the sole of the planer to form accurate chamfered edges. Set the depth of the cutter to zero for the first pass and angle the planer at 45°. The v-groove is machined at 90°, so use this as a guide.
For subsequent passes, set the cutter to 0.25mm and keep planing until you get the amount of bevel you want.
Step 6: Removing and Adjusting the Blades
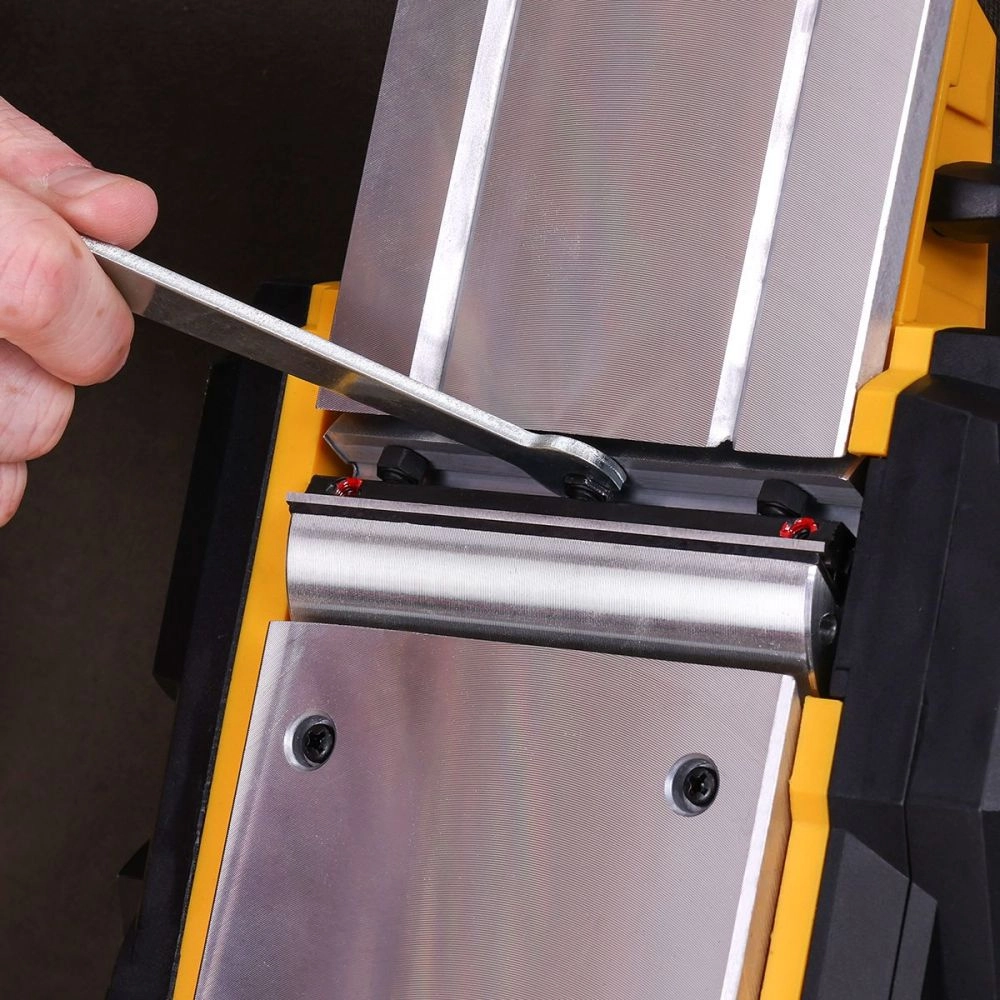
Some planers come with double-edged blades that you can reverse for more extended use. Removal is simple; use the hex wrench (which should come with the planer) to remove the nuts holding the cylindrical blade cassette.
Be extremely careful, though. These blades are very sharp.
Pro Tip: When fitting a new blade, ensure you install it correctly. Check the instructions because fitting can vary depending on the type of blades.
It’s essential to check the setting of the blades frequently to ensure they’re level and even. If they’re slightly out, you’ll get an uneven cut.
Check by using a steel rule or straight edge and consult the user manual, as adjustment methods vary between models.
Final Thoughts
Electric planers aren’t for everyone, but if you’ve got a lot of planing to do, it’s well worth investing in one of these power tools.
To see how easy it is to use an electric planer, watch the video below by Sikana:

But first, question whether an electric planer is the best tool for the job. A belt sander or finishing sander may be better if only a small amount of wood needs to be removed.
To learn more about sanders, check out our guide to the different types of sanders and find the best sander for your next project.