I grew up in a bungalow with carpet tiles across the kitchen floor, tripping over them whenever their poorly applied adhesive failed.
To help others avoid this trip hazard, I’ve put together this step-by-step guide on how to lay carpet tiles like a professional. Fortunately, the same process applies to laying vinyl tiles, so this is a 2-for-1 read!
Note: Achieving a professional standard of floor tile fitting is time-consuming, but it’ll be worth it in terms of appearance and safety.
Tools & Materials
If the list of tools and materials below seems daunting, don’t panic! They all play an essential role, and you’ll need less equipment than if you wanted to lay ceramic or porcelain floor tiles. Furthermore, you can use many of these tools to lay carpet.
Tools
- Knee pads
- Tape measure
- Pencil
- Bladed Knife
- Rolling pin
- Wallpaper seam roller
- Straightedge or metal ruler
- Wooden board for cutting tiles on
- Sharp scissors (for vinyl tiles)
- Hole saw (if making holes for pipes)
- Notched spreader (if using non-adhesive vinyl tiles)
- Gloves (if using non-adhesive vinyl tiles)
- Pipe and cable detector (if installing hardboard sheets)
- Crocodile clips (if cutting around a curved object)
Materials
- Vinyl or carpet tiles
- Black sack
- Adhesive (if not pre-installed onto vinyl tiles)
- Double-sided adhesive tape (for carpet tiles)
- Masking tape (for carpet tiles)
How To Lay Carpet Tiles — Step-by-Step Instructions
In the steps below, we’ve described the process of laying vinyl tiles. The steps for laying carpet tiles are similar but with a couple of differences. We explain these differences in the Piling on the Pressure section below.
Order at least ten per cent more tiles than your room measurements suggest to cover future repairs.
Don’t forget to include alcoves, bay windows and built-in cupboards in your measurements if you want the tiles to extend into these spaces.
Pro Tip: Ensure each box of tiles has an identical batch number to eliminate any risk of colour variations.
A Seat on the Board
Because carpet and vinyl tiles are thin, they show any ridges or imperfections in an existing subfloor. These can include protruding nails and screws, adhesive or foam, while dirt and grease prevent them from bonding to the floor. You can learn more about these issues in B&Q’s floor preparation video from 2:00 onwards.
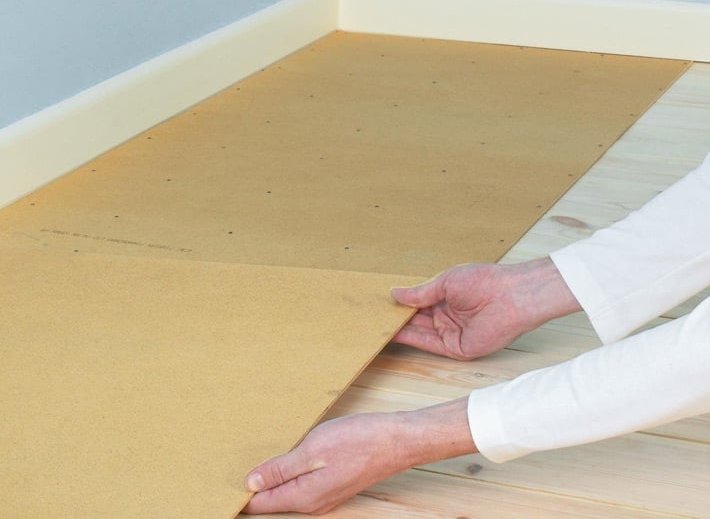
You can’t lay tiles directly onto floorboards, so you must install sheets of plywood or hardboard first. You’ll find handy tips and advice on laying sheets across a floor in our guide to chipboard flooring.
Before laying any sheets, use a pipe and cable detector to ensure you’re not inserting screws into anything dangerous or prone to damage.
Like floor tiles, give sheets 48 hours to acclimatise to the ambient temperature of your home before being laid. This time will prevent them from expanding once they’re in situ, which might cause them to bulge or overlap.
Secure each plywood sheet at all four corners and along each edge with countersunk screws. This approach will ensure screws aren’t left sticking up, preventing tiles from neatly laying on top.
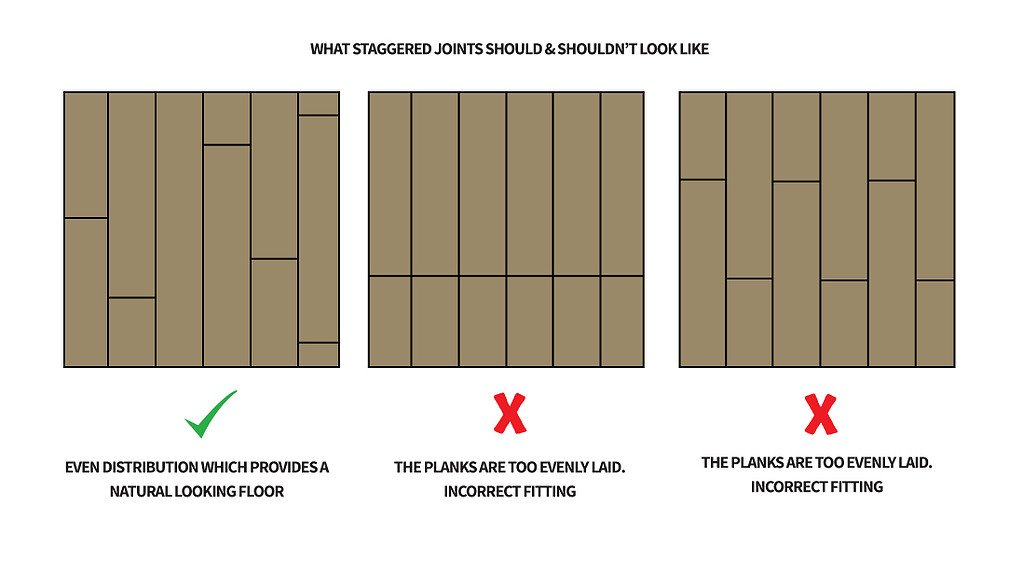
The long side of each sheet should run at right angles to floorboards (see Fig 1), with the sheets staggered to maximise their strength (see Fig 2).
Pro Tip: Before fitting subfloor sheets or installing your tiles, take the opportunity to paint your skirting boards.
Concrete Evidence
If your subfloor is concrete, the same principles apply regarding a smooth and level surface.
Remove any lumps or bumps to ensure nothing can poke into the underside of your floor tiles, resulting in an uneven finish.
Once you’ve removed all lumps and bumps, prime the concrete floor to seal it properly.
Ensure concrete floors aren’t damp before laying flooring onto them. Tape down a large sheet of polythene and leave it overnight. If moisture appears, you’ll need to identify and tackle the source of this dampness before attempting to stick down tiles.
1. Find a starting point
Draw a pencil line across the widest part of the space you’re tiling, ensuring it’s at right angles to the skirting boards or walls. Now draw another line across the longest part of the space.
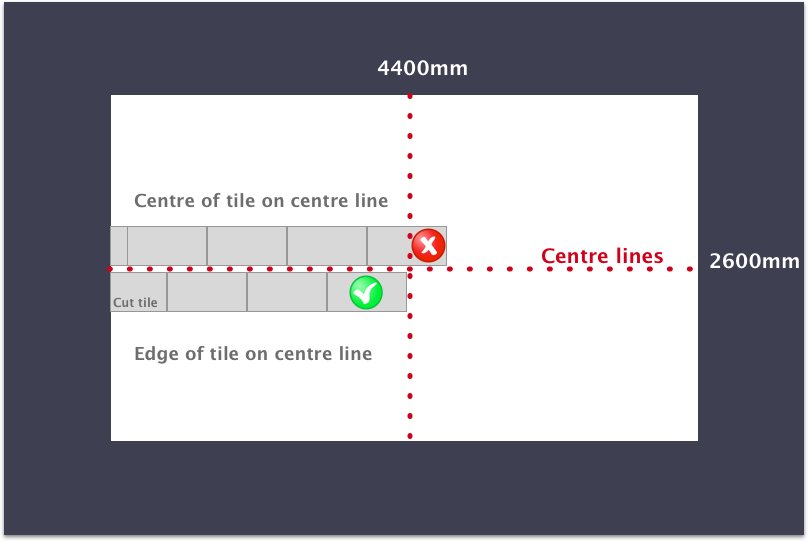
The intersection of these two lines will give you the corner position of your first tile, known as the key tile. Don’t start your flooring by laying tiles against a wall because internal walls rarely have perfect 90-degree angles.
You’ll need to trim tiles to fit around every edge of the space you’re working in. If your original key tile position means you’ll be left with a sliver of tile along one wall, move the key tile half a tile’s width away from that wall.
Ideally, the tiles around the edge of your floor should be at least half their original width after you’ve cut them to fit. Achieving a consistently wide border around every edge takes a bit of experimentation.
To check how the tiles will look, dry lay them. Remove them from their packaging, but don’t remove any protection for their adhesive backing (if they’re self-adhesive).
Push the tiles snugly together, checking how big a gap is left between the last whole tile and each side wall. If you need to reposition them, take every tile up, bar the key tile, and then relay them until you’re happy with how they look.
2. Fit your first tile
We’re assuming that the vinyl or carpet tiles you’ve bought are self-adhesive since most modern products are sold this way. If not, we explain how to apply adhesive in the Sticky Moments section below.
Pro Tip: We recommend self-adhesive vinyl tiles, which are much easier to install. They require fewer tools and generate less mess.
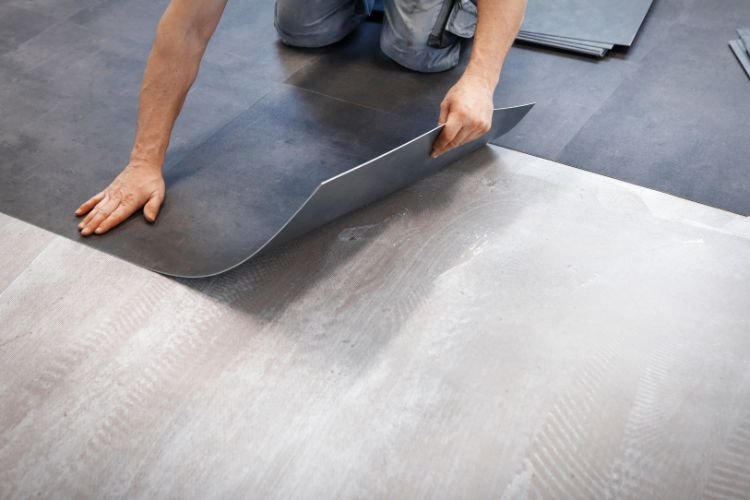
Peel the backing tape off the first tile and avoid touching the self-adhesive surface once exposed. Carefully position this key tile in the corner where the pencil lines meet.
Use the rolling pin to flatten out the centre of the tile, and then run the wallpaper seam roller along the edges to ensure a tight fit with the flooring sheets or concrete.
3. Create a square
With the key tile in situ, add three tiles around it to create a 2×2 square.
This square provides the template for every subsequent tile, so take particular care in laying the second, third and fourth tiles.
Ensure they fit snugly against their neighbours with no gaps. The other tiles will radiate out from this centrepiece at neat right angles.
4. Choose a direction to work in
Before laying all the other tiles, decide which direction to lay them in. Leaving doorways until last is generally advisable, so start working towards the far wall.
Repeat step 2 with each new tile, pressing it down firmly and ensuring no gaps with its existing neighbours.
5. Measure edge tiles
With all the whole tiles laid, it’s time to start cutting tiles to fit the gaps around the edge of your floor. Remember the old maxim ‘measure twice, cut once’.
A great way to do this is by following the three steps below:
- Remove the last whole tile (tile 1) and replace it with an identical tile which will be cut (tile 2).
- Push tile 1 against the wall or skirting board, resting it on top of tile 2.
- Draw a pencil line across tile 2 at the point where its base disappears under tile 1. Cutting it along this line will give you a perfect offcut to fit that particular gap once you reposition tile 1.
You can see this technique in a B&Q video from 4:44 onwards.

If your tiles have a pattern, ensure you cut the tile on the correct side to maintain that pattern right up to the skirting board or wall. You use the same principle when cutting wallpaper strips while wallpapering a room.
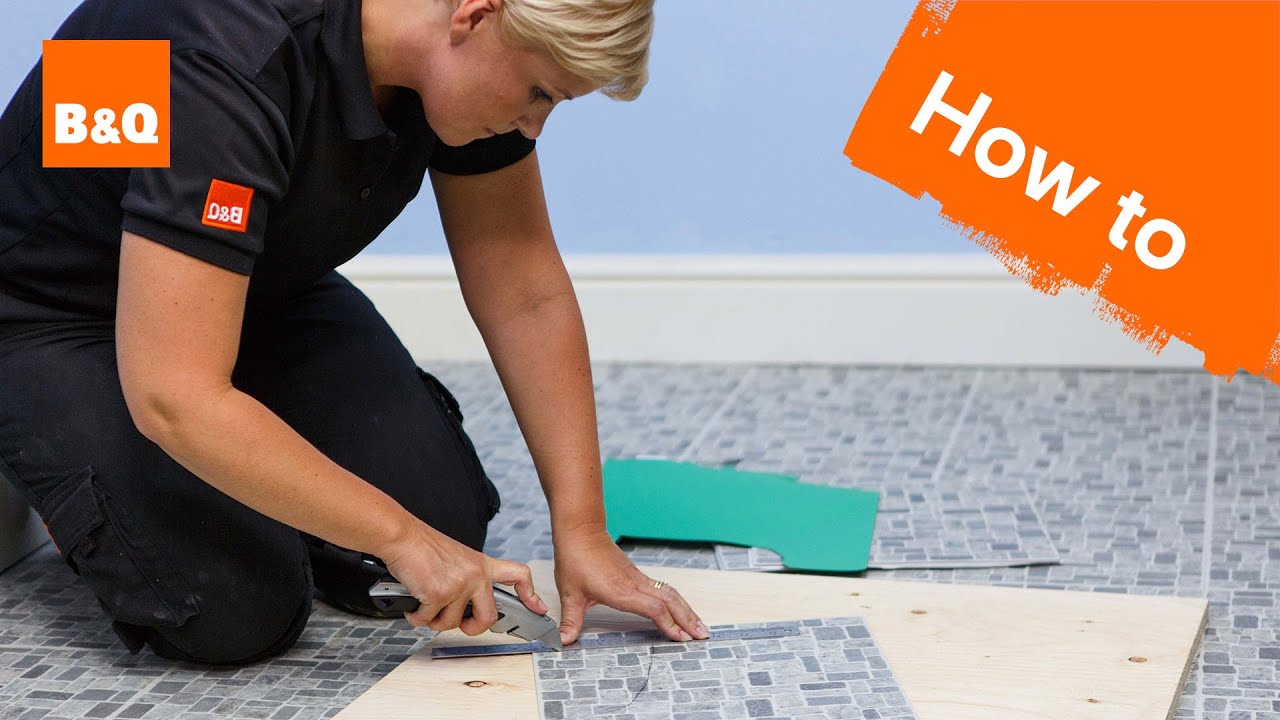
6. Cut edge tiles
Put the tile on a piece of hardboard, keeping any backing paper in place for now.
Use a craft knife and a straightedge to slice along the pencil line neatly. It should now fit the space between the first tile and the skirting board or wall. If you don’t get a clean cut from the knife, bend the tile until it snaps.
Check the trimmed tile fits the space between the whole tile and the skirting board or wall. If it does, remove the backing paper and stick it down. If it doesn’t, use sharp scissors to trim it to size – knife blades struggle to deliver neat cuts close to an existing edge.
You can see a brief demonstration of how to cut a tile in the video below from 0:34 onwards.
7. Cut curved tiles (optional)
This step doesn’t apply to every space, but some rooms (especially bathrooms) require curved edges on specific tiles. The best way to do this is by making a paper template of the shape you need to cut.
Cut a piece of A3 paper to the size of a tile. Cut 1cm slits along any sides of the paper tile which need to adopt a curve.
Slide the paper tile into position, gently pulling the strips upwards. Once the paper tile is in situ, press the strips down as far as you can, forming a tight crease where each strip touches the base of the curved object.
Next, take a pencil and draw a line along this crease. Remove the paper tile and cut along the pencil line. You should be left with a pretty good representation of the curve required but put it back in place momentarily to check.
Once you’re happy with the curvature of the paper template, firmly position it over a tile (you might want to use crocodile clips to keep it steady). Draw the curve onto the tile using a pencil and cut along this line. You should end up with a tile that slides perfectly into position around the pedestal.
You can see a visual representation of this process in the video below:
8. Cut holes for pipes (optional)
Again, this might not apply to your chosen room or space, but one obstacle commonly encountered is a radiator pipe close to the wall. To work around this, follow the steps below:
- Slide the tile against the pipe and mark the midpoint of the pipe (point X).
- Move the tile against the wall beside the pipe and mark the midpoint of the pipe (point Y).
- Draw a straight line from point X to the opposite side of the tile. Repeat for point Y. The point at which these two lines intersect is where the centre of the pipe will sit. Note: use a combination square or long spirit level to achieve perfectly straight lines.
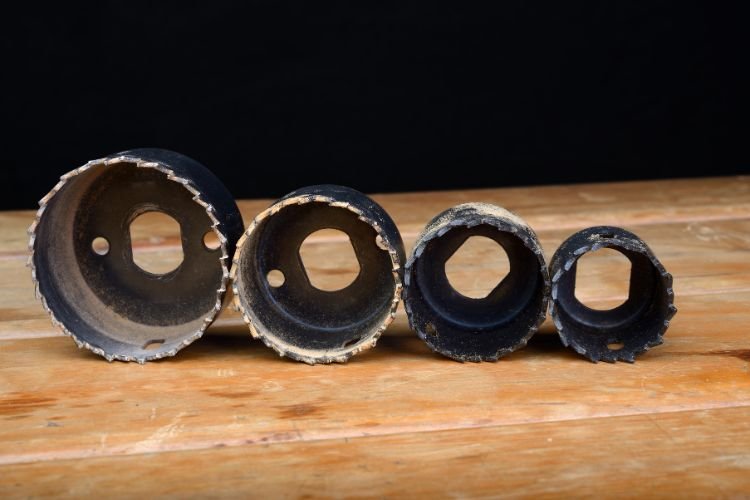
- Measure the diameter of the pipe, and source a hole saw attachment of comparable diameter. Position this on the tile so the centre point you’ve marked is in the middle of the attachment. Pro Tip: If the pipe gets hot, create a hole with a slightly larger diameter than the pipe, as this will facilitate expansion and contraction without damaging the floor tile.
- Drill through the tile vertically to create a clean hole where the pipe will stand.
- Use the knife to slice from the hole’s edge to the nearest edge of the tile. Peel the two sides of the resulting slit back while you slide the tile into place, wrapping them neatly around the pipe. You shouldn’t notice the cut once the two flaps are pushed back together and secured to the ground.
You can see these steps in action in the video below, from 1:08 onwards.
Sticky Moments
The steps above explain how to install vinyl tiles with self-adhesive backing. If they don’t have this backing, you’ll need to use whichever glue your tile manufacturer recommends.
Solvent and spirit-based adhesives can be flammable, so avoid matches, pilot lights or any other potential ignition source until the adhesive has completely dried. Opening windows and doors will accelerate the drying process.
Spread the adhesive or glue across the floor using a notched spreader, creating an area big enough to lay half a dozen tiles. These adhesives tend to set quickly, so avoid covering too large an area.
Firmly press down each tile, ensuring it’s in complete contact with the floor and any neighbouring tiles.
Run the roller across the tile’s surface, paying particular attention to pressing down the edges. If adhesive bubbles up between the cracks, wipe it away immediately.
The video tutorial below demonstrates these techniques:

Piling on the Pressure
The steps for laying carpet tiles are the same as above, except for the two crucial differences listed below:
Follow the Arrows
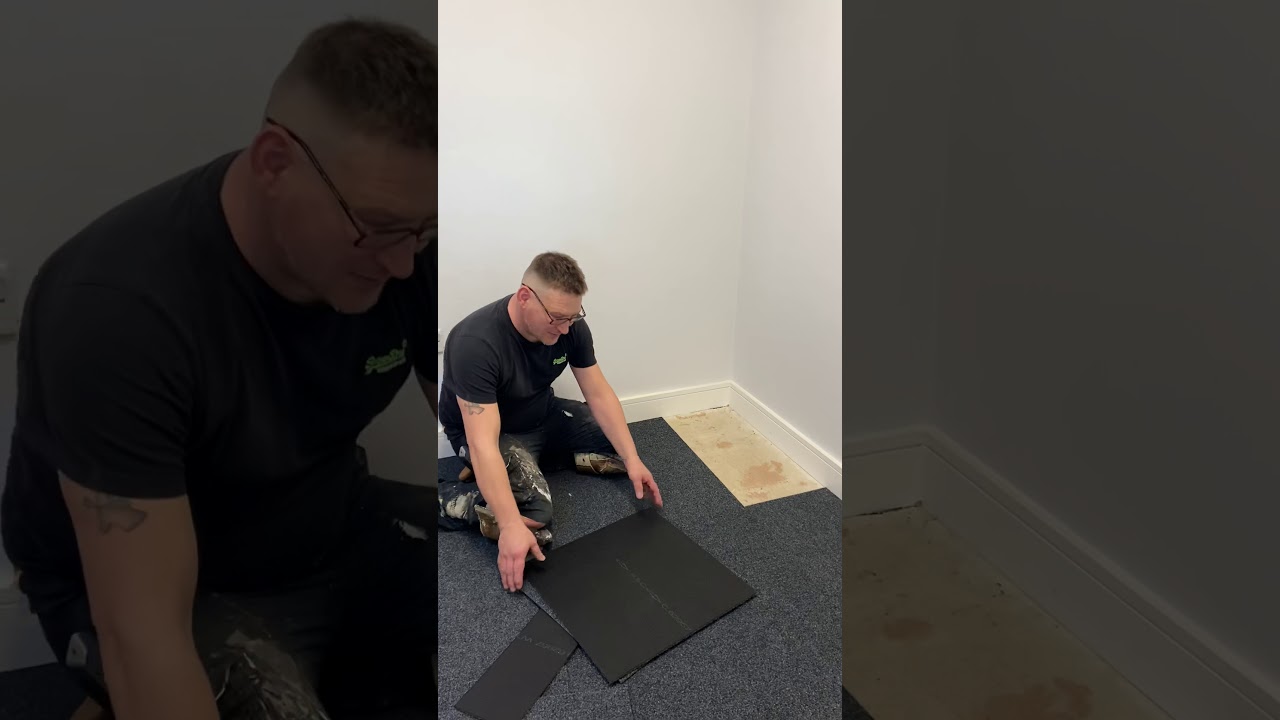
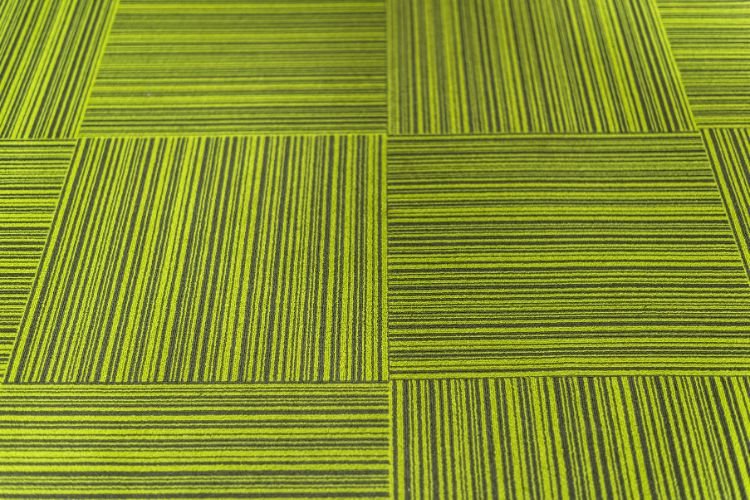
You can lay vinyl tiles in any direction unless they’re asymmetrically patterned. Carpet tiles, on the other hand, tend to have a pile direction typically indicated on the underside of the tile with an arrow.
Laying all the tiles with the pile in the same direction will give a consistent, carpet-like appearance. However, laying them in a chequerboard pattern gives the floor more visual interest, as in the green tile photo above.
Experiment at the dry laying stage when deciding which visual effect works best in your chosen space.
Get it on Tape
Unlike self-adhesive vinyl tiles, secure carpet tiles with double-sided adhesive tape. Fit this tape along the entire length of the tile’s edge to avoid corners peeling up.
Pro Tip: If you need to trim a carpet tile, apply a strip of masking tape and draw indicative lines along it to indicate where the tile needs cutting.
Final Thoughts
Proper preparation is the key to successfully laying carpet and vinyl tiles. Dry laying and creating paper templates might seem fiddly and frustrating, but they achieve far better results.