Covering your ceiling with plasterboard (aka dry lining) is a simple way to hide imperfections and avoid the health risks of scraping off asbestos-filled artex.
Fixing plasterboard to your ceiling is a big job but still well within reach of an average DIYer. In this guide, I’ll show you how to plasterboard a ceiling step-by-step.
Don’t fancy doing this job yourself? Find top-rated plasterers in your area by clicking the button below:
Plasterboarding A Ceiling — Pros & Cons
The table below highlights the pros & cons of covering your ceiling with plasterboard:
| Pros | Cons |
|---|---|
| It saves you from removing artex, which is time-consuming, messy, and potentially dangerous if it contains asbestos. | Requires a second pair of hands because plasterboard is heavy. A plasterboard lifter is highly recommended. |
| It leaves a perfectly smooth finish that makes decorating easy. | Not the cheapest option. |
| It provides an opportunity to cut holes in the ceiling before covering it. E.g. It’s the perfect time to add or move light fixtures. | |
| No need to fix holes in the ceiling. | |
| The required skill level is well within the realm of an average DIYer. |
Tools and Materials
I recommend 9.5mm thick boards when the joists are spaced 400mm apart and 12.5mm when they’re 600mm apart.
If available, get long enough boards to span the entire ceiling. Shorter boards are easier to handle, but this convenience will cost you when it’s time to finish the ‘butt joints’ (where the ends of the board meet).
Pro Tip: Unlike tapered joints along the board’s long edges, butt joints are hard to finish. Avoid them if possible.
Tools
- Electronic stud finder
- Tape measure and spirit level
- Chalk, pencil and marker pen
- Knife with replaceable blades. I recommend using a specialist drywall knife as these produce a cleaner cut.
- Plasterboard rasp
- Plasterboard lifter
- Step ladder
- Electric screwdriver
- Scissors
- Bucket
- Taping knife
- Filling knife
- Internal corner trowel
Materials
- Masking tape
- 50mm x 50mm sawn timber battens for noggins
- 12 x 100mm Countersunk wood screws for noggins
- 9.5mm plasterboard (tapered edge)
- 38mm plasterboard screws
- Perforated plasterboard tape
- Jointing compound
- 120-grit sandpaper
Before You Begin
- Switch the power off and remove the light fixtures.
- Don’t try to span holes larger than 150mm with plasterboard because screws will pop through the hollow space above.
- Take your time to locate and mark joist centres accurately. Getting this right makes the rest of the job much easier.
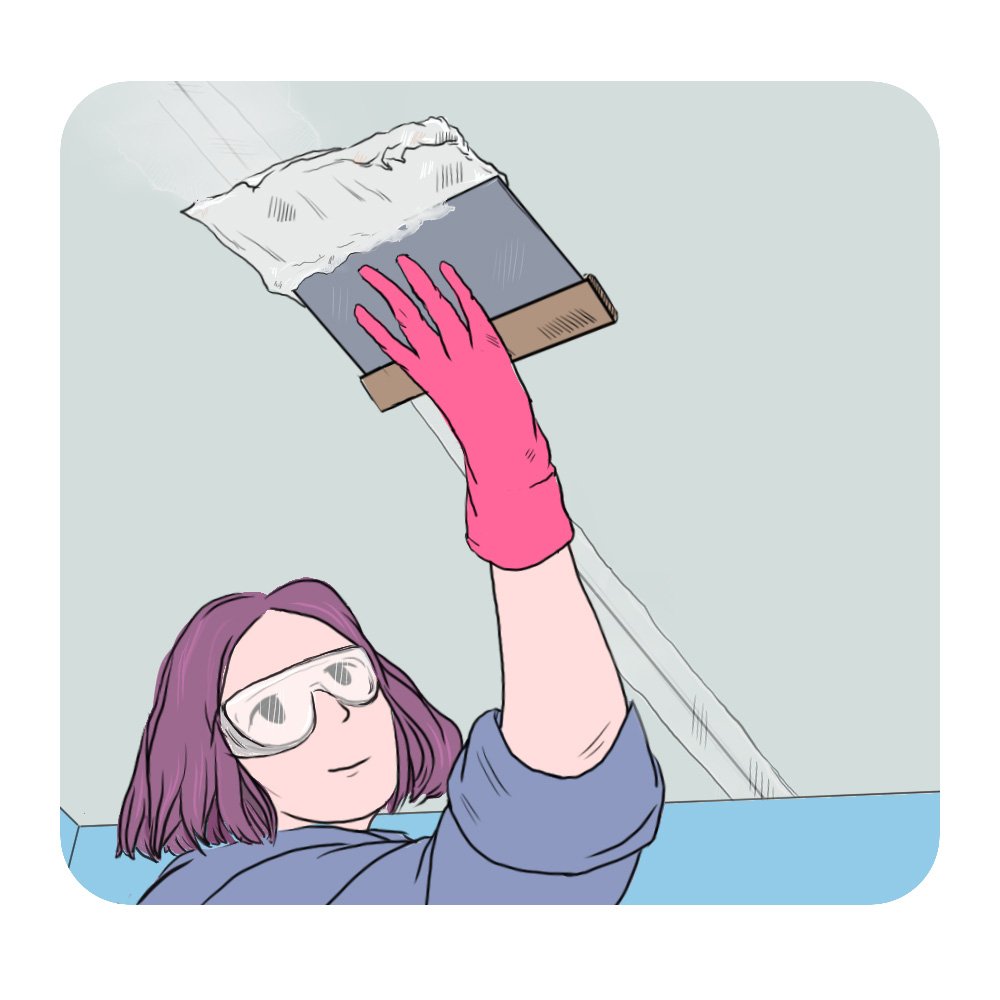
- Wear safety goggles at all times.
How To Plasterboard A Ceiling — Step-by-Step Instructions
Follow the 6 steps below to plasterboard a ceiling like a pro.
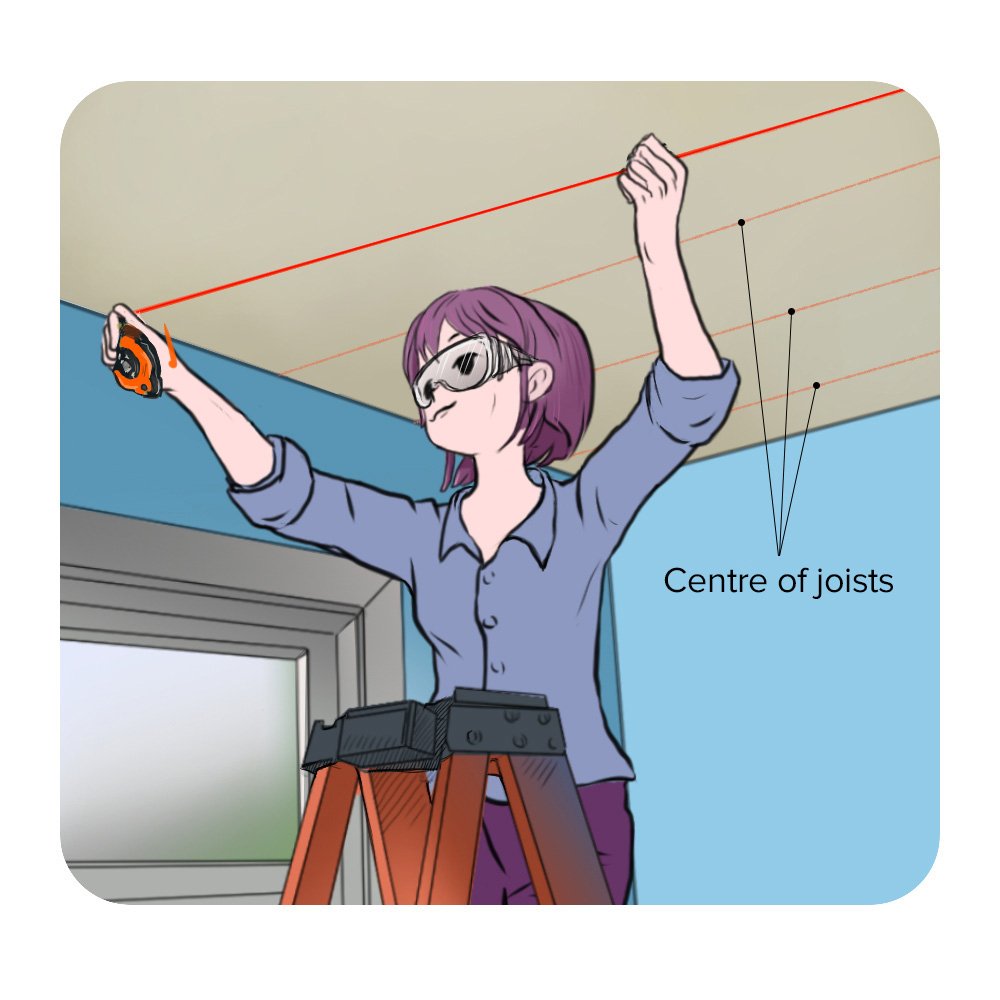
1. Finding and Marking Joists
Locate joists with an electronic stud finder. All joists should be either 400mm or 600mm apart but double-check with a nail. For rooms upstairs, measure the joist gaps in the loft.
Mark each joist with a chalk line on the ceiling and tape stuck to the wall (see Fig 1 below).
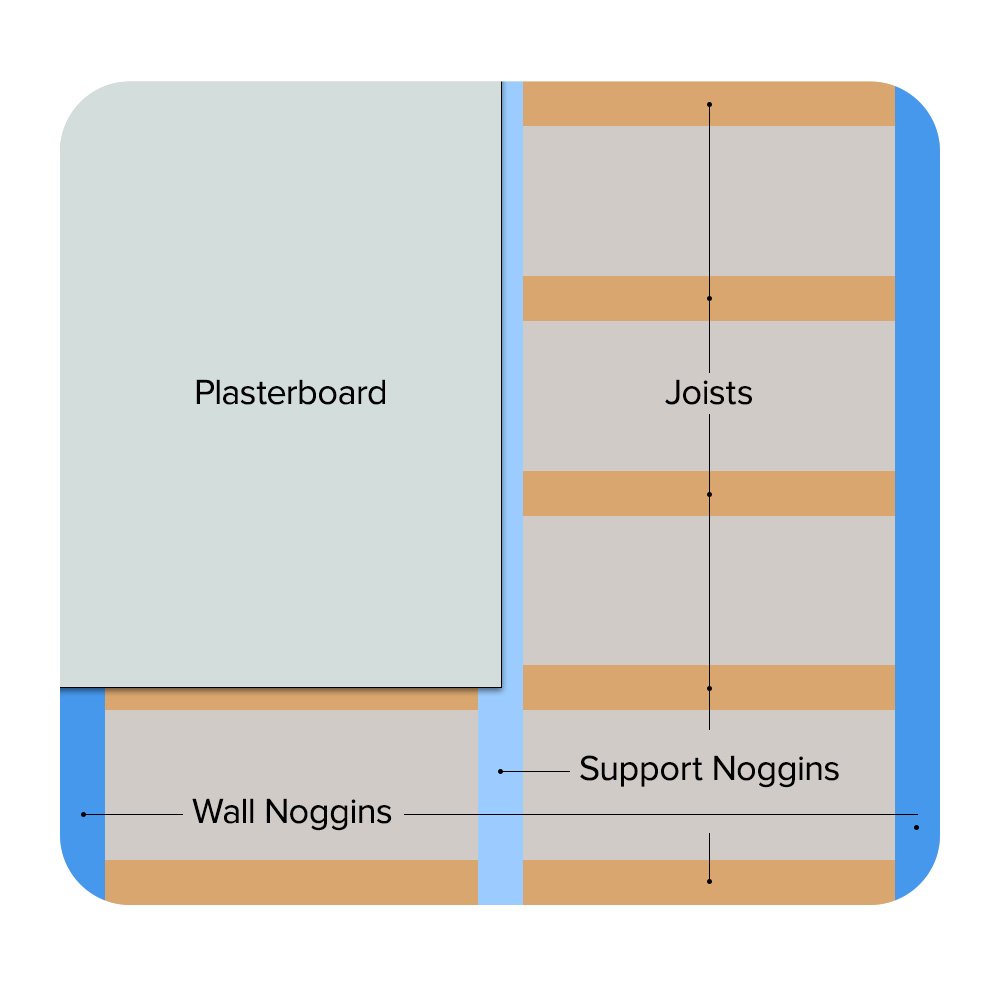
2. Add Noggins (if required)
The boards must be supported by a timber frame made of joists and noggins.
Use 50mm x 50mm sawn timber battens and follow the points below to ensure you have sufficient support for your plasterboard:
- Wall Noggins (royal blue coloured noggins in Fig 2) — If there is no perpendicular support where the joists meet with the wall, screw in some ‘wall noggins’.
- Support Noggins (sky blue coloured noggins in Fig 2) — screw in some support noggins between the joists, where the long edge of the plasterboard sits (as shown in Fig 2).
In the image below, note how the end of the plasterboard sits halfway across the joist. This placement allows the next board to butt up against it.
3. Calculate, Measure and Mark
- Calculate the ceiling area by multiplying its length by its width to produce the area in square metres (m²).
- Plasterboard is available in various sizes, with 900mm and 1,200mm being the most common widths. Lengths range from 1,800–3,600mm (most common options are; 1,800mm, 2,300, 2,400mm, 2,500mm, 2,700mm, 3,000mm and 3,600mm). Choose your board size and buy enough to cover the ceiling area calculated in Step 1. Buy a few extra boards as spares.
- Using the chalk lines and tape as a guide, measure and mark the boards so their ends will fall on the centres of the joists (as shown in Fig 2 above)
Example Calculation. If your ceiling is 4m x 4m, its area is 16 square metres (16m²). If you use 1,200mm x 2,400mm boards, each one has an area of 2.88 square metres (2.88m²). 16/2.88 = 5.55 boards, so 6 boards in total.
Note: 1,200mm is a popular board width because it neatly fits joists spaced 400mm or 600mm apart.
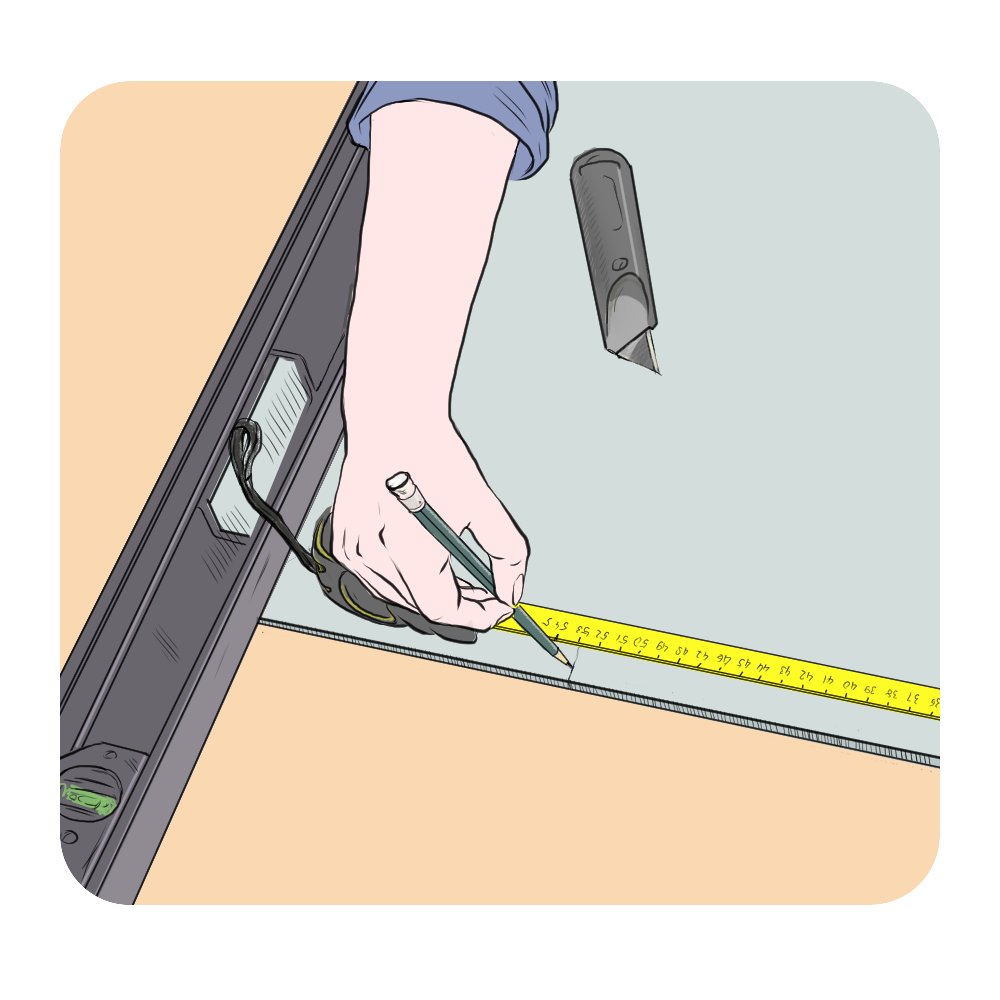
4. Cut Plasterboard
Most of your ceiling should be covered by full-size boards that require no cutting. However, some areas will need custom sizes. The steps below guide you through the cutting process:
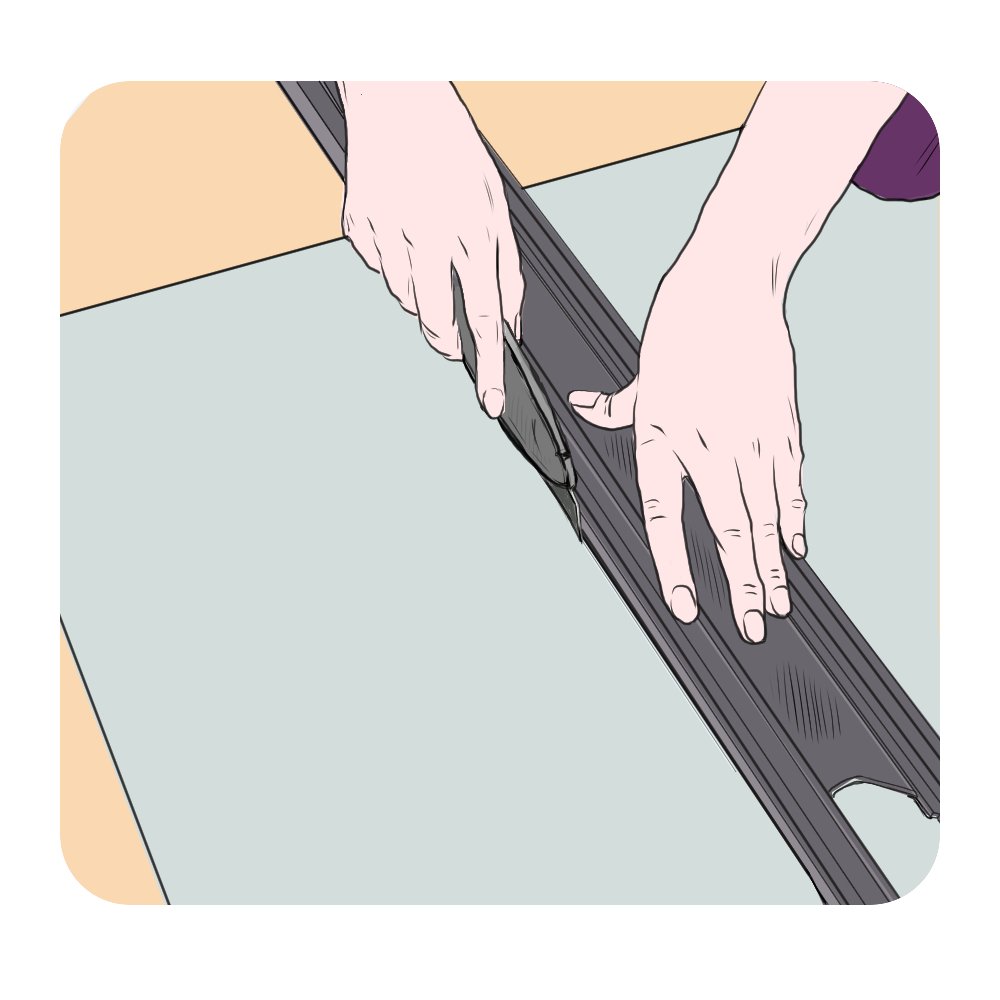
- Lay the board flat on the floor and mark your measured dimensions on it (Fig 3).
- Cut through the paper layer, but no deeper, with a knife against a straight guide (e.g. a steel ruler or spirit level). You may need to run the knife over it two or three times to achieve this, so don’t try to force it on the first attempt (Fig 4).
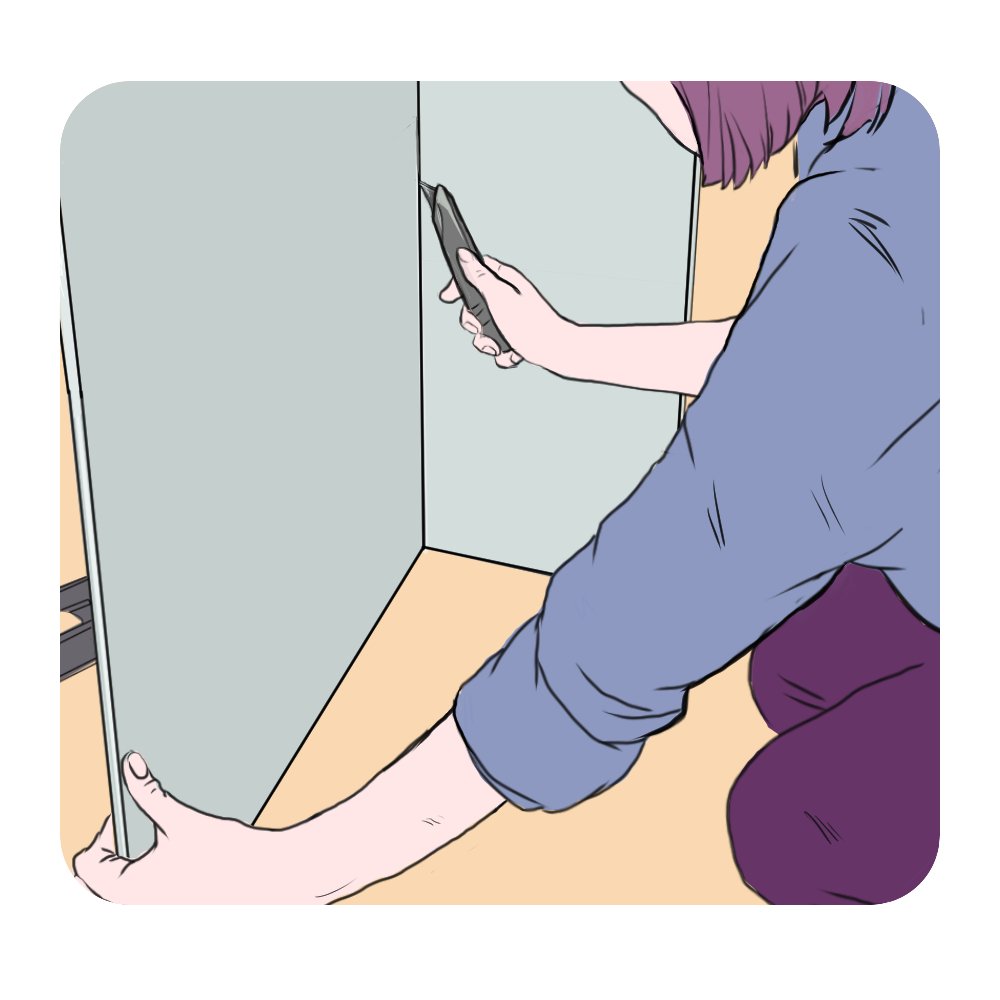
- Lift the board off the floor and firmly push one side of the cut. It should snap cleanly along the cut line (Fig 5).
- Cut through the other side’s paper layer (Fig 6).
- If necessary, use a plasterboard rasp to smooth out any rough edges.

5. Fix Plasterboard
- Starting from one corner of the room, slowly raise and place the first board using the plasterboard lifter. Place the board across the chalk lines that mark the joist centres (see Fig 7 below).
- Using 38mm plasterboard screws, fix the board to the joists.
- Fit screws every 150mm, but remember to keep them at least 10mm away from manufactured edges and, if applicable, 12mm away from cut edges. For now, only drive in enough screws to safely hold the board in place.
- Once the board is securely fixed to the joists, remove the lift and move on to the next board.
- When all the boards are up, add a new set of chalk lines over the boards (use the tape on the wall as a guide, as the original lines will be covered by the boards) and add the remaining screws.

6. Taping and Jointing
To produce a nice smooth finish for painting, tape, joint and sand the ceiling.
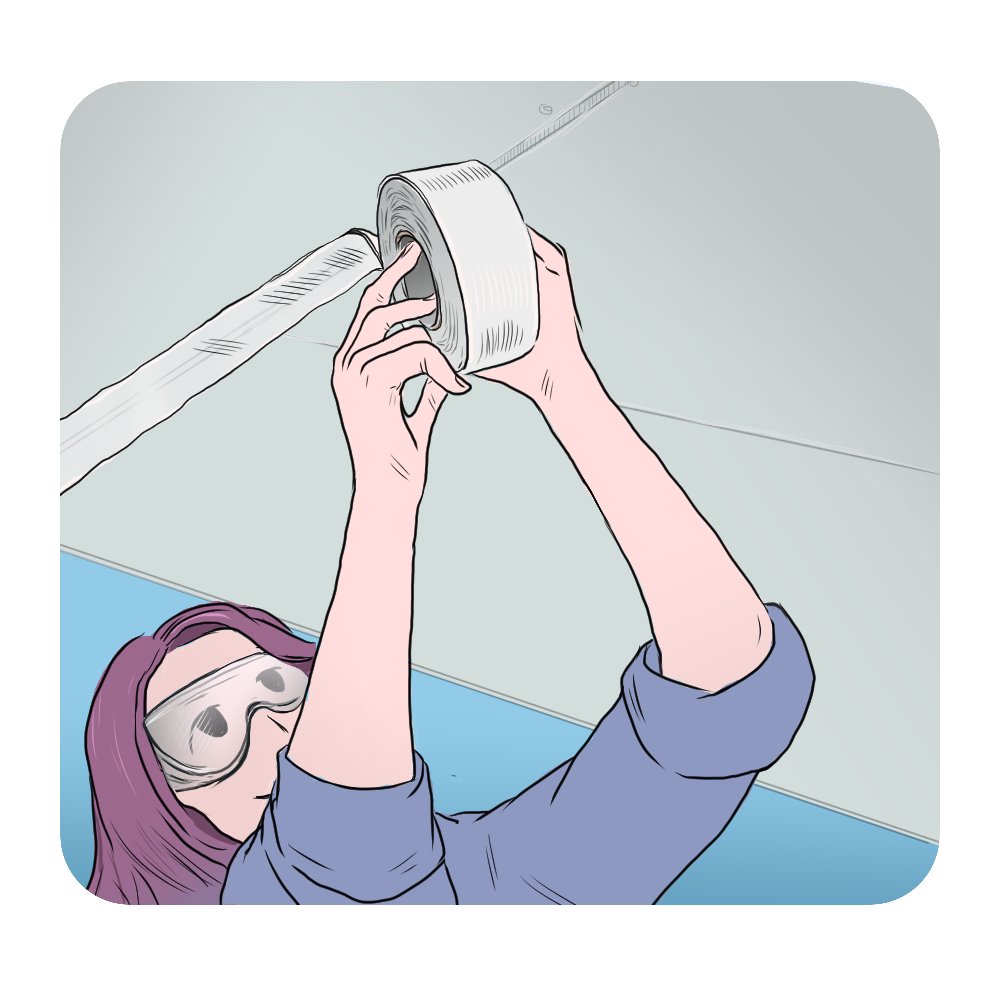
1. When all the boards are in place, tape over the joints with perforated plasterboard tape.
2. Mix some joint compound by following the instructions on the bag.
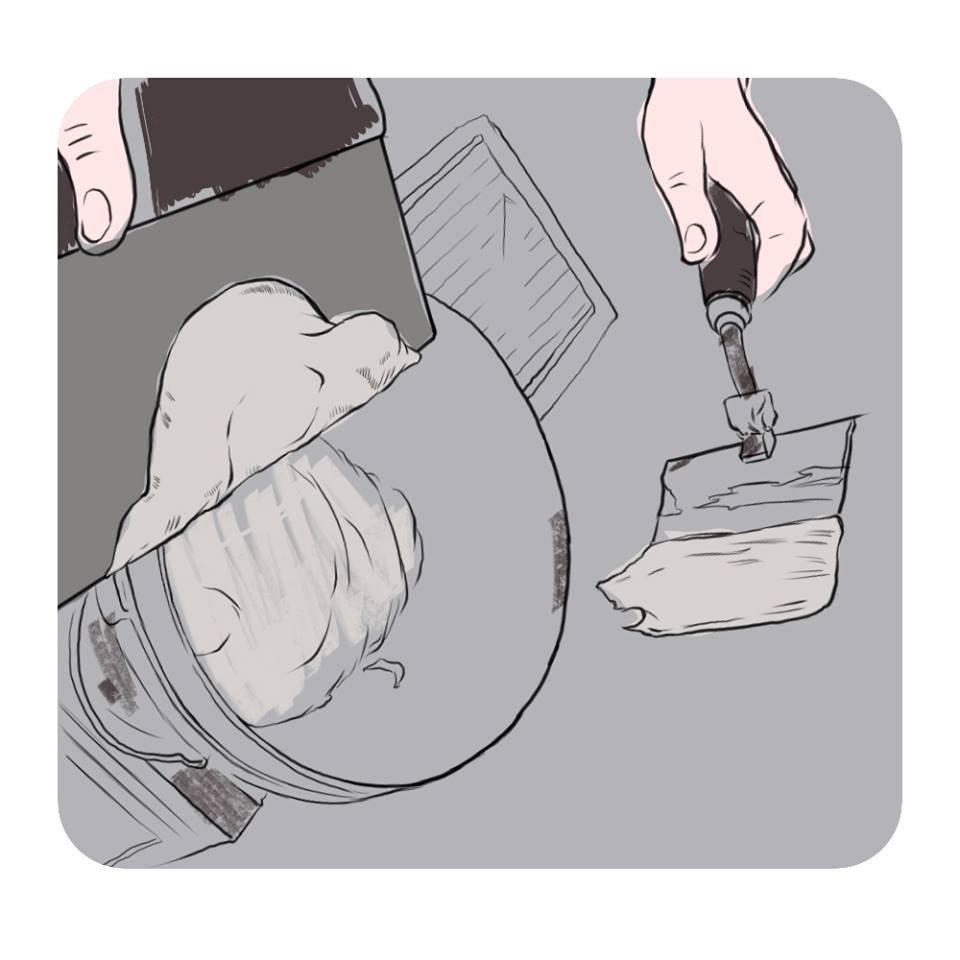
3. Using a taping knife, lightly spread the jointing compound over the taped joints. Note: A wide-bladed taping knife feathers out the compound, leaving only a tiny ridge to be rubbed down once it’s dry.
4. Leave the ceiling to dry for 24 hours and then sand it smooth using 120-grit sandpaper.
Pro Tip: Sanding jointing compound creates fine dust, irritating skin when showering. To help avoid this, open all doors and windows before sanding. Also, remember to wear goggles, gloves and a dust mask.
For more info on taping and jointing a plasterboard ceiling, watch the video below:
Don’t fancy doing this job yourself? Find top-rated plasterers in your area by clicking the button below:
Final Thoughts
After you’ve completed all the steps above, your ceiling will be ready for wet plastering.
As I learned from bitter experience, wet plastering is a challenging skill that takes years to perfect, so I highly recommend hiring a professional plasterer for this part. However, if you still want to try it, check out our step-by-step guide to plastering a ceiling.
Pro Tip: If you’re planning to plasterboard over a very old ceiling, watch how Charlie and Gerard do it in the video below :
