This article is part two of our two-part guide on tiling a wall.
Assuming you’ve completed part one, ‘How To Prepare a Wall for Tiling’, we can now start the fun bit — tiling!
Tools and Materials
Ensure you have all the tools and materials below before tiling a wall.
Tools
- Rule
- Trowel
- Grout float
- Tape measure
- Felt-tip pen
- Tile cutter
- Hacksaw (optional)
- Tile file (optional)
- Grout tool
- Claw hammer
- Spirit level
- Sponge and bucket
- Sealant (anti-mould)
- Cartridge gun
- Rubber mallet (optional)
Materials
- Tile spacers
- Tile adhesive
- Wall tiles
- Tile trim (optional)
- Clean cloth
- Grout
- Flat wooden board (optional)
Safety Gear
- Dust mask
- Goggles
- Safety gloves
How To Tile a Wall — Step-by-Step Instructions

Don’t attempt to tile your wall without reading our article, ‘How To Prepare a Wall for Tiling’. It guides you through all the prep work, including ‘setting out’ the tiles for the best results.
There are a few things to consider before you start:
- Use ready-mixed adhesive for ceramic tiles. It’s easier to use, and the consistency is always perfect. You can use powdered adhesive on ceramic tiles but risk getting the mix wrong, reducing the bond on the tiles and wall.
- Use powder-based adhesive for porcelain tiles. Ready-mixed adhesive relies on air to dry, taking longer than powder-based alternatives, which use a chemical process to cure for a stronger bond. A faster drying time is better for porcelain tiles because they’re heavier.
- If you use larger tiles (20cm x 20cm), apply adhesive to the wall and the back of the tile.
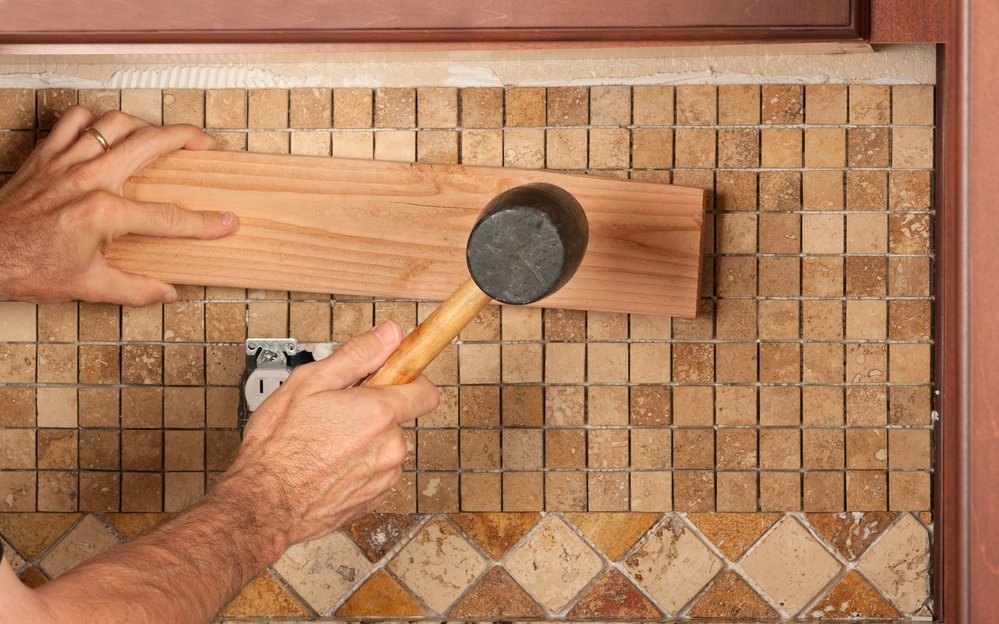
- If you use mosaic tiles, press them onto the wall using a rubber mallet and a flat wooden board. It ensures that they’re entirely flat and makes it easier to work on larger sections (see image below):
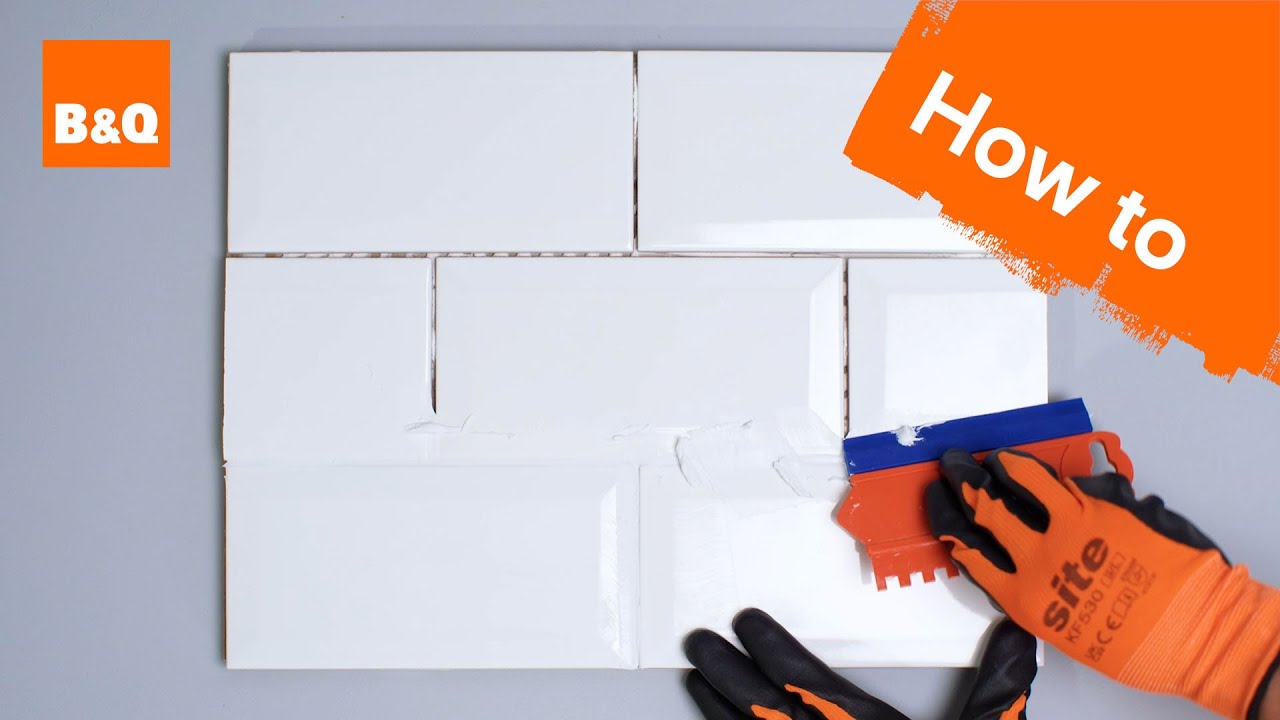
1. Apply Tile Adhesive
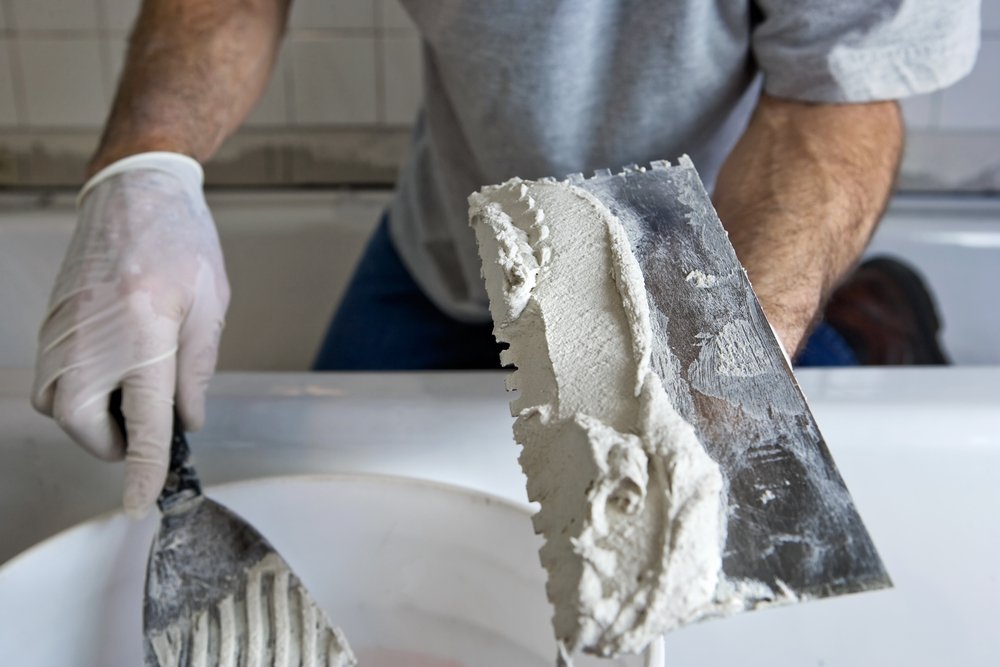
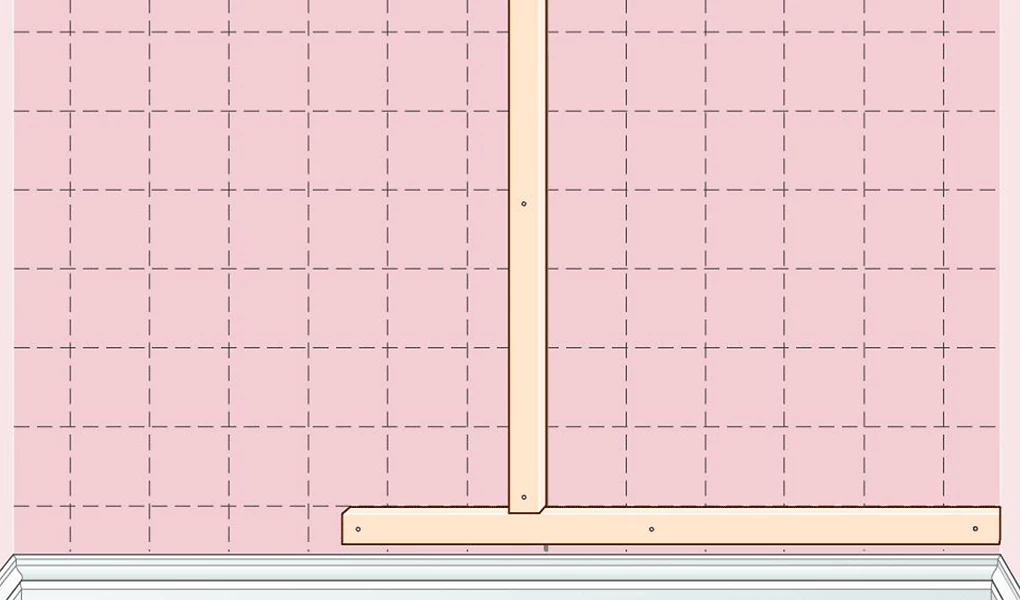
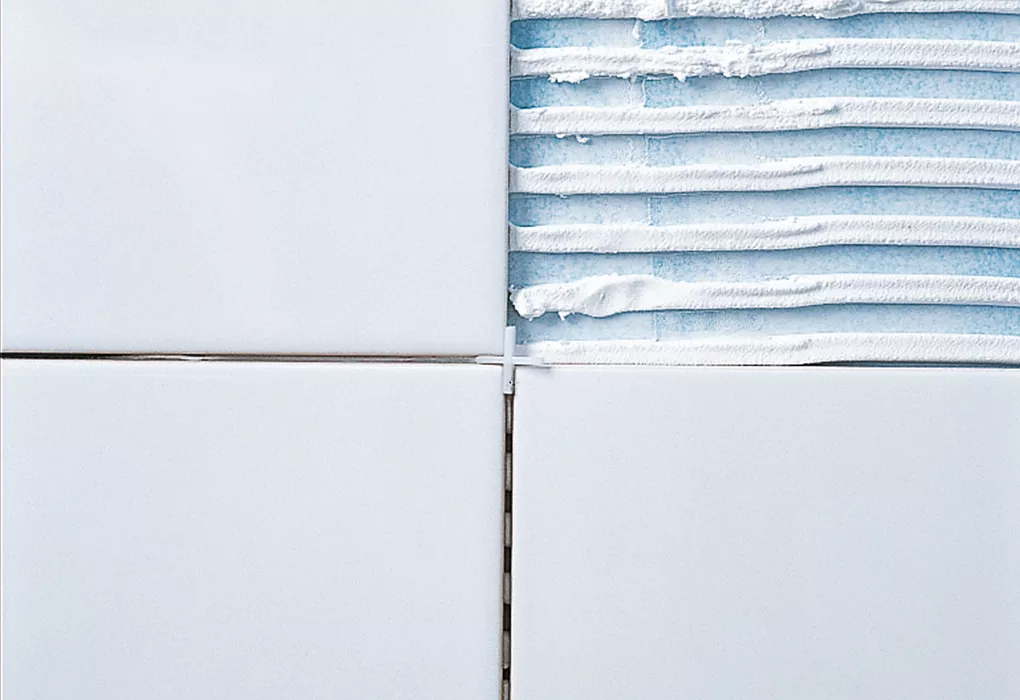
Scoop a generous amount of tile adhesive onto the tile trowel. Start in the corner where the two battens meet (see Fig 1).
Use the notches of the tile trowel and work away from the corner in horizontal strokes. Hold the trowel at 45 degrees to create equal adhesive ridges and an even spread.
Pro Tip: Check out our tile adhesive thickness guide to achieve an even spread.
Only work on one square metre section at a time to prevent the tile adhesive from hardening before you press the tiles into position.
2. Place the First Tile
Press the first tile into the corner where the two battens meet (see Fig 1). Ensure the tile sits flush against the wooden battens. Press the tile into position with a little twist and wipe off the excess adhesive with a damp sponge.
Rinse the sponge out in a bucket of water to prevent the adhesive from hardening. Place the second tile above the first one and press it into place with a little twist. Remember to add the tile spacers (see Fig 2).
Pro Tip: Wipe off excess adhesive as you go. If you leave it to the end, it’ll harden and become difficult to remove.
3. Repeat the Process
Place a new tile next to the first one and press/twist it into place.
Wipe off the excess adhesive and place a new tile spacer in the bottom corner where the tiles meet (see Fig 2).
Continue sticking tiles until you’ve covered the first square metre of adhesive.
4. Apply More Adhesive
Scoop more adhesive onto your tile trowel and apply it like before, working in horizontal lines. Continue laying whole tiles until the section is complete.
At this stage, we’re only concerned with complete tiles, but remember that we’ll have gaps that require cut tiles (as detailed in our ‘How To Prepare a Wall for Tiling’ article).
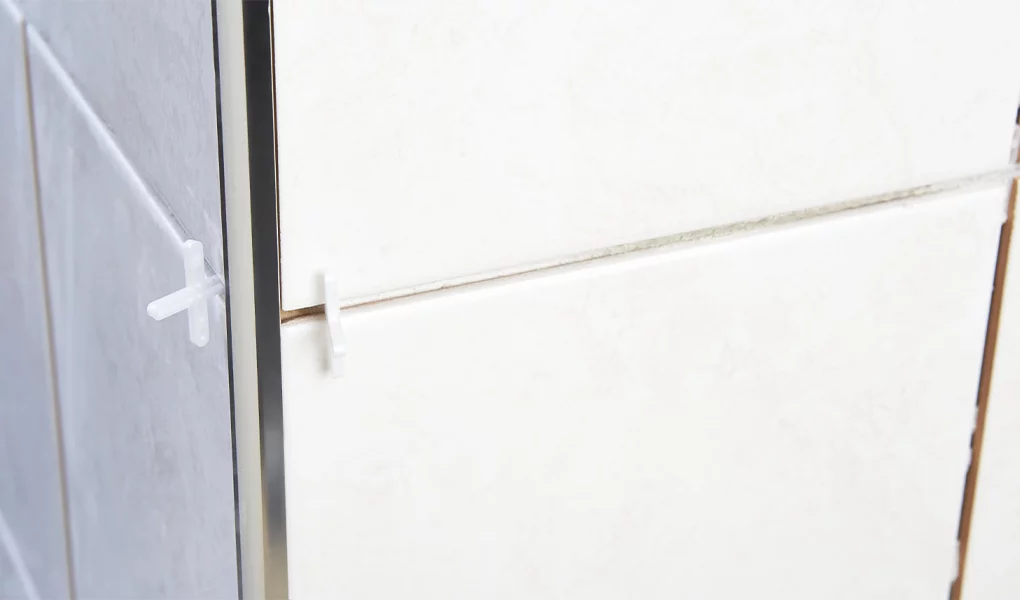
Pro Tip: When tiling round wall corners, only place one leg of the spacer between the tiles. You’ll remove them before we grout (see Fig 3).
5. Leave to Dry
Wait while the tile adhesive dries for the recommended time before moving on to the next step. Our guide on tile adhesive drying times offers lots of advice and tips.
6. Remove the Battens
Pull the nails from the wall using the claw hammer and remove the horizontal and vertical battens.
Attach the horizontal batten to the other section of the untiled wall to support the first line of tiles.
7. Repeat the Process
Cover one square meter of the untitled wall with adhesive and start in the corner next to the first tile you attached in Step 2. Keep going until you’ve covered the remaining wall section in whole tiles.
8. Remove the Horizontal Batten
Wait for the necessary adhesive drying time, then remove the horizontal batten with the claw hammer. Take care not to damage or dislodge the tiles.
Now you’re ready to tile the gaps around the edges of the wall.
Marking Tiles for Cutting
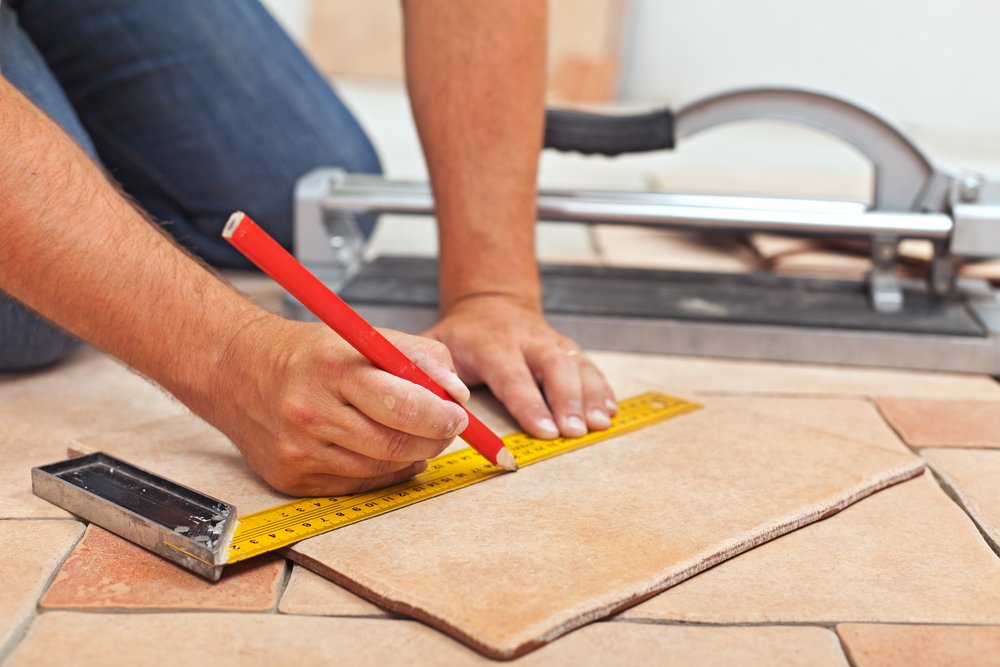
Grab the tape measure and measure the distance between the last complete tile and the wall’s top, bottom, or side edge.
Grab the ruler and pen, and mark the measurement on the tile to be cut. Make a series of dots on the front surface of the tile and join the dots with the rule. You now have a clear line to cut.
How To Cut Tiles
There are four main ways to cut tiles, each with its pros & cons. This section covers each method and highlights its best use case.
Safety Note: When cutting tiles, always don safety goggles, gloves, and a face mask.
Before we get into the four different cutting methods, here are some general things to bear in mind:
- Porcelain tiles are typically thicker than standard tiles (15cm) and require a diamond blade wet-saw tile cutter because they’re more delicate.
- Ceramic tiles are typically less than 15cm thick and can be cut using a scribe, manual tile cutter, or a wet tile saw with a diamond blade.
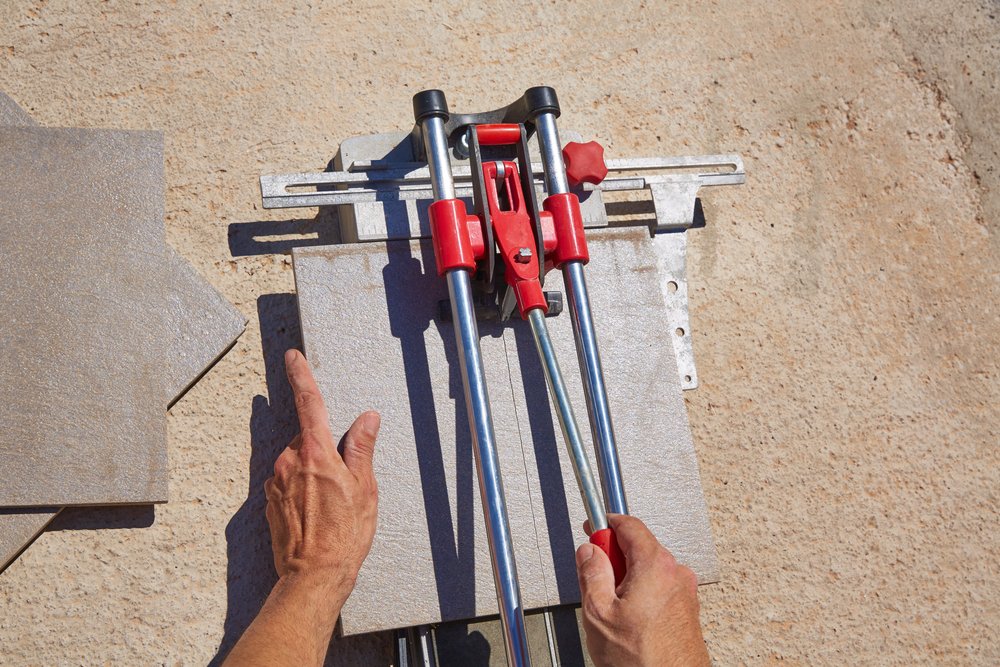
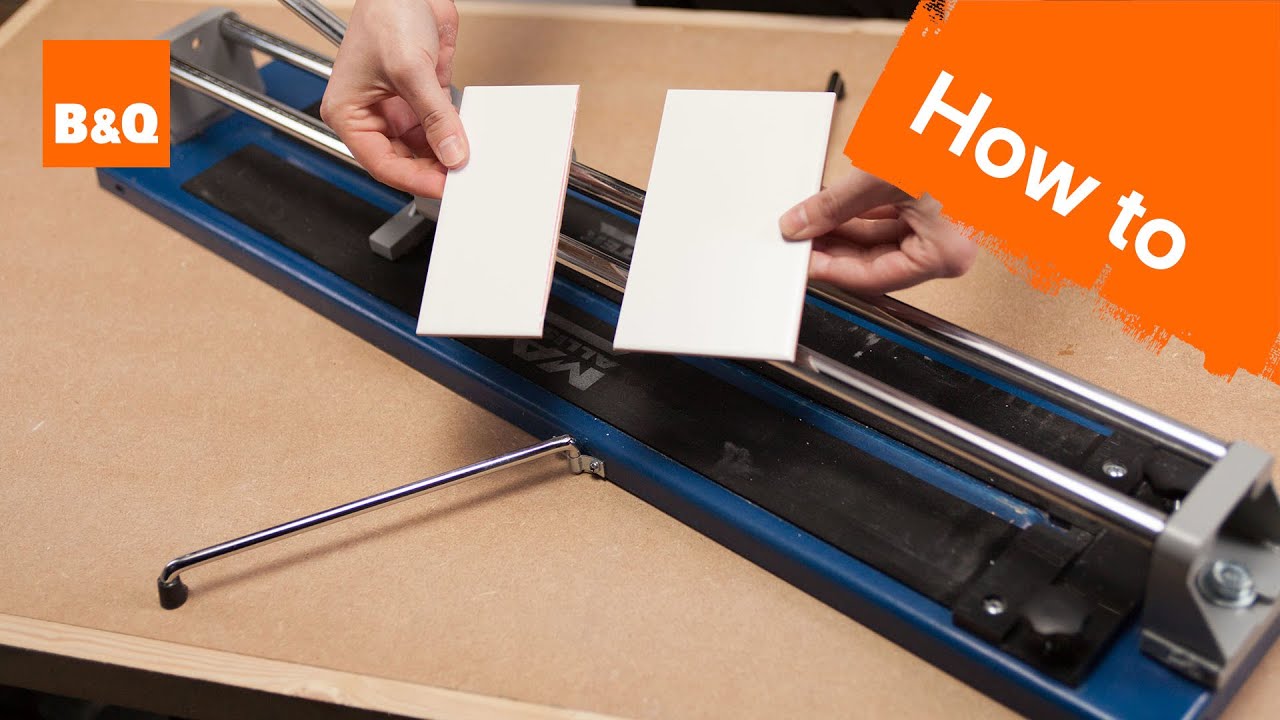
How To Use a Manual Tile Cutter
Manual tile cutters are simple to use and work well with ceramic tiles. They’re also cheaper than a wet tile saw with a diamond blade.
- Mark up the tile using the method detailed in the ‘Marking Tiles for Cutting’ section above.
- Insert the tile into the tile cutter and line up the cut mark with the tile cutter guide.
- Lower the handle so that the scribe makes contact with the tile surface.
- Push or pull the handle along the cut line, ensuring you score the entire tile length.
- Repeat the scoring action a couple of times for a clean cut.
- Lower the handle so the tile snapper touches the tile (straddling the scribed line) and press down. The tile should snap cleanly, leaving a straight edge.
How To Use a Tile Scribe
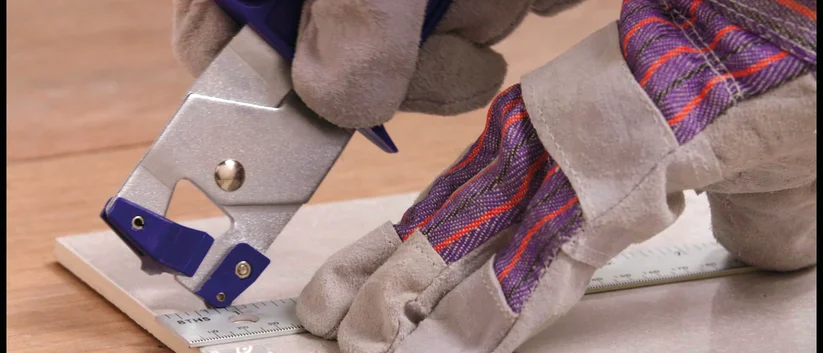
Tile scribes are the cheapest option and one of the easiest methods with some practice.
- Mark a line as before.
- Score along the line using the scribe and a metal ruler (see image above).
- Insert the tile into the tile snapper and squeeze the handles; the tile will snap cleanly.
How To Use a Tile Saw
Tile saws are ideal for ceramic tiles because they’re sturdier and make cutting more straightforward, but don’t use a dry tile saw on porcelain tiles because they will potentially crack.
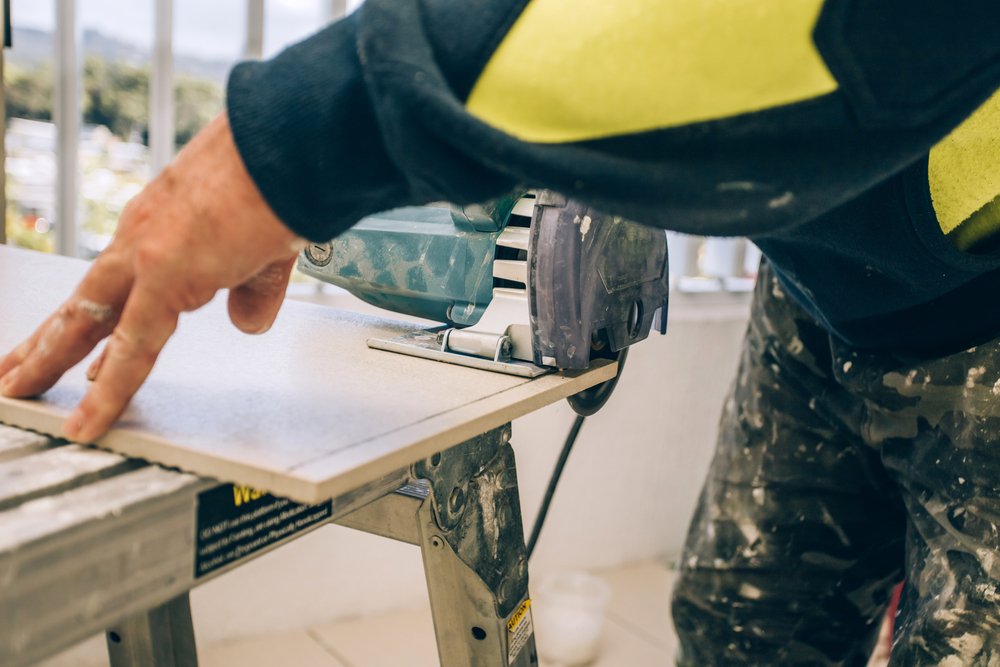
- Having marked the cut line, clamp the tile to your workbench with the section to be cut overhanging.
- Choose a slow-cutting speed and steadily work along the line.
- Turn the tile rather than the saw when cutting awkward shapes.
- Smooth off the edges with sandpaper or a tile file.
How To Use a Diamond Blade Wet-Saw Tile Cutter
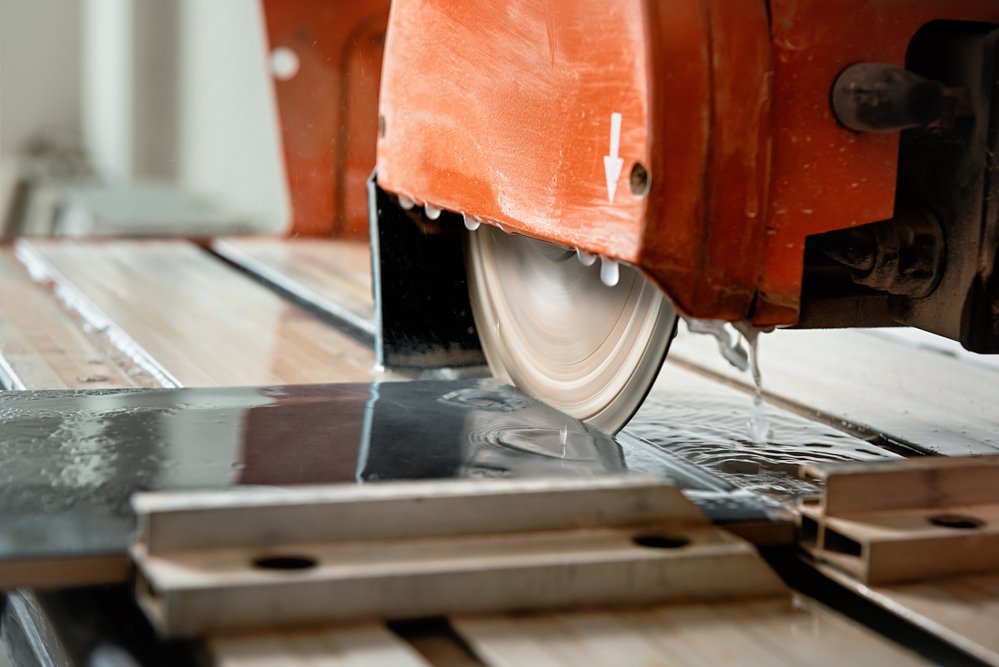
You can use a wet saw on all tiles, but it’s the best option for cutting porcelain. Remember to top up the saw’s water reservoir to avoid overheating.
- Mark the cut line in the same way as before and clamp the tile to your workbench.
- Line the diamond blade against the cut line and fire up the saw.
- Wait until the saw reaches optimum speed, and then press it against the tile until it bites into it.
- Use light force when pushing the blade along the tile, and always move the tile rather than the saw when changing direction.
- Cut the power to the saw when the blade slices through the tile.
- Check the cut edge and smooth it with a tile file.
The video below gives you a visual demonstration of all the tile-cutting techniques described above:
How To Tile Around Corners

When tiling around corners and obstructions like kitchen cabinets, there are two types to consider — internal and external.
An internal corner faces inward. An external corner faces outward (see Fig 3 above).
How To Tile Internal Corners
- Now that you’ve marked and cut your tile using the techniques above, check it fits. Make minor adjustments with the tile file if not.
- Coat the back of the tile in adhesive with the notched tile trowel and press it into place. Use tile spacers as before.
Pro Tip: If you’re tiling the other wall section that meets the corner, you can use the first new tile on the adjoining wall to mask any imperfections in the cut edge of the previous tile.
How To Tile External Corners
The easiest way to tile external corners is to use tile trim, which masks imperfections and protects the tiles from chips.
- Measure the length of the corner you want to attach the tile trim to.
- Measure the tile trim and mark where the cut will go.
- Cut the trim with a hacksaw.
- Add a thin strip of tile adhesive to the wall corner, and press the tile trim onto the wall.
- Add tile spacers along the trim length where the tiles’ top and bottom will meet. This keeps a gap for the grout.
- Apply tile adhesive to the untiled adjoining wall from top to bottom, taking care not to dislodge the tile trim.
- Start tiling the new wall, remembering to add tile spacers as you work down the wall to leave a gap for the grout.
- Make adjustments as you lay the tiles to ensure new tiles line up with those on the adjoining wall.
How To Grout Tiles
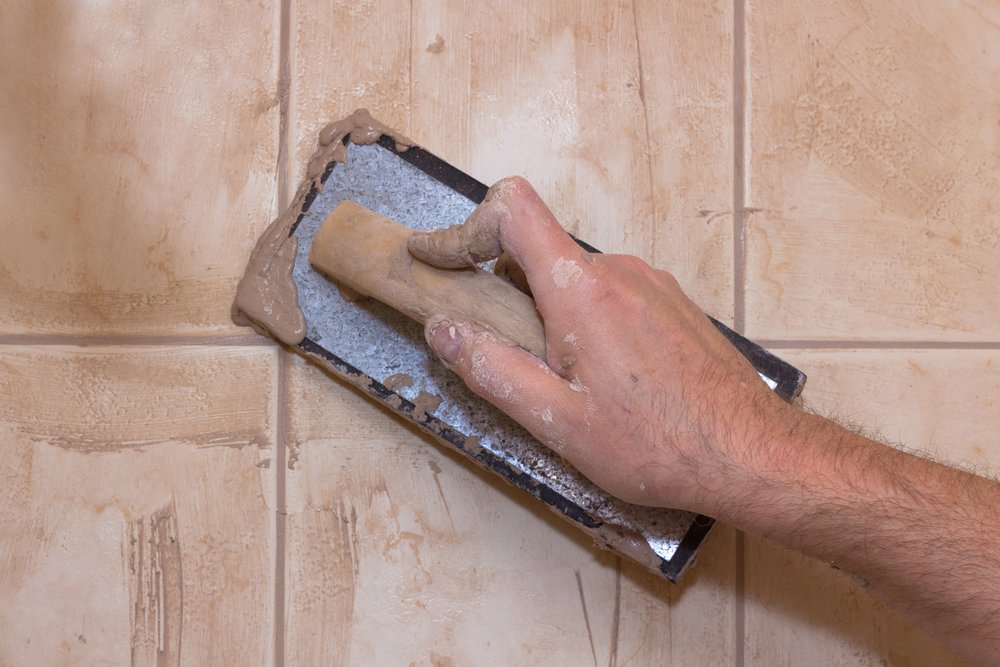
Now you’ve tiled the entire wall, fitted the trim, and waited while the adhesive dries, you’re ready to start grouting.
Pro Tip: Leave the tile spacers in while the tile adhesive dries. However, the trick is to remove them before it fully sets, but not too soon, or the tiles will slip.
- Remove all the protruding tile spacers from the trim and corners.
- Load the trowel with grout and press it onto the tiles, starting in the bottom left corner.
- Use the grout float to spread the grout into the gaps between each tile.
- Work in rapid diagonal strokes because the grout will quickly harden.
- Keep a damp sponge and a bucket of water handy to remove the excess grout from the tiles as you work. Don’t get the sponge too wet.
- Once you’ve covered the gaps with the grout, use the grout tool to smooth the joints between the tiles. Lightly press, or you risk removing the grout.
- Give the wall a final wipe with the damp sponge and leave it to dry.
- Check the tiles once the grout has set, as you may need to wipe them with a damp sponge one final time to remove powdery residue.
- Wipe the wall down with a soft, clean cloth.
The video below demonstrates the technique:
How To Seal Tiles
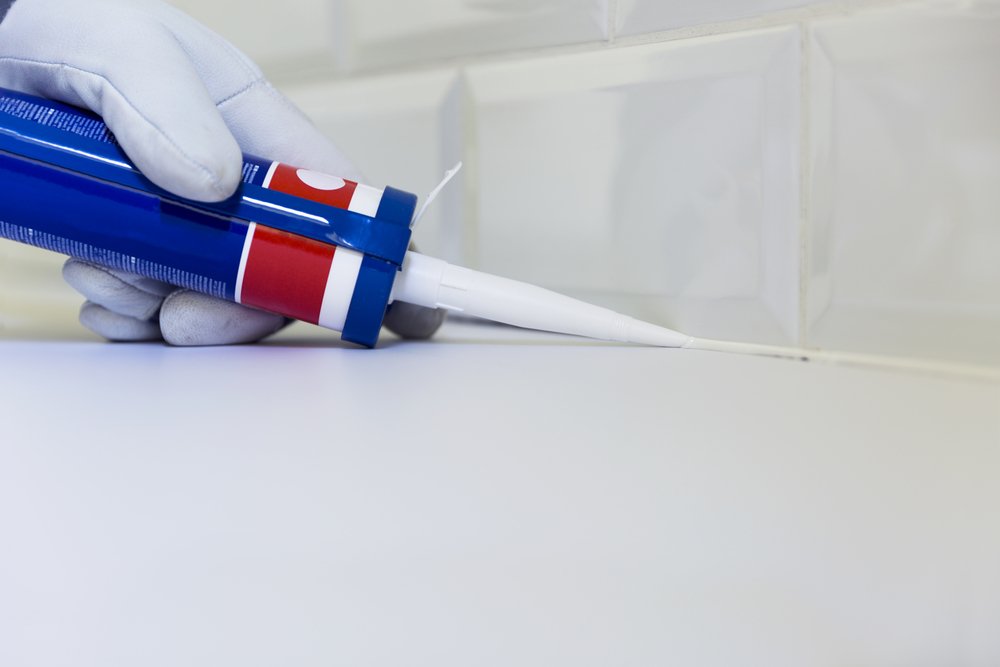
Once you’ve tiled and grouted, seal around wash basins and bathtubs to prevent water damage.
- Attach the nozzle to the sealant tube and cut the end at 45 degrees, following the instructions on the packaging. The nozzle is stepped to offer varying thicknesses.
- Load the tube into the cartridge gun and depress the trigger to secure it.
- Start at one end of the tiles and run a continuous line of sealant along the base where the tiles meet the basin or bath. Keep steady pressure on the sealant gun trigger and work slowly.
- When you reach the end of the line, remove the sealant gun.
- Spray the sealant with a strong solution of soap and water. This helps when you remove the excess silicone.
- Use a sealant smoothing tool to scrape away the excess and evenly distribute the sealant.
- Leave the sealant to dry for the recommended time.
The video below demonstrates the whole process:

Final Thoughts
If you put effort into preparing your walls for new tiles and follow all the steps above, you’ll achieve a professional finish.
Alternatively, if the prospect of tiling fills you with dread, find top-rated tilers in your local area using Rated People and receive FREE quotes for your next tiling project.