Applying the correct amount of tile adhesive is a difficult skill. If you use too much, the surface will be uneven, but if you use too little, the tile won’t stick.
In my experience, you must understand the type of adhesive and trowel you’re using to strike the right balance.
Types of Tile Adhesive
There are three main types of tile adhesive, and deciding which is the best for your project depends on how they perform in different settings.
Thinset Mortar
Thinset mortar is the most commonly used tile adhesive. It’s cement-based and comes in powder form, like this EverBuild Rapid Set Mortar, or in premixed tubs, like this Bostik Rapid Setting Cement.
Pro Tip: As a rule of thumb, use five litres of water for every 22.5kg bag of powder. Add the water slowly to ensure your mix doesn’t become too watery.
Thinset mortar is simple to apply, making it easier to gauge thickness. It’s also better in moisture-rich areas like bathrooms and kitchens. However, it’s prone to drying and cracking.
Pro Tip: Adding a PVA bonding agent to the thinset mortar improves flexibility and prevents cracking.
You must achieve 95% adhesive coverage when tiling in wet areas. In other words, only 5% of the tile surface should be untouched by adhesive.
Tile Mastic
Tile mastic is a thick acrylic glue that comes in ready-mixed tubes. It doesn’t have the same water resistance as thinset mortar, so it’s better in low-moisture rooms such as bedrooms, living rooms, etc.
When tiling in dry areas, you only need 85% adhesive coverage, leaving 15% of the tile untouched. Furthermore, because mastic is water-based, it cleans up quickly and is simple to apply.
Mastic is better for spot repairs like re-glueing fallen tiles rather than large-scale projects.
Epoxy Tile Adhesive
Epoxy tile adhesive is the most robust of the three types because it withstands grease, moisture, heat, and anything else you can throw at it.
However, epoxy tile adhesive is difficult to apply, making it hard to get the right thickness. Furthermore, it gives off a strong odour, so wear a respirator if the room lacks airflow or windows (e.g. cellars).
Tile Adhesive Trowels — Square vs U Notched
You can use various sizes of Square-Notched and U-Notched trowels to spread tile adhesive evenly, but each type delivers a different depth once the tile is fully embedded in the adhesive.
When buying trowels, there are two key factors to consider — Shape (square or u-shaped) and Size.
Teeth Shape
A square-notched trowel leaves half the adhesive height when fully compressed, whereas a u-notched trowel leaves around one-third.
For example, a square-notched trowel with a notch depth of 10mm leaves a 5mm adhesive bed beneath the tile, but a u-notched trowel with a notch depth of 18mm leaves only 6mm.
Teeth Size
A trowel’s given size refers to the size and spacing of the trowel’s teeth. This measurement indicates how much adhesive the trowel will leave on the substrate before being compressed.
Square-notched and U-notched trowels are measured the same — the first measurement is the width of the notches, and the second is the depth of the notches.
For example, an 8x8mm square-notched trowel will leave 8mm adhesive ridges on the substrate with 8mm spaces between each ridge.
Trowel Coverage Table
The table below shows commonly used trowel sizes with the ridge and adhesive bed height they produce. As you can see, the compressed bed height for all square-notched trowels is half the ridge height, whereas the u-notched trowel is only one-third.
| Trowel Shape and Size (mm) | Ridge Height (mm) | Compressed Adhesive Bed (mm) |
|---|---|---|
| 6×6 (square) | 6 | 3 |
| 8×8 (square) | 8 | 4 |
| 10×10 (square) | 10 | 5 |
| 12×12 (square) | 12 | 6 |
| 10×18 (U-notched) | 18 | 6 |
Square-Notched Trowel
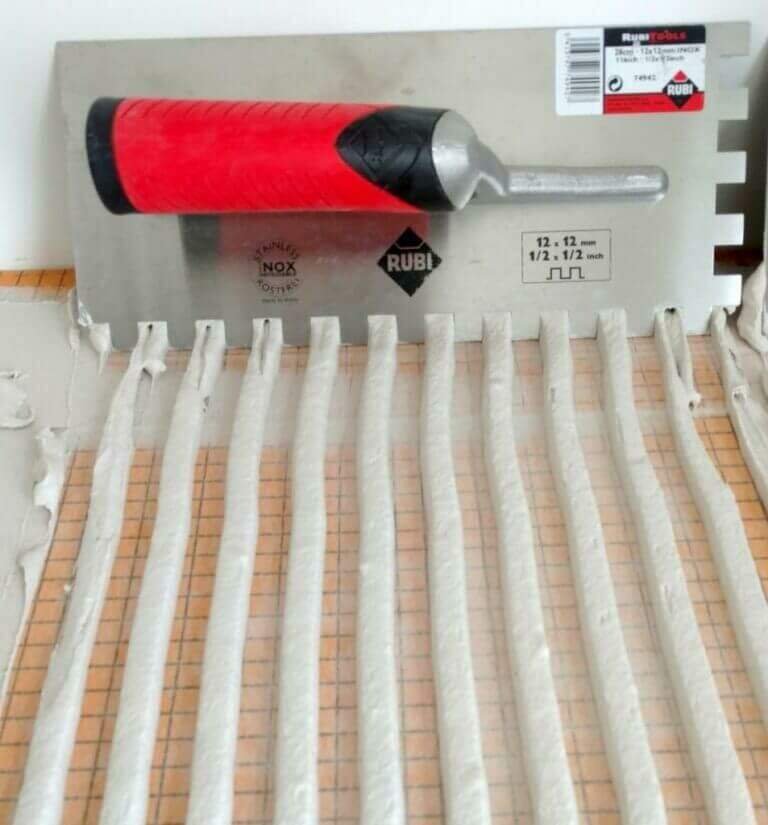
Square-notched trowels are ideal for heavier tiles because they deliver a thicker adhesive spread and evenly distribute the weight of the tile.
As mentioned above, square-notched trowels compress the adhesive depth to half the original ridge height. So if the trowel lays down 10mm ridges, the depth halves to 5mm once the tile is pressed into place.
| Pros | Cons |
|---|---|
| Lays down more adhesive. | Uses more adhesive. |
| Wider notches for better grip. | Not suitable for mosaic tiles. |
| Compresses deep into the mortar. | |
| Better at distributing the weight of larger tiles. |
U-Notched Trowel
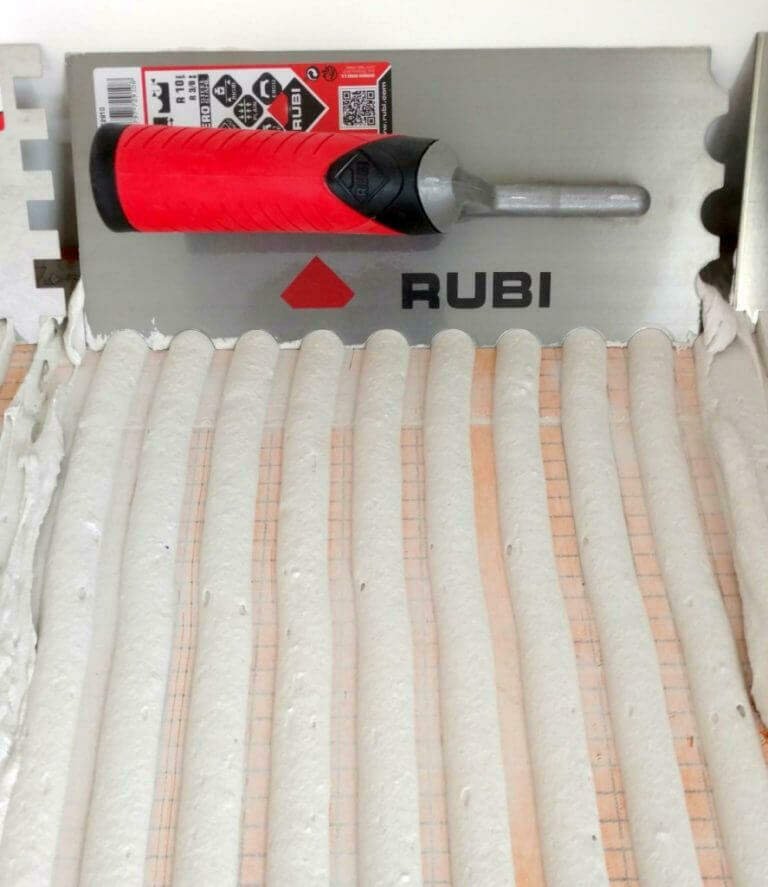
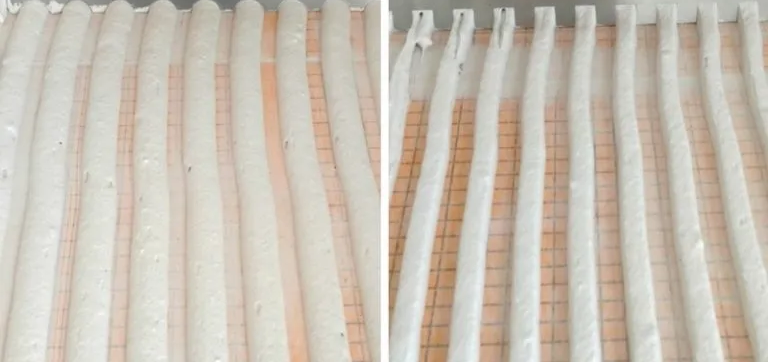
U-notched trowels have U-shaped teeth, creating curved ridges. When you press a tile onto these ridges, the adhesive compacts, holding the tile in place.
These trowels compress the adhesive depth to one-third of the original ridge height. So if the trowel lays down 18mm ridges, the depth reduces to 6mm once the tile is pressed into place.
U-notched trowels make it easier to manoeuvre tiles into position and are better suited to mosaics.
| Pros | Cons |
|---|---|
| Uses less adhesive. | Unsuitable for heavier tiles |
| Better for wall tiles. | |
| Ideal for small/mosaic tiles. |
Pro Tip: The trowel packaging states the depth and width measurement, but sometimes you’ll only see one dimension. In this case, the notch depth and width are identical.
Trowel Size Guide
The table below provides a rough guide for which size trowel to use when working with standard tile sizes.
| Notch Size (mm) | Tile Size (cm) |
|---|---|
| 3–4.5 | Mosaics/small format tiles (10×10 or smaller) |
| 6 | Small/medium format wall tiles (10×10–30×30) |
| 8 | Large format tiles (20×20–30×30) |
| 10 | Floor tiles (30×30–40×40) |
| 12–20 | Large format tiles (40×40+) |
How To Apply Tile Adhesive on a Wall
To apply tile adhesive like a pro, follow the seven steps below:
- Mix five litres of water for every 22.5kg of adhesive powder into a bucket.
- Use a mixing paddle attached to a power drill for a smooth consistency.
- Load the smooth edge of your trowel.
- Start in the wall’s bottom left corner and apply the adhesive in upward sweeping motions.
- Work in sections, roughly two to three tiles wide and high.
- Create thick ridges by flipping the trowel and scoring the adhesive with the square notches.
- Press the tile onto the wall, starting in the bottom left corner.
- Use a rubber mallet to tap the tile down so the adhesive grips.
- Repeat until the wall is complete.
To see the above in action, watch the video below:
Final Thoughts
Tile adhesive thickness depends on its type (Thinset Mortar, Tile Mastic or Epoxy Tile Adhesive) and the trowel you use.
Remember the following key points:
- Square-notched trowels lay adhesive in thicker ridges and compress it to cover more surface area. These trowels are better suited for larger tiles.
- U-notched trowels create curved ridges, making it easier to manoeuvre tiles into the adhesive. These trowels are better for smaller tiles.
To learn more about tiling, check out our guides to preparing a wall for tiling and how to tile a wall.
FAQs
Below are answers to frequently asked questions about tile adhesive thickness.
Can you use too much tile adhesive?
Yes, you can use too much tile adhesive.
If you create large wet blobs under the tile, you weaken the bond between the adhesive and the tile. You’ll also extend the adhesive’s drying time, increasing the tile’s chances of moving.
How much height does tile adhesive add?
Tile adhesive height depends on how thick you apply it.
Trowel notch sizes vary between 4mm and 20mm. If the trowel has a 10mm square notch, you can expect a compressed adhesive height of 5mm (half the notch height).
If the trowel has an 18mm U-notch, you can expect a compressed adhesive height of 6mm (one-third of the notch height).
When should I use a V-shaped trowel?
V-notched trowels are perfect for fitting mosaic tiles on a mesh backing or for tiles smaller than 10cm.
Unless you work on intricate patterns, you won’t use a V-notch trowel for tiling walls and floors.