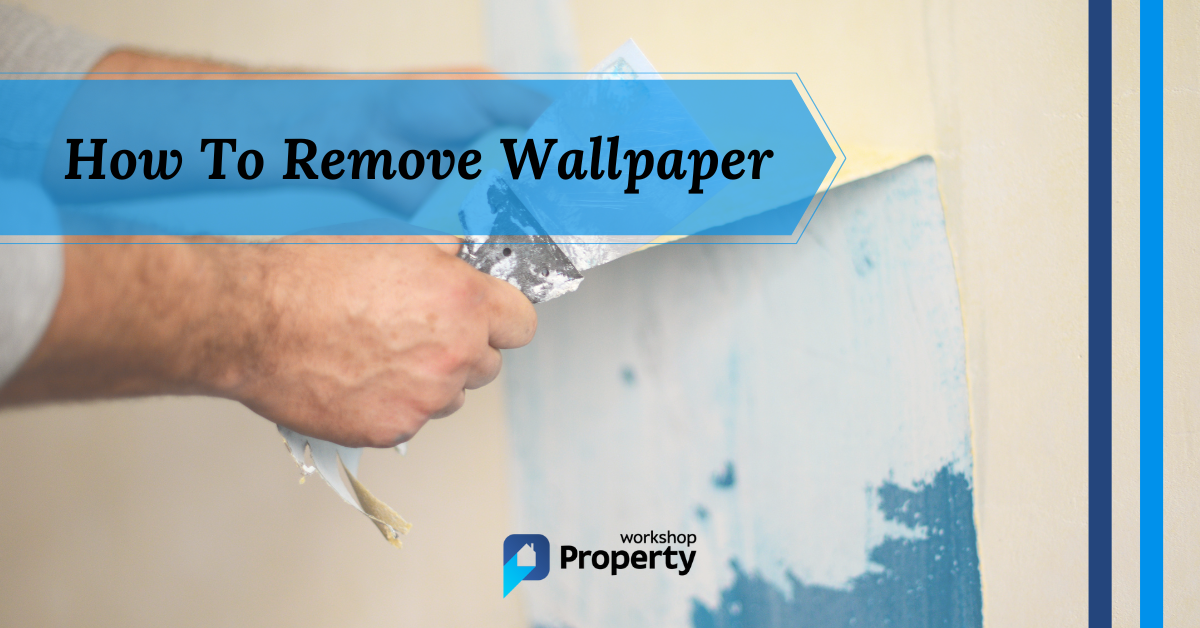
Experience has taught me that nothing is as easy as it looks, including knowing how to remove wallpaper.
You may be tempted to paper over the existing wall covering, but that can lead to issues like creasing further down the line.
In this article, I’ll show you how to remove wallpaper in easy-to-follow steps, including hints and tips for the best results.
Tools and Materials
Ensure you have all the tools and materials below before removing wallpaper from your walls.
Tools
- Multimeter
- Electric steam stripper
- 4-inch wide stripping knife
- Orbital scorer (optional)
- Step ladder
- Metal rule
- Utility knife
- Stiff-bristled broom
- Bucket
- Sponge
- Jug (to fill the steam stripper)
- Screwdriver
Materials
- Dust sheets
- Waterproof plastic bags (for socket and switch protection)
- Masking tape
- Black bin bags (for waste material)
- Clean cloth or rag (to dry the wall)
- Rubber gloves
Safety Gear
- Face mask
- Safety goggles
- Protective clothing (or old clothes)
- Heat-resistant gloves
Safety First
Before you begin removing wallpaper, follow the safety tips below:
- Never place your step ladder on uneven ground, and never overreach, especially when working on stairs and landings.
- Keep any chemicals and solutions away from pets and children.
- Safety goggles keep your eyes clear of dust and paper fibres.
- A face mask prevents paper fibres from entering your lungs and reduces the possibility of inhaling chemical wallpaper stripper.
Removing Wallpaper — 3 Options
Consider which paper-removing option is best for you. There are three methods to choose from — Soap and Water, Steam, and Chemical Stripper.
Which one you choose depends on how difficult the old wallpaper is to remove, the number of layers, and the room size.
Let’s look at each method in more detail:
Option 1: Soap and Water
This option is the cheapest and most straightforward method. Adding soap to the mix helps dissolve the old adhesive, making the removal more efficient.
Wallpaper absorbs the moisture and starts to bubble and lift off the wall, enabling you to scrape it away with the stripping knife.
However, while it may be cheaper, it requires elbow grease and determination.
| Soap and Water Pros | Soap and Water Cons |
|---|---|
| Minimal tools required | Extremely messy |
| Easy to execute | Possible water damage to other surfaces |
| Minimal cost | Won’t remove all wall coverings |
| No chemicals | Time consuming and tiring |
Option 2: Steam
To remove wallpaper with steam, you’ll need a specialised wallpaper steamer. These tools include a water tank, a hose connection and an electric hotplate to disperse moisture evenly across the wallpaper.
An electric steamer is the best way of removing multiple layers of wallpaper and stubborn materials like woodchip. Plus, they make light work of more extensive areas of wallpaper. To learn more about using steamers, check out our wallpaper steamer guide.
However, there are downsides to consider, like the cost of the steamer and the risk of injury.
| Steam Pros | Steam Cons |
|---|---|
| Penetrates deeper | Steamers can be expensive |
| Great for more extensive areas | You risk scalding your hands |
| Removes stubborn wallpaper like woodchip | Takes some practice |
| No chemicals |
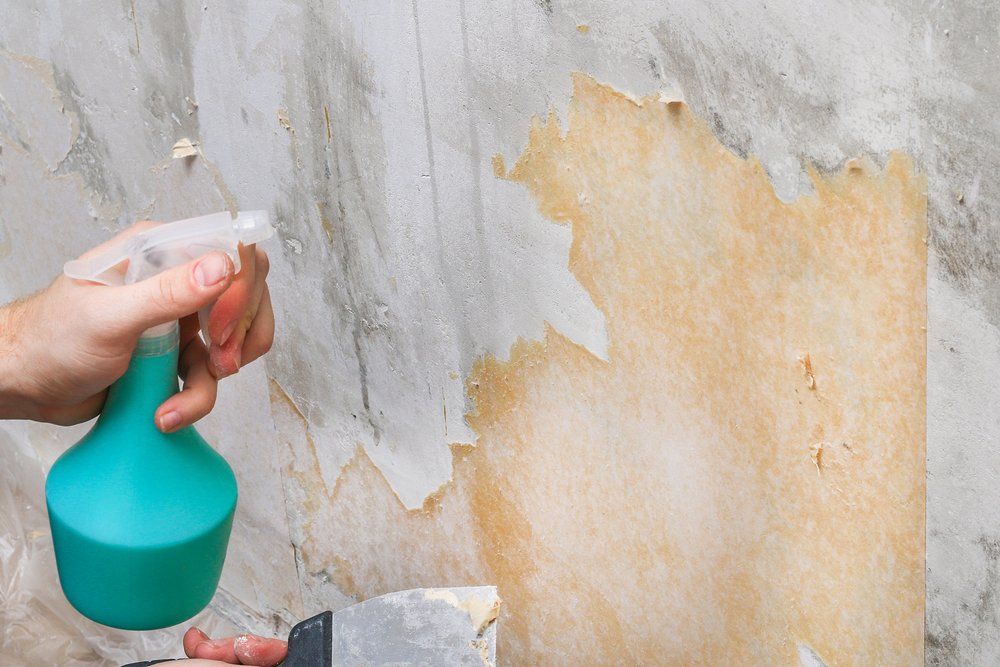
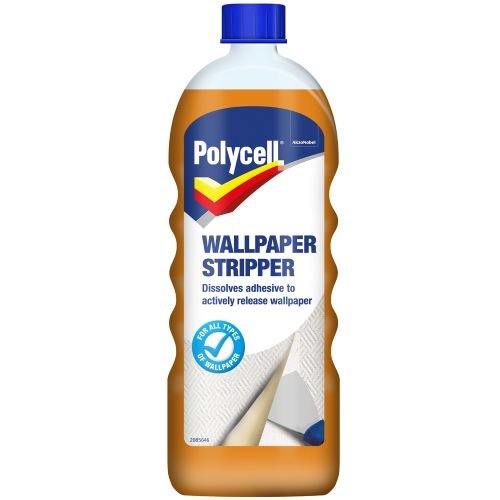
Option 3: Chemical Stripper
Chemical wallpaper strippers come in concentrated bottles that are diluted with water or a spray solution that you apply directly to the wallpaper.
Chemical strippers are ideal for removing one or two wallpaper layers at a time. They work by dissolving the old wallpaper adhesive, releasing the paper and making removal much more straightforward.
Using a chemical solution is not the greenest method of wallpaper removal, and it can pose a risk to pets and children.
Pro Tip: Make a homemade version using white vinegar and water. The acid in the vinegar dissolves the old adhesive to free the wallpaper.
| Chemical Stripper Pros | Chemical Stripper Cons |
|---|---|
| Lift two layers at a time | Uses harmful chemicals |
| Less elbow grease | May not be safe for pets and kids |
| Easy to use | Not suitable for multiple layers of wallpaper |
| Fast-acting | Better for smaller areas like feature walls |
Now you know your three options, it’s time to prep the walls.
Preparing the Room for Wallpapering
I’ve learnt that investing time and effort in the prep work makes the process faster and smoother, with better results.
1. Clear the Room
Working around obstacles is a recipe for disaster. Don’t cut corners, and where possible, clear the room.
If some furniture is too difficult to remove, stack it in the centre of the room and cover it with a dust sheet.
2. Remove Everything from the Walls
Remove all wall furniture, like pictures and shelves, including vents. Use the plastic bags to cover any vent openings, securing them with masking tape.
3. Switch Off Electrics and Remove Face Plates
Moisture from the steamer or sponge can penetrate the wiring, sockets and switches, so it’s safer to cut the room’s power as a precaution.
Loosen face plates on light switches and sockets, and gently ease them away from the wall so there is a small gap. Doing this allows you to access the wallpaper behind the plates.
Pro Tip: Use a multimeter on the sockets and light switches to check the power is off (see 4.52 in the video below). If in doubt, find a local electrician on Rated People.
The video below provides a basic tutorial on multimeter use and shows you how to check sockets.

4. Protect Sockets and Switches
Cover sockets and switches with masking tape and plastic bags to protect them from getting wet.
5. Lay Dust Sheets
Removing wallpaper is messy, especially if you have loose or blown plaster. Dust sheets protect floor coverings and any other items within the room.
6. Score Wallpaper
Scoring wallpaper helps create perforations for better moisture absorption.
Orbital scorers make light work of this task and don’t damage your wall when used correctly. They’re also effective on painted surfaces.
The video below shows you how to use an orbital scorer (see 0.14 in the video):

Pro Tip: Don’t press down too hard when using an orbital scorer, as this can damage the plaster below. Also, don’t use the blade of your stripping knife, as this gouges the plaster.
How To Remove Wallpaper — Step-by-Step Instructions

Now that we’ve prepped the walls and room, it’s time to remove the wallpaper. Let’s look at the three main options:
Option 1 — Soap and Water Method
- Fill a bucket with warm water and add washing-up liquid. The water doesn’t have to be warm, but it does make the process much more comfortable.
- Dip the sponge into the water and wring out the excess liquid. If dipping your hands in water doesn’t appeal, fill a spray bottle with soapy water and apply it to the wall.
- Start at the top of the wall, rubbing the sponge over the surface. As the water penetrates the wallpaper, you should see it darken and the wallpaper ripple. If you think more water is needed, apply another coating.
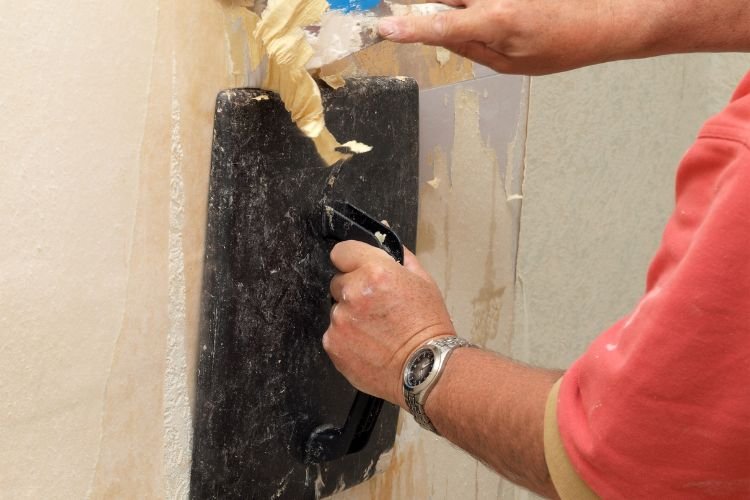
- Wait 10 minutes before scraping the wallpaper from the wall with the 4-inch stripping knife.
As mentioned above, using soap and water is effective, but not if your wallpaper is stubborn. You might also struggle to remove woodchip coverings.
Pro Tip: Use a metal rule and utility knife to score along the top of the wall where it meets the ceiling. This technique ensures a clean line and avoids the old wallpaper pulling off ceiling paint. Repeat this process for door and window frames.
Option 2 — Steam Method
Using an electric steam stripper is an effective way of removing wallpaper, but before you begin, there are a few safety considerations to follow:
- Read the instructions before you start, even if you think you know how to use a steam stripper, as there may be differences between models.
- Open doors and windows to ventilate the room. Steam strippers generate a lot of moisture.
- Wear heat-resistant gloves.
- Stand the boiler on a flat surface.
- Never leave the steam stripper unattended, especially if kids and pets are in the house.
- Don’t detach the hose while the stripper is in use
- Never move it by pulling on the hose.
- Don’t let the water reservoir run dry. It may cause the stripper to overheat.
- Always leave the stripper to cool for two minutes with the power off between refills.
- Fill a jug with warm water and pour it into the steam stripper. Using warm water helps the stripper reach the correct temperature faster. Place the hot plate of the steamer in a bucket (as detailed in the video below — see 1.03). Once you see steam coming from the stripper, it’s ready to use.
- Start at the base of the wall. Hold the steamer hot plate on the wall for 10 seconds until the paper softens and loosens. Move the pad onto the next section while pulling the damp wallpaper away from the wall. Use a stripping knife on stubborn spots.
- Repeat this process using the stripping knife to detach wallpaper in corners and other hard-to-reach places. Hold the knife as flat as possible to avoid gouging the walls.
- Remove the fallen strips of wallpaper as quickly as possible. Wallpaper adhesive is still active and may stick to your dust sheets if left to dry.
- Steam strippers come with detachable plates to handle hard-to-reach spaces like around switches and sockets or above door frames.
Pro Tip: Woodchip wallpaper is notoriously difficult to remove. It also tends to hide uneven walls and multiple layers of old wallpaper. You may need to hold the steamer hot plate on the wall longer to penetrate deeper into the additional layers.
The video below by HSS Tool Hire demonstrates the technique perfectly:

Option 3 — Chemical Stripper Method
For this exercise, we’re using a ready-mixed spray solution. You can buy a concentrated chemical wallpaper stripper that needs diluting with water. Apply with a sponge or sprayer (as detailed in the video below — see 3.21).
As before, these are safety considerations to remember:
- Wear protective gloves to avoid skin damage.
- Wear safety goggles and a face mask.
- Open windows to improve ventilation.
- Never leave the chemical wallpaper stripper unattended.
- Always read the product instructions before use.
- Follow the application instructions when spraying it onto the wall. The guidelines will tell you how long you should leave the spray stripper to do its work. Some solutions have a yellow dye that stains the wallpaper to indicate where you’ve sprayed.
- Once you’ve waited for the recommended time, use the stripping knife, making short movements to lift the paper from the wall. Hold the knife as flat as possible to avoid damaging the plaster beneath the wallpaper. If the wall begins to dry while you work, apply another coating.
- Repeat this process, working from the top of the wall to the base. It’s more efficient working from top to bottom because the chemical solution will run down the wall, penetrating the wallpaper as it does.
- Remove the old wallpaper before it dries and adheres to the dust sheets.
The video below by Ultimate Handyman shows how to use a concentrated chemical wallpaper stripper:

Cleaning the Wall
Once you’ve removed the wallpaper, you’ll have a few small sections left on the wall. Remove these reaming sections by following the instructions below:
- Brush the wall down using a stiff-bristled brush to remove any loose bits of wallpaper. It also ensures that the wall is free of dust and adhesive residue.
- Scrape off stubborn patches with the stripping knife but avoid gouging the wall. Use another application of chemical wallpaper stripper to remove stubborn spots of paper and residue.
- Once you’re happy all the wallpaper is gone, rinse the wall with clean water using a bucket and sponge.
- Dry the wall with a clean cloth or rag, ensuring the wall is completely dry before applying new wallpaper or paint.
- At this point, you may need to perform minor repairs to the plasterwork.
Pro Tip: To help the walls dry faster, turn the heating on to raise the room temperature. Failing that, wait 24 hours before redecorating.
Final Thoughts
When removing wallpaper, always follow the instructions above and remember that the key to professional results is in the prep work.
Pro Tip: Removing wallpaper is physical and time-consuming work. If you don’t fancy doing it yourself, find top-rated professionals in your local area using Rated People.