I once helped a friend convert a garage into a guest room. Our first job was removing all the oil, grease and paint spilt over the years. This was backbreaking work that took several hours to complete.
I later discovered that sealing his concrete floor with PVA would have prevented most of this hard labour. So, do your future self a favour and follow this DIY guide on sealing concrete floors with PVA.
Why Seal Concrete Floors?
Sealing a concrete floor protects it from the elements and creates a much easier surface to clean. It also produces a surface that bonds well with paint, tile, and screed finishes.
The best product for sealing a concrete floor is PVA.
What is PVA?
PVA, or polyvinyl acetate, is an odourless resin that’s white when applied but dries colourless.
PVA has high bonding strength, so manufacturers use it as a bonding agent in many applications, including wood glue.
To improve PVA’s durability and water resistance after it’s dried, builders apply a layer of paint over it. If you want to know more about floor painting, our guide to the different types of paint includes a section about concrete floor paint.
PVA vs SBR
Styrene-butadiene rubber (SBR) is similar to PVA in that it seals and protects concrete and bonds well with finishes such as paint, tiles, laminate, etc.
However, SBR is water-resistant, meaning PVA is a better option because it allows the concrete to breathe during its drying process.
Depending on the concrete thickness and weather conditions, a newly laid concrete floor can take up to three months to dry out. Therefore, you shouldn’t apply anything that seals in the moisture during this drying period.
Tools & Materials
For a freshly laid concrete floor, you need the following:
- PVA primer-sealer — 1–5 litres, depending on the area to be covered.
- Vacuum cleaner — don’t use your best one!
- Mop.
- Bucket for mixing — 5 litres should be big enough.
- Paintbrush or roller for applying PVA — a yard brush will do, but not too stiff.
For older concrete floors, you may also need the following:
- Paint stripper.
- Cement/sand concrete repair kit.
- Trowel to apply filler.
- Scraper to remove paint and other solid substances.
- Trisodium phosphate (TSP).
Health & Safety Measures
Chemicals like TSP and paint stripper can cause burns when mixing, so wearing the correct PPE is essential.
Wear goggles and rubber gloves to protect your eyes and skin, and mix these products in a well-ventilated area.
How To Seal A Concrete Floor with PVA
To seal a concrete floor with PVA, follow the four steps below.
Step 1. Prepare Concrete Floor
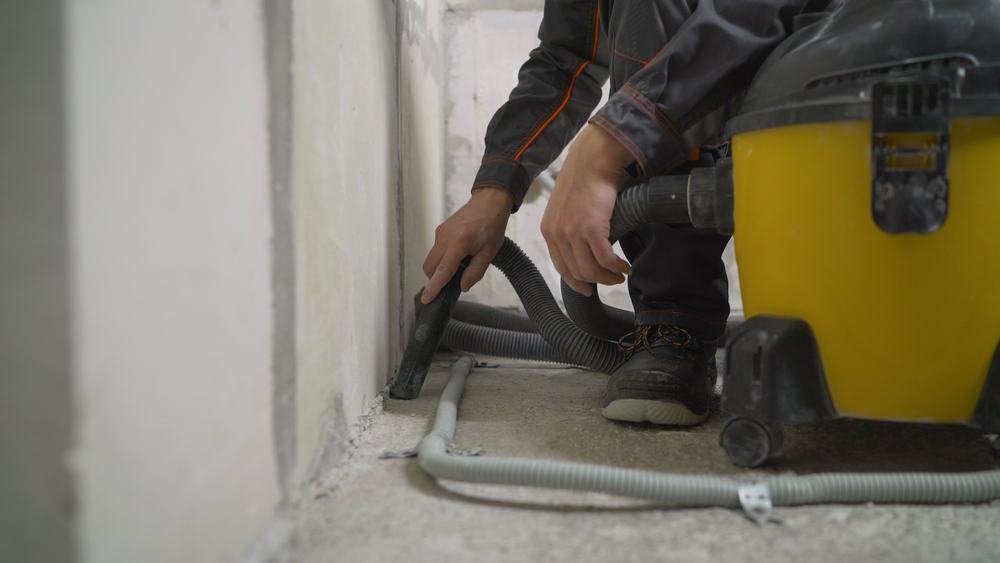
For new concrete floors, this only involves vacuuming dust.
For older floors, remove any paint, greasy deposits, bits of cement, and other solids that have spilt over the years. You may also need to remove broken bits of concrete and fill holes.
Allow any patching to dry before proceeding.
Step 2. Thoroughly Clean Concrete
You can skip this stage if it’s a new floor, free from oil and grease.
- Prepare a solution of 15g TSP to 1 litre of water. This solution covers around 10m2, depending on the floor’s smoothness.
- Pour the solution onto the concrete floor and brush it onto the surface.
- Allow at least 10 minutes for it to dissolve any oily substances, and then wash down using tap water — ideally with a hose and a brush.
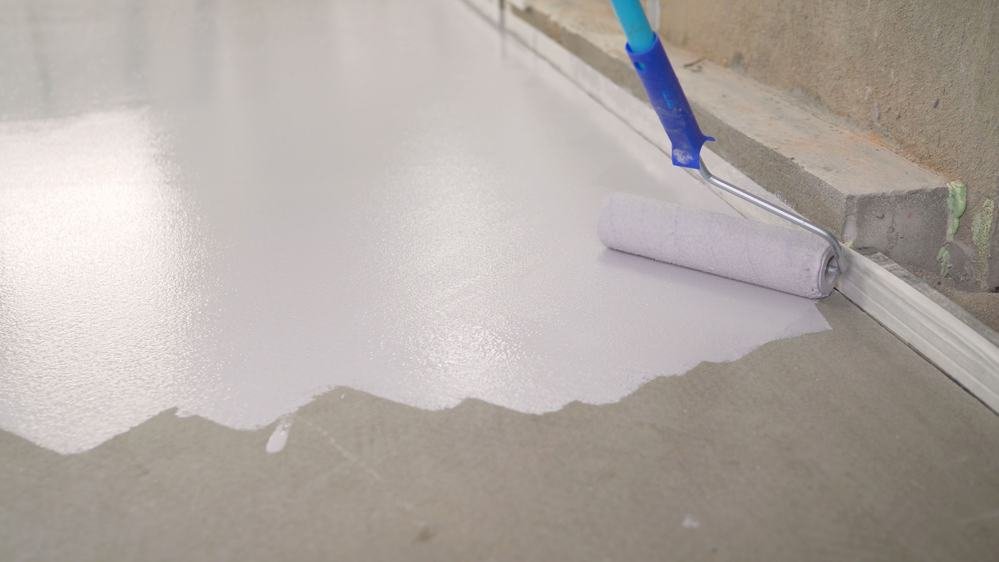
Step 3. Apply PVA — First Coat

- Mix a solution of one part PVA with four parts water in a bucket and stir. Only mix what you need — as a guide, a 1:4 mix ratio covers 24 to 56 m2 per litre, depending on the concrete’s porosity.
- Apply one coat of the solution and allow it to dry — it should take about 8–10 hours. The milky-white liquid goes clear when it’s thoroughly dried out.
Pro Tip: Apply the solution with a long-handled roller so you can do it while standing.
Step 4. Apply PVA — Finishing Coat
The finish coat mix is thicker to make it more durable. The ratio varies between manufacturers, but I recommend mixing one part PVA with three parts water. This mix should cover 18 to 42 m2 per litre, but it’s more likely to be at the higher end because the surface is less porous after the first PVA coat.
Follow the same instructions in step 3, but remember to mix one part PVA with three parts water.
Final Thoughts
PVA is handy for many jobs around the house, including as an adhesive. So don’t worry if you have a lot left over; you’ll find a use for it.
If you’re still in doubt, the video below demonstrates how to prepare and seal a concrete floor. Don’t pay too much attention to the quantities because this depends on the concrete’s porosity and the product used.

Pro Tip: PVA is also great for plastering walls. Check out our guide to using PVA for plastering to learn more.