I remember my first tiling job — it didn’t go well!
Never one to give up, I spent many hours researching and practising the correct tiling techniques. Before long, I was tiling like a pro, and I’ve since completed many successful tiling projects.
In this two-part guide, I’ll show you everything I’ve learned so you can also tile a wall like a pro.
This first part deals with prepping the walls and marking out the tiles. The second part covers tiling a wall, including hints and tips to make life easier.
Tools & Materials
Ensure you have all the tools and materials below before you begin preparing your walls for tiling:
Tools
- Pencil
- Tape measure
- Stripping knife
- Paintbrush
- Spirit level
- Claw hammer
- Chisel
- Pipe, cable, and stud detector
- Square
- General-purpose handsaw
- 220-grit sandpaper
- Sanding block
Materials
- Three 25mm x 50mm timber battens (one as a gauge rod, two as guides on the wall.)
- Filler
- Trowel or putty knife
- PVA glue (to prepare walls in wetter areas like bathrooms)
- Wall tiles
- Tile spacers
- 50mm masonry nails
- Tile backer board (optional depending on the wall quality)
- Dust sheets
Safety Gear
- Face mask
- Goggles
Tiling Design
Before you start, you must understand the various design options to calculate the correct quantities.
Linear Tile Design
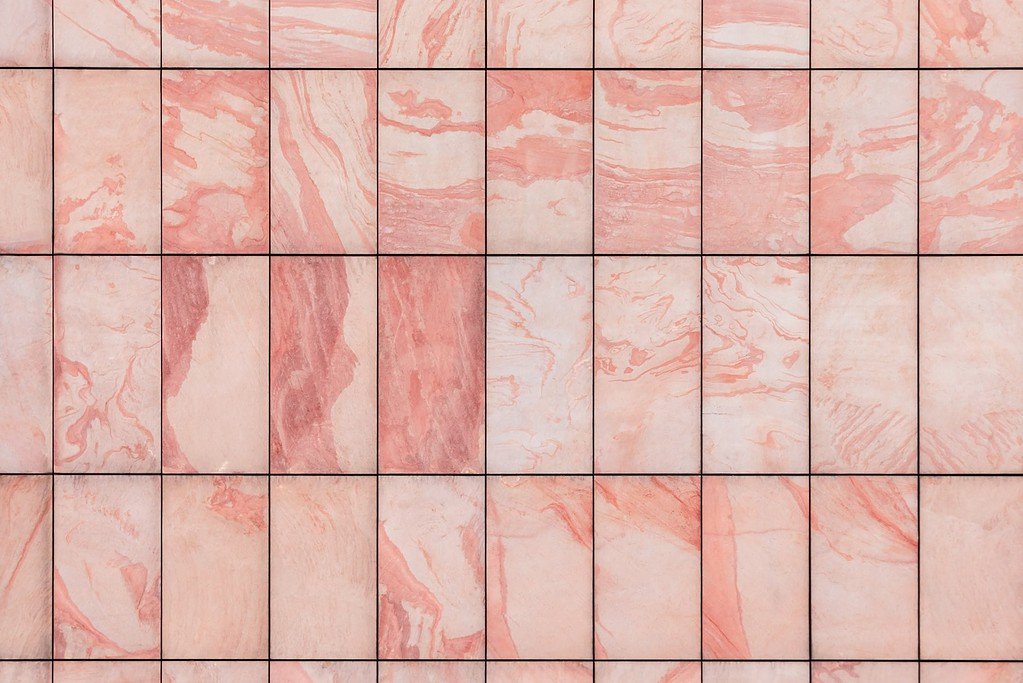
This is the most common tile design, where the grout lines up, creating a grid.
This classic pattern works with square and rectangular tiles and is the best layout for beginners because it’s simple to master and requires minimal cutting.
Diamond Design
To make this design, rotate the square tiles so that they touch point-to-point, creating a repeating diamond pattern across the wall.
This more complex design involves extra tile cutting, so it’s not the best option for beginners.
Pro Tip: If attempting a diamond pattern, purchase 15% more tiles for extra cutting and wastage.
Brick Bond Design
We’re all familiar with a brick wall pattern, where one brick starts halfway along the brick below. The brick bond tile design follows the same principles.
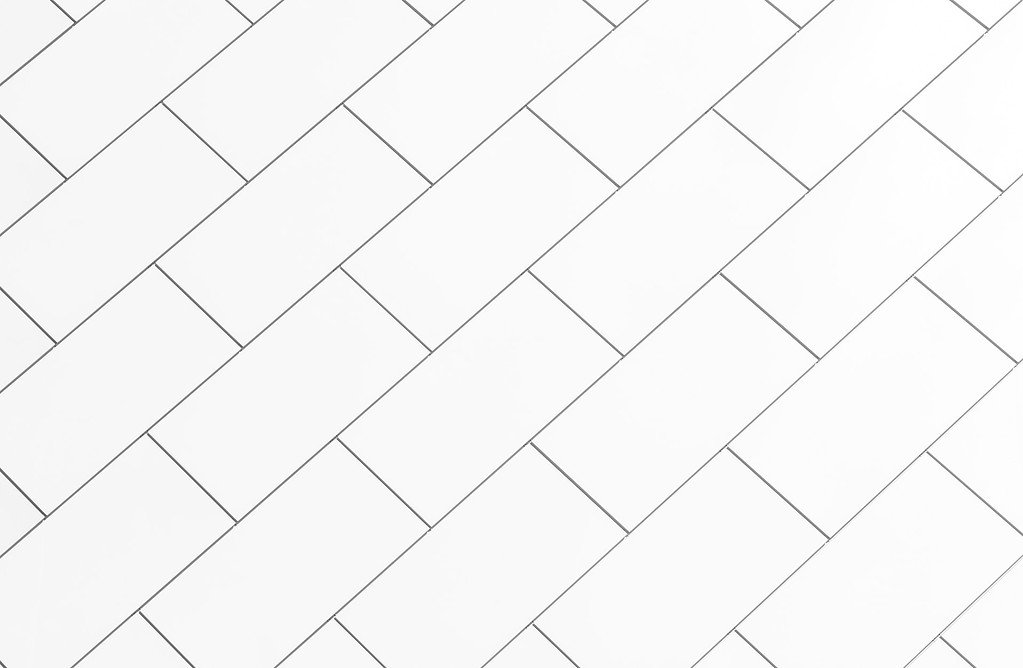
Herringbone Design

Herringbone patterns have been used for centuries and were prevalent in the Tudor period; examples can be seen nationwide.
You’ll need rectangular tiles to complete this look, and it works by angling the tile in a zig-zag pattern to create a classic look.
Pro Tip: If the idea of tiling fills you with dread, check out our article on UK tiler costs.
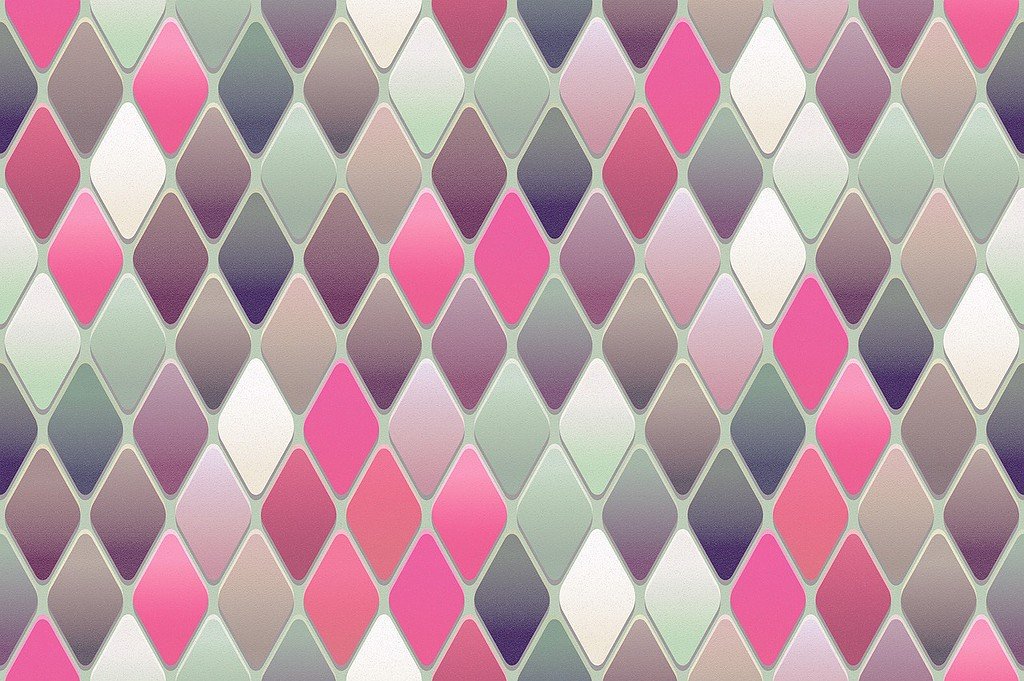
Hexagon Tile Design
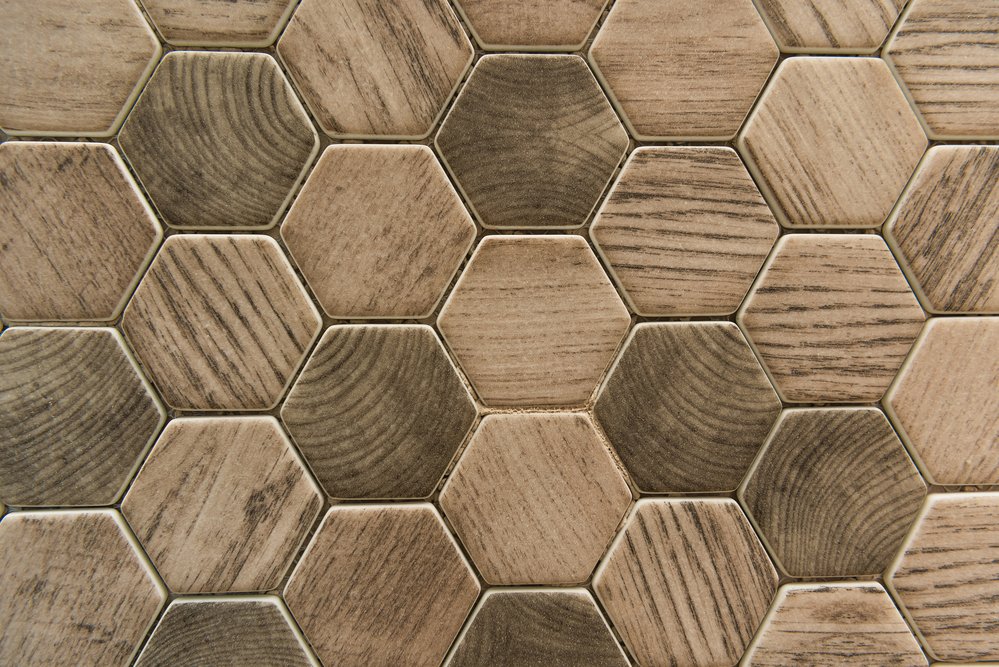
A hexagon tile design is sometimes called a honeycomb pattern for obvious reasons (see image above). Hexagons have six sides, making it simple to match up the tiles to create a pattern.
The tricky bit comes when you reach edges or straight lines. This isn’t a design I’d recommend for beginners because of the potential tile wastage through cutting errors. Add 15% to your tile purchase to compensate.
Calculating Tile Quantities
Once you’ve settled on the tile design, you must calculate how many tiles you’ll need.
This depends on two things:
- The total area you’re tiling
- The size of the tiles
There are two ways to calculate the number of tiles needed:
- Use a tile quantity calculator like this one from B&Q. It automatically adds an extra 10% to cover breakages and mistakes.
- Check the packaging for coverage details. It states how many square metres each pack covers. Next, measure the length and height of the wall and multiply the two measurements to give you the total wall area in square metres. Now, divide the total wall area by the coverage stated on the packaging.
You’ll also need to subtract the square meterage of doors and windows. You can use the tile calculator to help you do this or simply multiply the length by the width.
Pro Tip: To add the additional 10%, multiply the tile packs required by 1.1 and round it up to the nearest whole number.
This technique also helps you assess tile adhesive quantity because the coverage is printed on the packaging.
Tiles have batch numbers to ensure you get uniform colours throughout. Tiles with different batch numbers may have slight colour variations.
The video below gives you a more visual explanation of how to estimate the number of tiles needed:

Stage 1 — Preparing Existing Tiled Walls
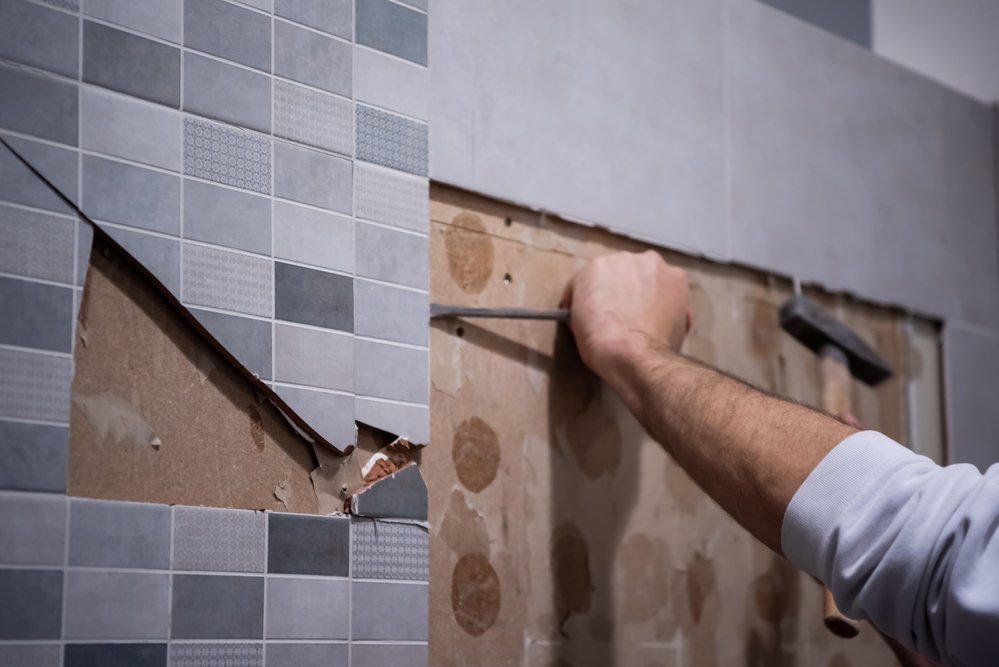
Don your goggles and face mask because prepping walls with existing tiles is dirty work. Old tile adhesive may contain asbestos and silica, which can cause ear, nose, and throat irritation.
According to the Health and Safety Executive, silica is the most significant health risk to construction workers in the UK after Asbestos. They estimate that 500 workers died as a result of exposure in 2005. So, please take your safety seriously!
1. Remove Old Tiles
Lay the dust sheets and open windows to allow airflow. Use the stripping knife to pull the old tiles from the wall, or use a hammer and chisel for stubborn tiles.
2. Check Wall Quality
Check the wall quality beneath the tiles. You can move on to the next step if only minor damage (small cracks and holes) exists.
However, if the wall needs more remedial work, jump straight to Step 4. Check out our recent plastering price guide if the walls are beyond repair.
3. Apply PVA Glue
Ensure the wall is clear of dust, loose plaster, and tile adhesive. Don’t worry too much about small bumps and cracks because you can use extra tile adhesive to level those out.
Coat the wall with PVA glue using a paintbrush if you’re happy with the surface quality. PVA seals the plaster, minimising adhesive absorption into the wall.
4. Use Tile Backer Boards
Tile backer boards are the perfect way to repair and waterproof more significantly damaged walls, and they create a smooth surface for the tiles to adhere to. Use tile adhesive to secure them to the wall like you would for tiles.
Stage 2 — Preparing Bare Walls
Bare walls are more straightforward to prep than walls with existing tiles.
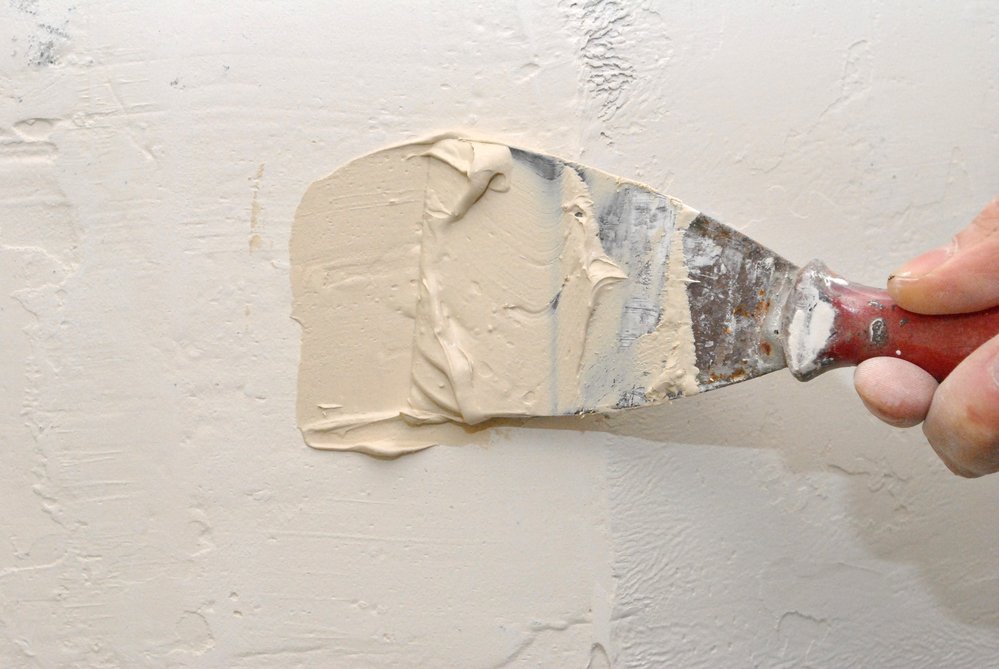
1. Fill Gaps and Holes
Small gaps and blemishes aren’t too troublesome, but larger imperfections are.
Use a trowel or putty knife to apply filler to the wall to create a smooth surface. Wait the required time while the filler dries and smooth it with 220-grit sandpaper.
Pro Tip: A sanding block helps you achieve smoother and flatter surfaces.
2. Wash Walls
Use sugar soap or soapy water to wash the walls. If you’re tiling in a kitchen, sugar soap removes grease and grime residue more effectively. Wait while the walls dry.
3. Apply PVA Glue
As with Step 3 of Stage 1, PVA seals the plaster to minimise moisture absorption and helps the tile adhesive bond.
The video below by Homebase shows you the steps to prepare a bare wall for tiling.

Stage 3 — Create Gauge Rod
A gauge rod shows how many tiles you need per row to reduce wastage and minimise awkward tile cutting. Here’s how to make one:
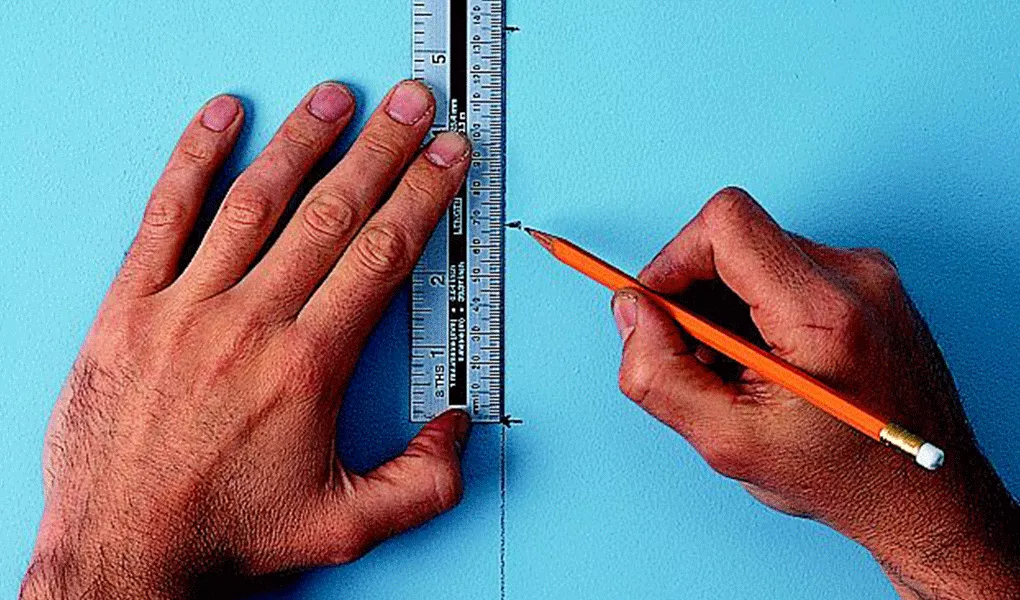
1. Lay Out Tiles
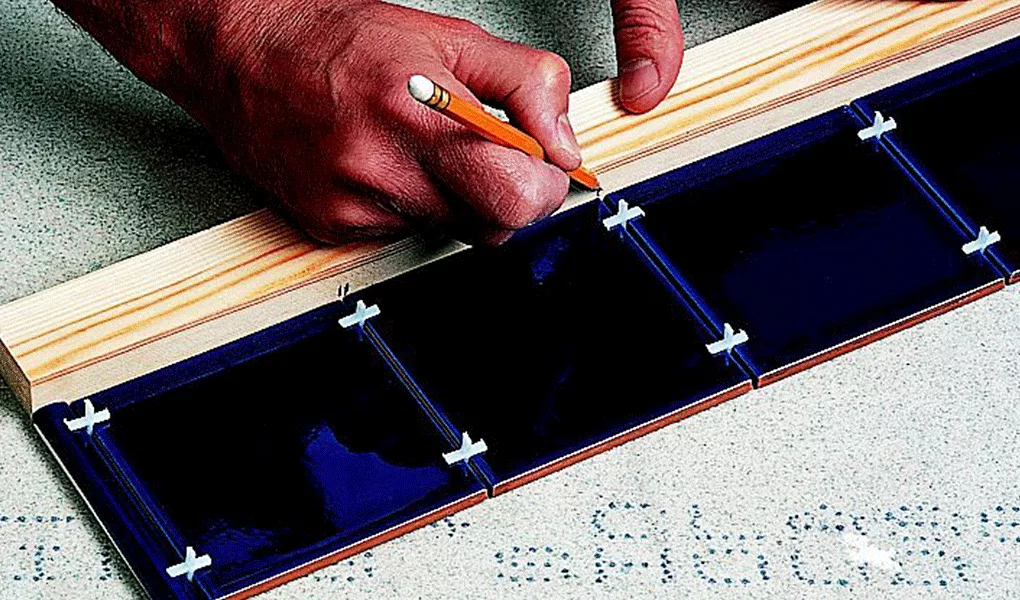
Place your tiles in a row along the length of your rod, including the spacer bars between each tile.
Place the end of your wooden batten next to the first tile in the row, ensuring the ends line up, as shown in the image above.
2. Mark Positions
Mark each tile position on the wooden batten using the square and pencil, including the spacer gaps (see Fig 1 above).
Repeat this along the length of the batten until you reach the last tile in the row. You’ve now made a gauge rod!
Stage 4 — Setting Out Tiles
Before you start, centralise the planned tile positions so that your first row is in the correct position — we call this ‘setting out’.
This method ensures you don’t reach the end of the wall and have to make small slither cuts to the tiles that can be awkward and look unprofessional. It also means the pattern is uniform, providing the neatest possible finish.
1. Find and Mark Centre-Point
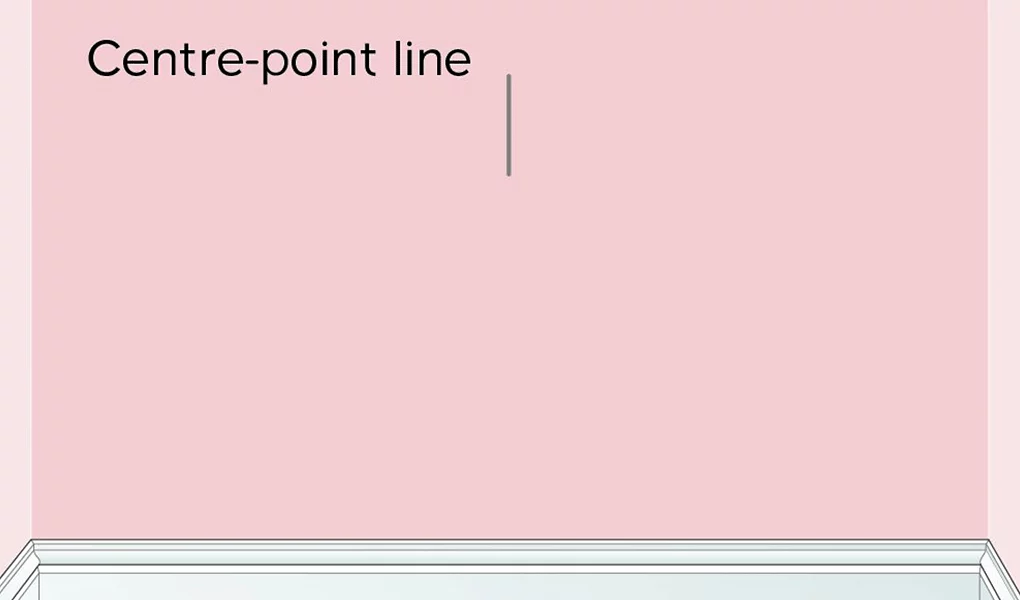
Measure the wall width with the tape measure, marking the centre-point with a pencil halfway up the wall (see Fig 2).
2. Use Gauge Rod

Hold the gauge rod horizontally against the wall, placing it over the centre-point (see Fig 3).
Ensure that the end of the gauge rod meets the end of the wall so you know how many tiles you’ll need from the centre-point working out towards the adjoining wall.
So in the image above, we need six tiles.
3. Using Gauge Rod on Wider Walls
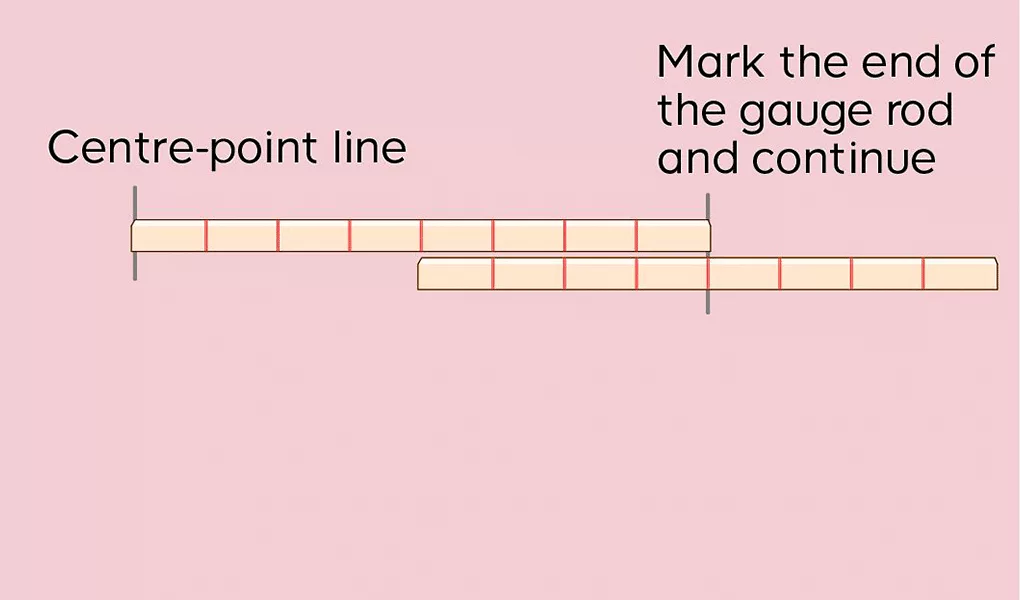
It’s unlikely that your gauge rod will reach from the centre-point to the end of your wall. If it doesn’t, place the rod against the wall and mark the furthest end of the rod from the centre-point, and then slide the rod so that you start from the new mark (see Fig 4).
So in the image above, we need twelve tiles.
4. Make Adjustments
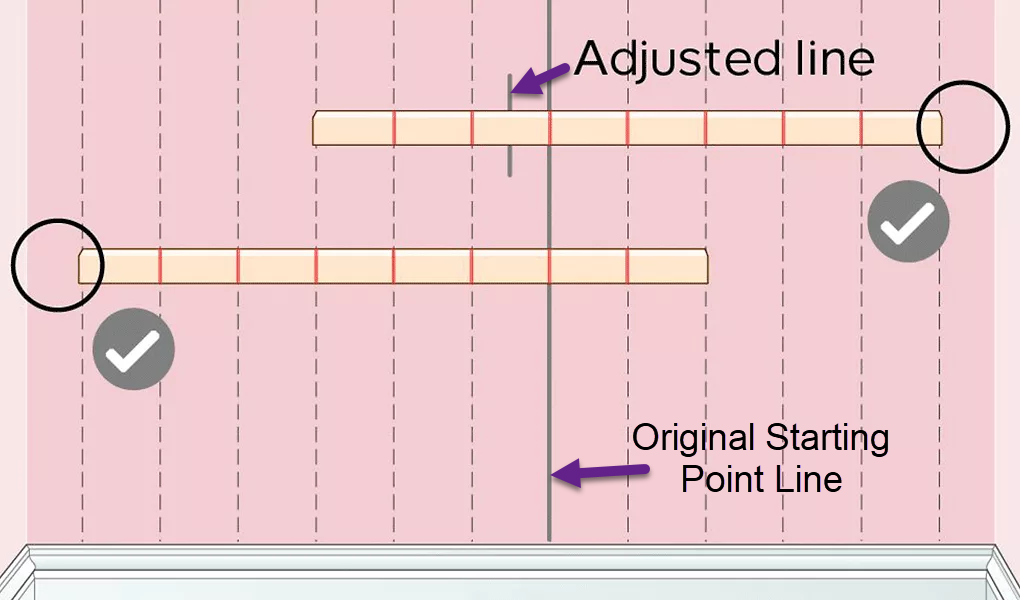
You may need to adjust the horizontal starting point by half a tile’s width if the gauge rod indicates the need to cut a small slither to complete the row.
Repositioning the starting line by half a tile width leaves a wider gap next to the adjoining wall, which is easier to execute and looks neater.
The image above shows it in more detail — see circles highlighting at least half a tile width at the beginning and end of the row.
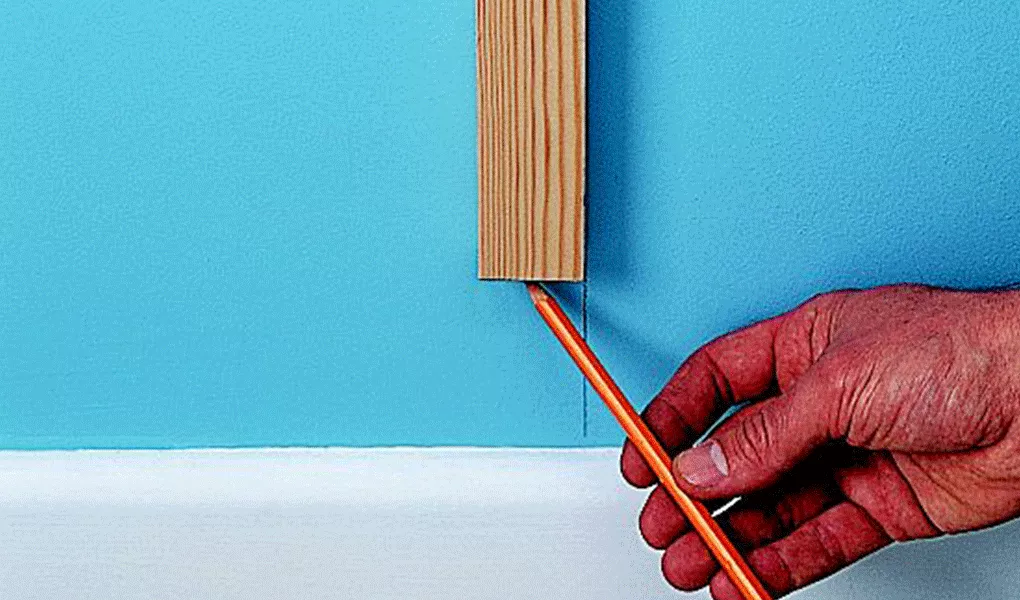
5. Draw Vertical Line
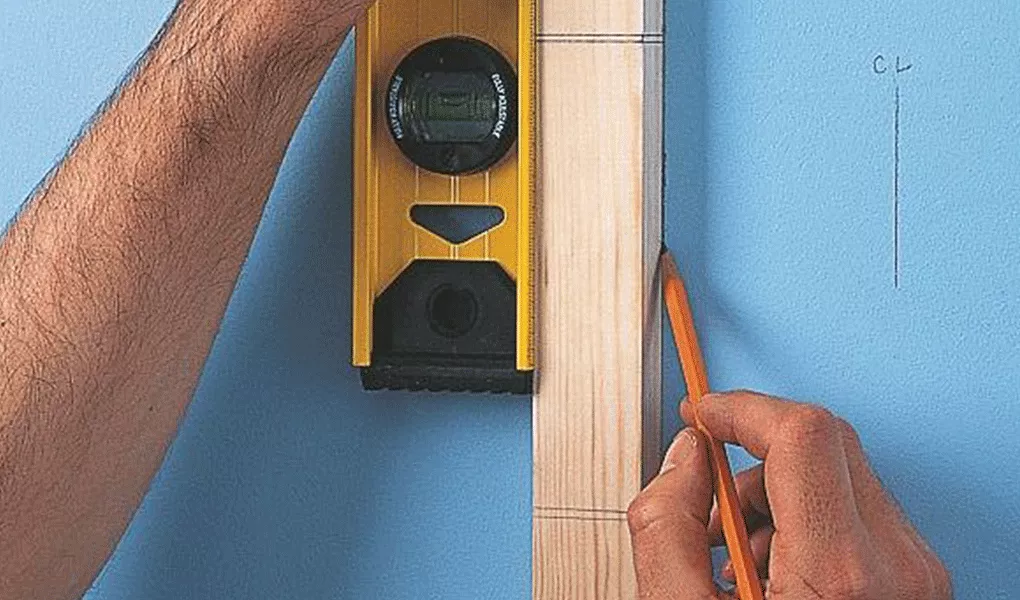
Turn the gauge rod vertically against the centre mark from Step 1, ensuring that the bottom end of the rod starts at the base* of the wall. Use a spirit level to ensure the line is verticle.
Draw a line from the top to the bottom of the gauge rod, marking the top end of the batten as you did in Step 3. This helps when moving the rod up the wall because it gives you a new starting point.
6. Mark Tile Positions
With the gauge rod against the vertical pencil line, place one end of the rod against the base* of the wall you’re tiling.
Move the rod up the line, using the pencil to mark the tile locations.
If the wall height exceeds the gauge rod, use the end marks you made in Step 5 to give you a new starting point. Repeat this process until you reach the top of the wall.
*Depending on the wall you’re tiling, the base could be the floor, skirting board or work surface (e.g. kitchen countertop).
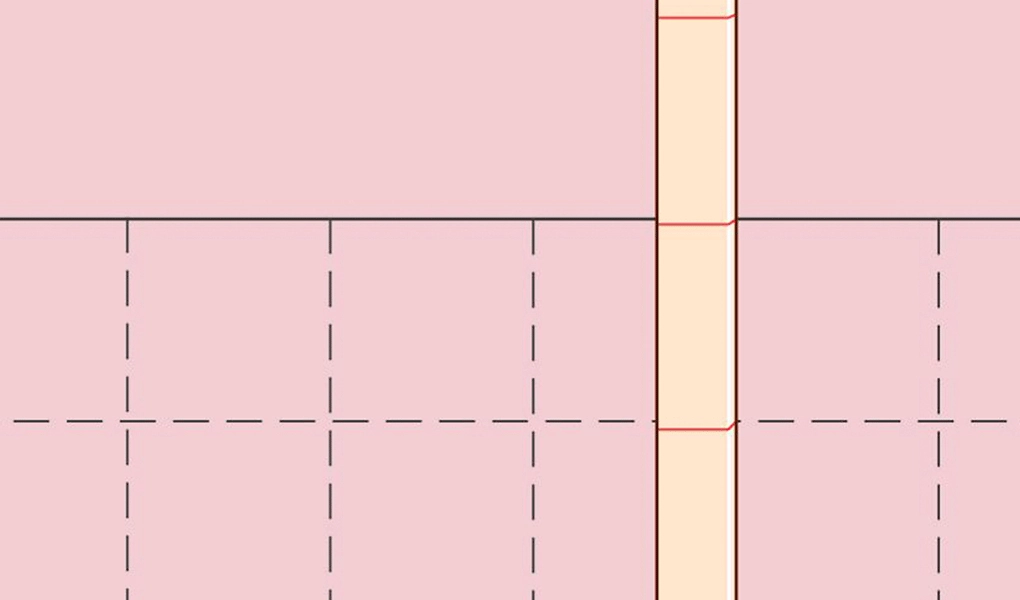
7. Adjust if Necessary
As you did on the horizontal line, you may need to adjust the vertical starting point to ensure that the last tile nearest the ceiling is at least half a tile’s width. This reduces fiddly cutting and wastage, and it also looks more professional.
Measure halfway down from the top edge of the first tile at the base of the wall. Make a pencil mark to show the halfway point of the tile. This adjusts the gauge rod’s starting point by half a tile, meaning you’ll need to cut a half tile for the bottom of the column.
8. Remark Wall
Place the gauge rod on the new vertical starting point and mark the position of the tiles working up the wall.
You should now have two sets of marks; the original tile positions and the halfway point between each one.
Don’t worry that it looks confusing because when you apply the first tile (which we cover in our ‘How to Tile a Wall ‘article), it’ll become obvious which tile mark to work from.
9. Repeat Across Wall
Now that you’ve set out the first section of the wall to be tiled with a template, you can repeat this process across the entire surface.
Pro Tip: Use the pipe and wire detector to check for hidden obstacles under the plaster, like cables and plumbing. Follow the instructions for your particular model.
10. Cut Battens to Size
Battening the walls supports the tiles while the adhesive dries, preventing them from sliding.
Hold the first batten against the wall along the tile baseline. Find the centre of the wall using the existing pencil marks from Step 2 (or Step 3 if you made adjustments) and cut the batten to size with a handsaw.
Do the same for the vertical batten, following the vertical line from Step 5.
11. Attach Horizontal Batten
Once you’ve cut the battens to size, nail one across the base of the wall following the line of the first row of complete tiles.
Use the masonry nails, but only hammer them part-way into the wall to make it easier to remove them with the claw hammer.
You’ve now marked out the batten for your horizontal line.
12. Attach Vertical Batten
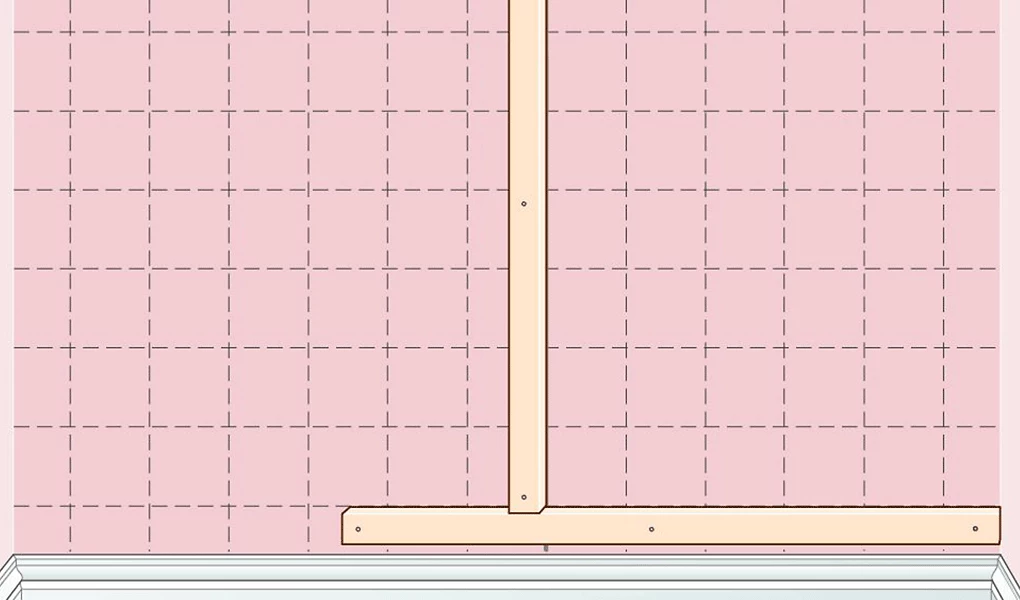
Repeat the process of the previous step, attaching a vertical batten. It should look like the image above.
When tiling, start in the bottom left-hand corner where the two battens meet and work outward towards the adjoining wall on the right-hand side.
Setting Out Part-Tiled Wall
When planning to part-tile a wall, like a splashback, you must ensure that the top row consists of complete tiles as it creates a neater line and is easier on the eye.
1. Mark Top Line
Using the techniques set out in Step 1 of Stage 4, find the horizontal centre-point of the section to be tiled. Next, measure the height of the tiled area and mark it with a pencil.
2. Use Gauge Rod
Hold the gauge rod against the wall vertically, lining the top tile line with the rod (see image above).
Check the base of the gauge rod to determine the width of the first row of horizontal tiles. If the gap is smaller than half a tile, consider raising the top line of the tiled section until the first row is half a tile wide.
3. Set Out Tiles
Follow Steps 2 to 12 in Stage 4 (Setting Out Tiles).
Planning Tiled Splashback
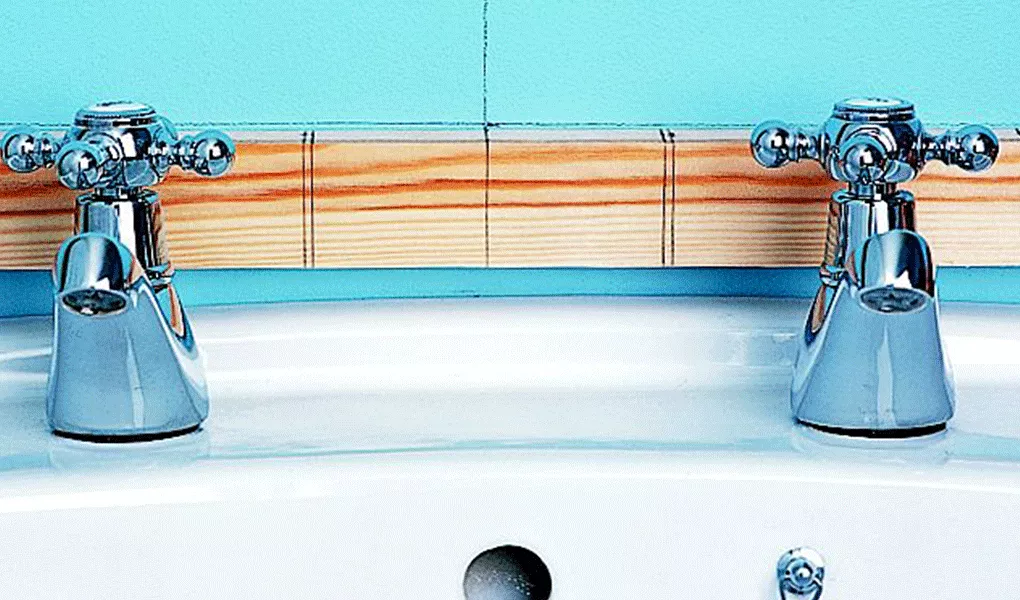
Tiling behind a wash basin or bath makes an excellent focal point, but there are some principles to bear in mind. We’ll be tiling behind a wash basin for this exercise.
1. Check Basin is Level
Use a spirit level to check that your sink is level. You can start the first row of horizontal tiles directly onto the basin if level. If not, we’ll show you what to do in Step 6.
2. Find Centre
Measure the sink width and mark the centre-point. Decide the splashback height (most kitchen splashbacks are 450mm to 600mm — roughly the height of two standard rulers) and measure and mark it on the wall.
Pro Tip: We don’t need to worry about cutting tiles on the splashback’s top, left and right sides. We’ll work with whole tile widths and edging tiles instead.
3. Create Gauge Rod
Decide how many tiles wide you want the splashback, bearing in mind the width of the basin.
Lay the required number of tiles onto a flat surface, including the spacers and edging (if using), to create a template.
Measure the width of the row of tiles and cut a wooden batten to size.
4. Mark Gauge Rod
Lay the cut batten against the base of the tile template you used in the previous step.
Mark the position of each tile and include the small gap created by the spacers. The batten supports the first row of complete tiles.
5. Make Vertical Line
Use the spirit level and draw a vertical line up the wall to the top edge of the tiled area. This marks the vertical centre-point and the height.
6. Correcting Uneven Basin
In Step 1, we checked the level of the basin. If it’s level, lay the first horizontal tile row directly against the basin.
If the basin’s not level, centre the batten with the vertical central pencil line you made in Step 5 and attach it to the wall using masonry nails (as shown above). Use the spirit level for accuracy.
7. You’re Ready to Start
With the batten attached, you’re ready to apply the tile adhesive and start tiling using the techniques listed in our guide, ‘How To Tile a Wall‘. Don’t worry if your wash basin has a slightly curved lip because grout and sealant fill the gaps.
Final Thoughts
Tiling is about precision, and the steps above give you the best template for success.
The harder you work on the preparation, the better the results. If you try to cut corners, errors will appear and ruin the final effect.
Once you’ve prepared the wall, the second part of this guide, ‘How To Tile a Wall in 8 Easy Steps‘, teaches you the best tiling techniques.