Quarry tiles have been around for centuries, but it’s only been in recent years that we’ve seen a resurgence in their use in domestic situations.
A few clients recently asked me about using quarry tiles in their new homes, so I did some digging and discovered how to lay them like a pro.
So if you want to know more about this age-old flooring product, read on.
What Are Quarry Tiles?
The Romans first introduced quarry tiles, but their use died during the Middle Ages. However, in recent years they’ve fallen back into favour, with Architects specifying their use on many prestigious projects.
The word ‘quarry’ is misleading because these tiles are not quarried. Quarry tiles are clay, shale, and other earthy minerals ground into a powder. Water is added and extruded into tile forms before being dried and baked in kilns at temperatures exceeding 1,100°C.
Benefits of Quarry Tiles
Quarry tiles are tough-wearing (rated PEI 5 on the resistance to abrasion scale, where 5 is the highest) and resistant to oil and grease spillage, which makes them an excellent choice for kitchens and hallways.
They have exceptional slip resistance, measuring 63 when dry and 58 when wet on a scale where 36 is considered low slip potential.
But the main reason people go for quarry tiles is their appearance. I.e., the “farmhouse” look is very popular now in urban locations for those trying to create a rural vibe.
Suitable Base Materials
Quarry tiles are heavy and rigid, so they need a firm base. Timber floorboards are likely to flex under the weight of the tiles, so you can either take the boards up and fix 18-22mm plywood or lay a thinner sheathing ply over the boards.
Either way, screw the plywood down rather than nail it to ensure it doesn’t work loose over time. I recommend using flexible adhesive and grout.
A concrete base is fine so long as it’s flat and damp-free. If there are undulations and low/high spots, lay a levelling screed to provide a flat surface before tiling. Don’t adjust the bed thickness to compensate.
Bedding Methods
Traditionally, quarry tiles were laid on a mortar bed 15 to 25mm thick. A 50mm screed would be laid first if the floor was uneven.
There is a vast range of adhesives, premixed and powder forms (for mixing on-site), making it much easier for DIY enthusiasts.
The most significant advantage of using an adhesive is the speed with which you can lay tiles. If you want to know more about the choices and tools required, look at our guide on How Thick Should Tile Adhesive Be?
If you decide to use an adhesive when laying tiles, you should read our guide, How Long Does Tile Adhesive Take to Dry, before going any further.
It comes down to personal choice, but for internal floors, I prefer to work with ready-mixed products like the adhesive and grout by Evo Stik.
Shapes and Sizes
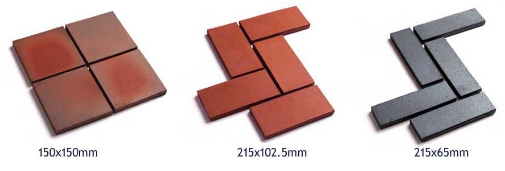
Quarry tiles are mostly square or rectangular. The sizes are usually limited to 150 x 150mm, 215 x 105mm, and 215 x 65mm. Thickness varies from 12 to 19mm.
The rectangular tiles match the shape and size of a brick, either laid flat or on edge, so they’re ideal for laying in a brick-bond pattern. Tilers typically lay square tiles parallel to the longest wall or diagonal across the floor.
Colours
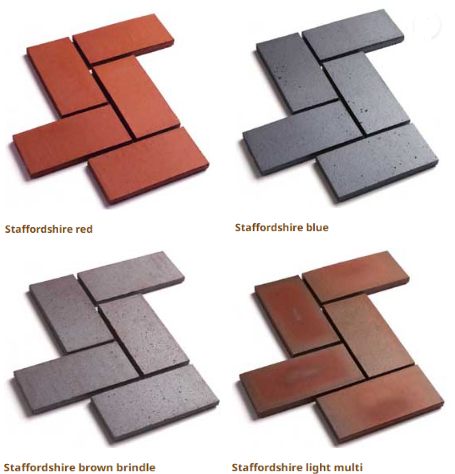
Unlike ceramic tiles, available in various colours and patterns, quarry tiles are limited because of the manufacturing process. Like bricks, quarry tiles are commonly red, blue, multi (light or dark), or brindle.
Quarry Tiles vs Terracotta Tiles
It’s a popular misconception that quarry tiles are a form of terracotta, but they’re entirely different. Yes, they’re both made from clay, but they are different types of clay.
Quarry Tiles
Quarry tiles are like bricks. I.e. they’re made from a mixture of clays fired at an extremely hot temperature. Also, because they’re so dense, they don’t need sealing.
Terracotta Tiles
The clay used in making terracotta tiles is much more refined, and as a result, the finished product is smoother and softer than a quarry tile, making it more porous. Due to their porous nature, you must seal terracotta tiles if using them in areas prone to water spillage and staining.
Tools and Materials
Below is what you’ll need for laying quarry tiles on a concrete base using adhesive.
Tools
- A wet-n-dry vac (not essential, but you need to clean the floor thoroughly)
- Tape measure (preferably 5m or more)
- Pencil
- 900mm spirit level
- Rubber mallet and claw hammer
- Electric wet tile cutter
- Toothed trowel (size as recommended by the adhesive manufacturer)
- Grout float
Materials
- Tile adhesive and grout
- Timber batten 22mm x 38mm x 1,800mm
- Masonry nails
- Tile spacers (6mm thick)
- Cleaning materials
Health and Safety Measures
Always wear eye protection when cutting tiles. Also, wear gloves for the adhesive, grouting, and cleaning parts.
How To Lay Quarry Tiles — Step-by-Step Instructions
There are two schools of thought when laying floor tiles of any kind:
- Start in the middle and work out. This method provides you with equal-sized cut tiles all around.
- Start at the wall opposite the main door and work in rows. This method reduces the number of cut tiles.
This guide will show you how to lay tiles against a wall, and I’ll also show you how to vary the method if you prefer a diagonal pattern.
Step 1: Preparation
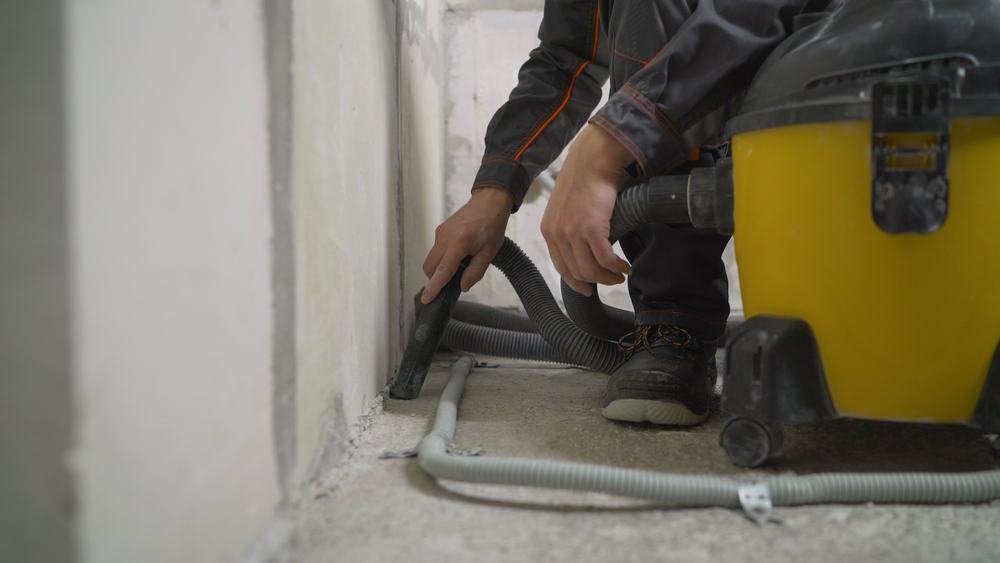
Sweep the floor to remove debris, and then run a vacuum over it to ensure it’s clean. A wet-n-dry vac is ideal for this purpose.
Note: You must first seal new concrete floors. For further advice, read our guide on sealing a concrete floor with PVA.
Check the floor for undulations, cracks, or other defects, such as hollow spots beneath a screed. Also, test the floor for dampness. You must rectify any of these issues before going any further.
If you’re laying tiles on a kitchen floor, you will likely have fitted kitchen units. In this case, remove and trim the plinth piece. Similarly, if you have an inward opening door, you’ll have to cut that down too (see How to Plane a Door for advice on this).
Step 2: Setting Out
Start from the wall opposite the door. If there is more than one door, use the main access door.
Pro Tip: Don’t tile yourself into a corner. You don’t want to be walking across a freshly tiled floor, so ensure you work towards a door.
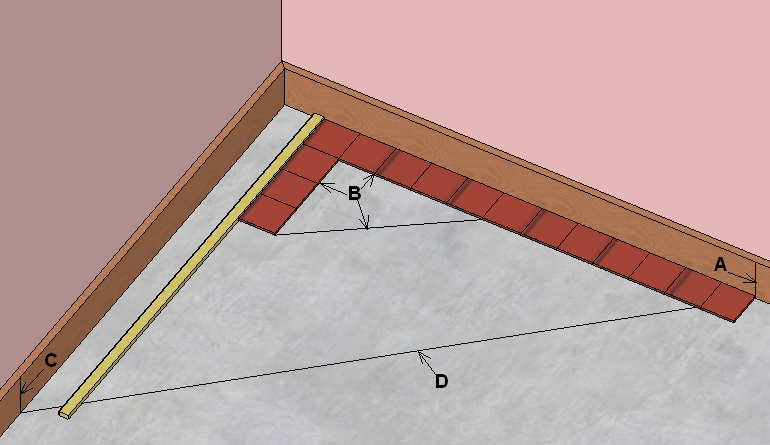
Assuming it’s straight, use this wall to set out the tiling — this is the base wall. Establish the mid-point of the base wall, marking it with a pencil (A).
To understand how things will work out, dry lay the tiles from the mid-point to the corner. Remember to allow for joints so you can accurately see how much room is left at the edges. Ideally, you want half to a complete tile left at the edges to allow a bit of wiggle room if the room isn’t square — a most likely scenario.
Nail the batten into the concrete floor using masonry nails, aligning it with the end tile. Use a set square or employ the 3, 4, 5 rule (B) to ensure this batten is at right angles to the base wall.
The 3, 4, 5 rule: If one side of a triangle is 3 units long and the other is 4, the diagonal will be 5 units long in a right-angled triangle.
If you wish to lay the tiles diagonally, mark a point on the adjacent wall equal distance to the mid-point (C). Join these points together; if the room is square, this should be 45° (D).
Dry lay tiles against the batten to see how things work out in this direction.
Pro Tip: To check for squareness before commencing, measure the length of each wall and the diagonals (corner to corner) and sketch this out on a piece of graph paper. This technique also lets you work out the area and the required tiles.
Step 3: Laying Tiles
Pro Tip: Because quarry tiles are a natural clay product, you’ll find some variation in shades and texture, so use tiles from the same batch and mix them up from different boxes to create a random effect.
As stated above, use an adhesive to bed the tiles upon. Gather enough tiles to lay an entire row and, starting at the mid-point, spread the adhesive at the required thickness using a notched trowel. Spread enough to lay up to 10 tiles in one go—any more, and it will start to dry out.
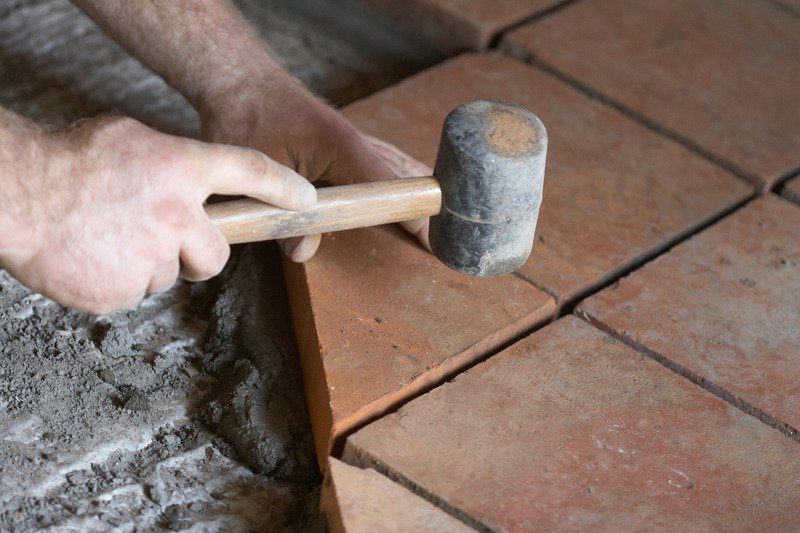
Place the tile onto the adhesive bed with a slight twisting motion to remove any air pockets. Use plastic spacers to ensure equal gaps between tiles (we recommend 6mm). Check for levelness and tap the tiles with the mallet.
Continue until you reach the batten, leaving a margin for the cut tiles later. Work back from the batten towards the centre for the next row and continue back and forth until you’ve completed that floor section.
Remove the batten using the claw hammer and repeat the process from Step 2. Carry on this way until you’ve laid all but the infill tiles.
Step 4: Cutting and Laying Infill Tiles
Once you’ve covered the bulk of the floor, it’s time to fill in those gaps along the edges.
To ensure the cut edge is against the wall, measure from the end tile to the skirting in two places and transfer these measurements onto the tile. Allow 10mm for the joints.
Pro Tip: Use masking tape where you want the cut to be and draw your line on this. Not only does this protect the face of the tile when cutting, but it also helps you see the line on darker tiles.
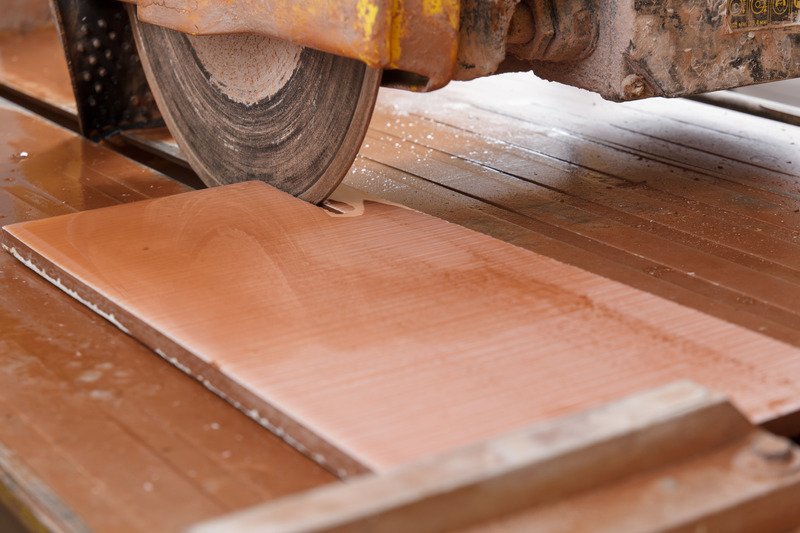
Use the tile cutter to cut the tile along the pencil line. If you haven’t got a tile cutter, an angle grinder will do the job but check out our guide, How To Use an Angle Grinder to Cut Tile, first.
For a more detailed account of cutting quarry tiles, check out our guide on how to cut quarry tiles.
When it comes to laying the cut tiles, the area might be too tight to apply the adhesive to the floor, so apply it to the tile instead. Use the toothed trowel to apply the correct thickness across the whole tile.
Pro Tip: You may find grooves in the back of the tile because of the extrusion process. In this case, spread the adhesive across these grooves.
Step 5: Grouting and Finishing
Quarry tiles are made from dense clay, so they have a low absorption rate and don’t need sealing. However, in areas where spillage of oil and grease is likely, it’s a good idea to coat them with a sealant such as LTP Mattstone.
Apply the sealant thinly using a gloss paint roller before grouting. This approach makes cleaning much more straightforward.
Some fast-set adhesives allow grouting after four hours, but for cement-based adhesives, wait between 12 and 24 hours before grouting.
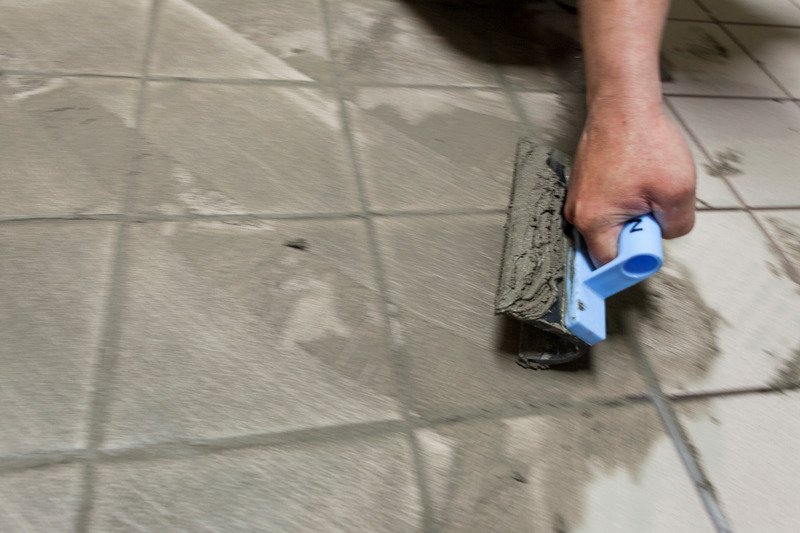
Apply the grout using the grout float, working the mix into the joints. Start at the far corner and work towards the door.
Some grouts start to set very quickly, so only mix what you can use in 15 minutes. Note: this isn’t a problem with pre-mixed grout.
Clean off excess grout as you go. If you leave it to the end, you’ll find removing it difficult. Use a damp cloth or sponge first, then finish it off using a window cleaning scraper.
Leave it for around four hours before using water to give it that final ‘builders clean’. A stiff yard brush and a bucket of water are all you need for this, but don’t leave it too long, as a grout haze will form over the tiles, which is hard to remove.
Don’t use acid-based cleaners for future maintenance, as this can soften grout. Soapy water should work in most cases.
Pro Tip: We recommend this tile and stone stain remover by Topps Tiles for stubborn stains.
Final Thoughts
Laying quarry tiles differs from laying ceramic or porcelain tiles, but with some practice, you’ll be laying them like a pro in no time.
Quarry tiles will last you a lifetime, so laying them properly is well worth the investment.
If you want to see more on how to work around doors and awkward angles, the video below from Handyman London will help: