While the bare brick look is trendy, many still prefer a smooth wall. One way to achieve this is by attaching plasterboard over masonry walls and using wood battens to provide support.
This guide shows you how to batten a wall with vertical and horizontal wood battens, ensuring a stable framework to attach plasterboard.
Pro Tip: Battening a wall is a great method for installing insulation, as the battens provide a gap between the wall and the plasterboard. This gap is perfect for placing insulation before the boards are secure.
Tools & Materials
Ensure you have all the tools and materials below before you start battening.
Tools
- Spirit level.
- Measuring tape.
- Pencil.
- Metal ruler.
- Hand saw.
- Workbench.
- Cordless drill with bits for wood and masonry.
- Hammer.
- Impact driver.
Materials
- Plastic wedges (if the wall is uneven).
- Wall plugs.
- Wood screws.
- Insulation (if using).
- Plasterboard — we recommend Gyproc WallBoard 12.5mm.
- Plasterboard screws.
- Timber battens — we recommend 3,600mm x 38mm x 25mm sawn-treated battens.
How To Batten a Wall — Step-by-Step Instructions
Follow the steps below to batten a brick wall like a pro!
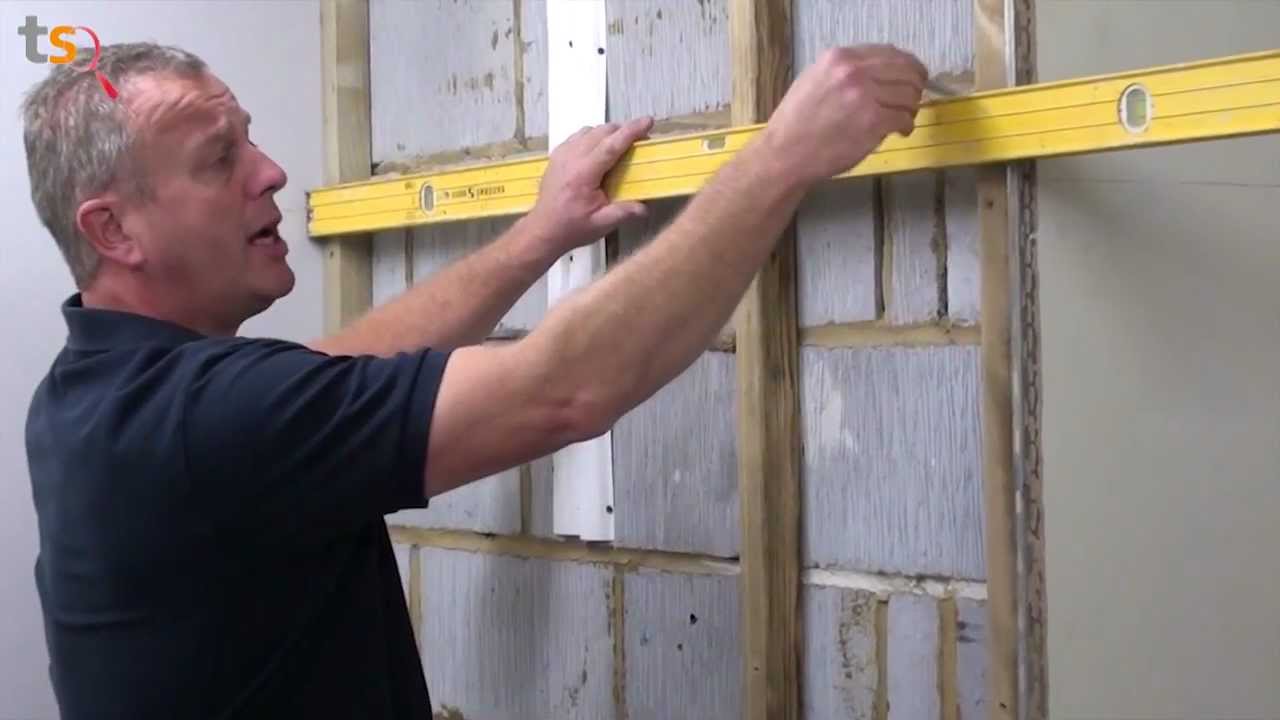
Step 1. Check wall level
- Place the spirit level vertically against your bare brick wall and check if the wall is level.
- You can attach wood battens directly to a level wall, but if the wall slants out at any point, plastic wedges must be placed behind them to ensure they’re level.
Step 2. Measure and cut ceiling batten
- Measure and cut the ceiling batten. I.e. the batten that will run horizontally along the top of the wall. Mark the line to be cut with a pencil and metal ruler.
- If walls have a slant, cut the ends at an angle so they fit snugly into corners.
Note: You might need to cut more than one batten to cover the full length of the wall.
Step 3. Mark drill points
- Place the ceiling batten in position and mark drill points using a pencil.
- Place several marks evenly spaced out along the batten so the fixing will go through to the centre of the brick behind.
Note: This approach is much stronger than fixing into the mortar or at the edge of a brick.
Step 4. Drill holes in ceiling batten
- Place the batten on a workbench.
- Drill holes at the points marked in step 3 using a combi drill with a wood bit.
Step 5. Drill holes in the wall
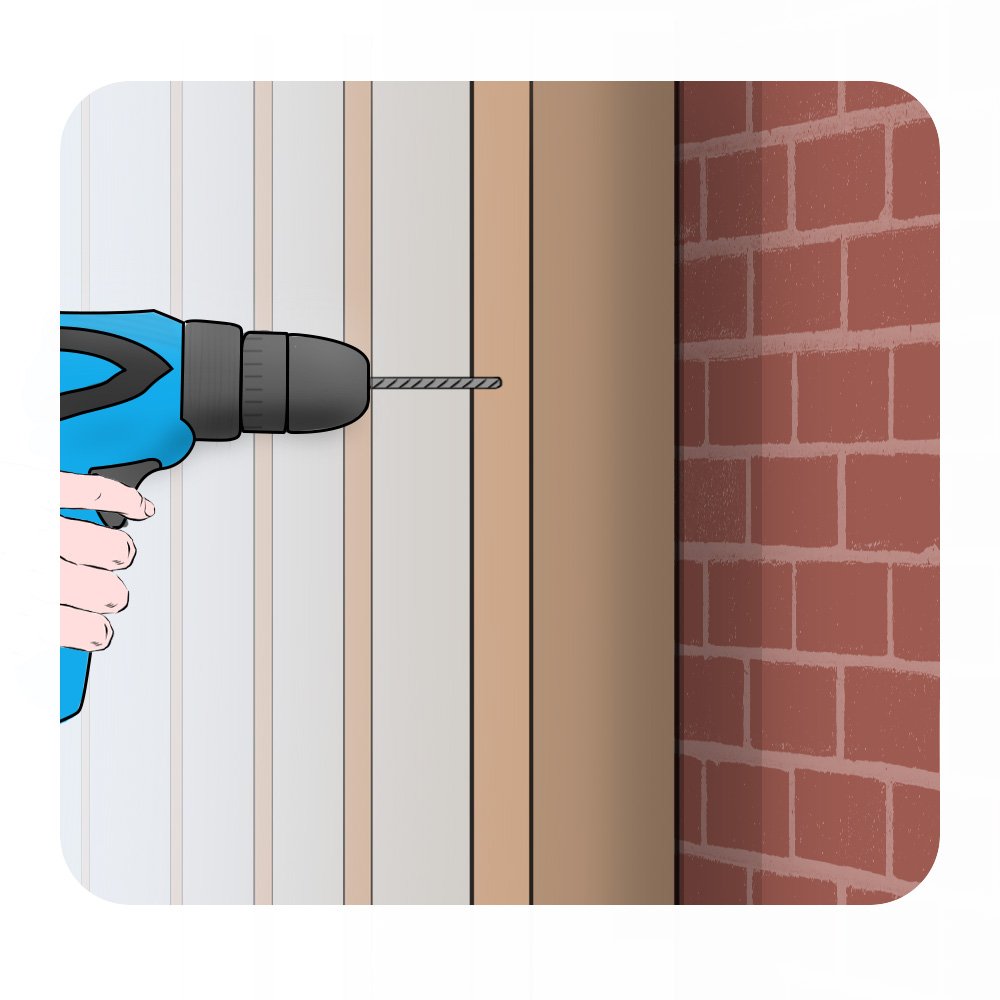
- Place the ceiling batten in position.
- Drill through the batten holes and into the wall using a masonry bit.
Step 6. Insert wall plugs
- Remove the batten and push wall plugs into the holes in the wall
- Lightly hammering them in for a tight fit.
Step 7. Screw ceiling batten in place
- Place the batten in position.
- Push the screw through the batten and into the rawl plug. Hand-turn the screw so it holds steady.
- Drive screws into place using an impact driver.
Step 8. Repeat for floor batten
Repeat Steps 2–7 but for the floor batten. I.e. the batten that will run horizontally along the bottom of the wall.
Step 9. Repeat for vertical corner battens
- Repeat steps 2 through 7 but for the two vertical corner battens. Consider these two battens as the ‘first’ and ‘last’ vertical battens.
- Measure between the horizontal ceiling and floor battens to find the length of the vertical corner battens.
Note: The vertical corner battens might need fitting at an angle to compensate for unlevel walls.
Step 10. Fit remaining vertical battens

- The first board must cover the first vertical batten and half of the second vertical batten. So, measure the board and mark the position of the second vertical batten on the wall.
- The second vertical batten (and every vertical batten thereafter apart from the last) must be horizontally and vertically plumb, so check using a spirit level. Repeat steps 3 through 8 to fix all the battens in place.
Pro Tip: If the wall has window frames or doorways, the batten must be placed against the frame, even if not plumb level.
Step 11. Fix further horizontal battens if needed
- If the boards are not as tall as a wall, measure, cut and fix horizontal battens between uprights.
- Fix the top and bottom of the boards to these additional battens.
Step 12. Attach plasterboard
- Fix boards on top of the battens using plasterboard screws, having first placed a layer of insulation (recommended) between battens if you wish. Stagger the joins if you can to create a more durable surface for plastering.
- Screw until the metal head is flush with the board, but do not over-screw, as the board could split.
Final Thoughts
When following this guide, remember the following key points:
- Ensure battens are level.
- The frame fits the wall accurately without sloping.
- Battens are close enough to ensure the plasterboard covers them.
If you want to see this process, check out the video below. Note that Tommy takes a slightly different approach, but the key principles are the same.
When your wall is finished, you may want to fix items on it. E.g. shelves, paintings, etc. These items require special fixings, which you can learn more about in our guide to the 7 best plasterboard fixings and their uses.