I’m going back many years now, but I remember helping my dad paint our garage, and I couldn’t figure out why it never seemed enough, no matter how much paint we put on the walls.
Of course, the paint we were applying was utterly unsuitable for painting breeze blocks; it was more of a whitewash. In later years, I decided to look at where we went wrong.
Our critical mistake was our poor choice of paint and then applying it with the wrong tools. Apart from that, we did a great job! 🙂
So if you want to avoid the same mistakes and know the best way to paint breeze blocks, read on.
Painting Breeze Blocks Couldn’t be Simpler
Breeze blocks are lightweight concrete blocks that contain cement and fly ash or cinders (hence the name cinder block in America). Breeze blocks are usually hollow to make them lighter, and their rough surface characterises them.
Because of this rough surface, breeze blocks present a challenge when painting them. The rough finish requires more paint than smooth concrete blocks, and the porosity of the surface sucks in more paint.
Spray, Brush or Roller?
There are three methods of painting breeze blocks:
- Spraying with a paint sprayer (or spray gun)
- Brushing with paintbrushes
- Roll on with a paint roller
Often, you may find people, particularly those in the trade, who use all three when painting a wall. Let’s take a look at these options.
Paint Sprayer
Electric sprayers are the easiest to use and the most time-efficient. So if you have a large area to cover, it might be worth investing in a paint sprayer.
Paintbrush
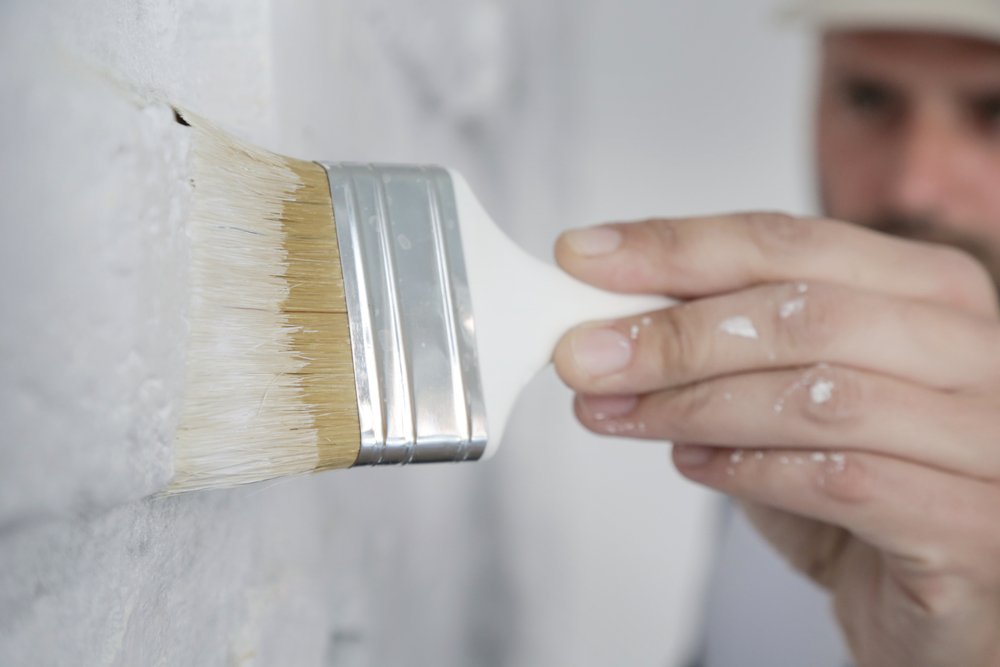
Painting with a brush makes it easier to work the paint into the irregular surface of breeze blocks. However, it’s an arduous job using a paintbrush alone.
There’s no point using your best quality brush for this kind of work — it’s a case of never mind the quality, feel the width! A broad brush with synthetic bristles is best for painting large areas.
Paint Roller
If you use a roller, the fat fluffy ones are best for getting into the gaps and filling the holes in the surface of the blocks.
Again, synthetic fibres work well — no need for an expensive lambswool roller.
Types of Paint for Breeze Blocks
In this section, we’re focusing on paint suitable for breeze blocks. To learn more about paints in general, check out our guide to the different types of paint.
Emulsion Paint
Emulsion paint is the most common paint to use on breeze blocks because it’s cheap and easy to dilute.
Emulsion comes in various colours and finishes, but I recommend a matt white if you want to brighten up a garage or workshop. You’ll find that a matt finish will hide surface irregularities better than any other type of finish.
Mould Resistant Paint
Mould-resistant paint is an emulsion paint with a fungicide additive to prevent mould growth. I recommend this paint for use in damp areas such as a basement.
Mould-resistant paints tend to be limited in colour choice, but there are a few options if you’re only looking for a matt white.
Water-based Masonry Paint
Masonry paint is typically used on external walls. Still, it’s equally suited to internal breeze block walls, especially where the walls are prone to dampness from the outside or likely to get wet from inside activity.
Masonry paint bonds well with rough surfaces, making it ideal for use on breeze blocks. If you use the textured variety, it will also help cover blemishes, holes and cracks.
The downside? It is expensive for this type of job.
How Much Paint Do You Need?
Breeze block is porous and soaks up paint very quickly. However, after applying the first coat of paint (mist coat), you’ll find that subsequent coats cover the surface nicely.
Using a good quality emulsion such as Dulux Trade Supermatt, you’ll cover up to 18 m2/litre, but a mould-resistant paint such as Ronseal’s Anti Mould Paint only manages up to 13 m2/litre.
Masonry paint is at the bottom in terms of coverage at 4-5 m2/litre. However, you can get away with only two coats, whereas the other types of paint may require three coats on top of the mist coat.
Tools & Materials
Here’s a list of the tools and materials you need. I chose emulsion paint for this project because it’s the most economical.
Tools
- Yard brush or stiff hand brush
- Bucket of water for cleaning the walls
- Five or ten-litre tub for mixing paint with water
- 225mm roller and paint tray
- Broad paintbrush
- Ladders (if necessary)
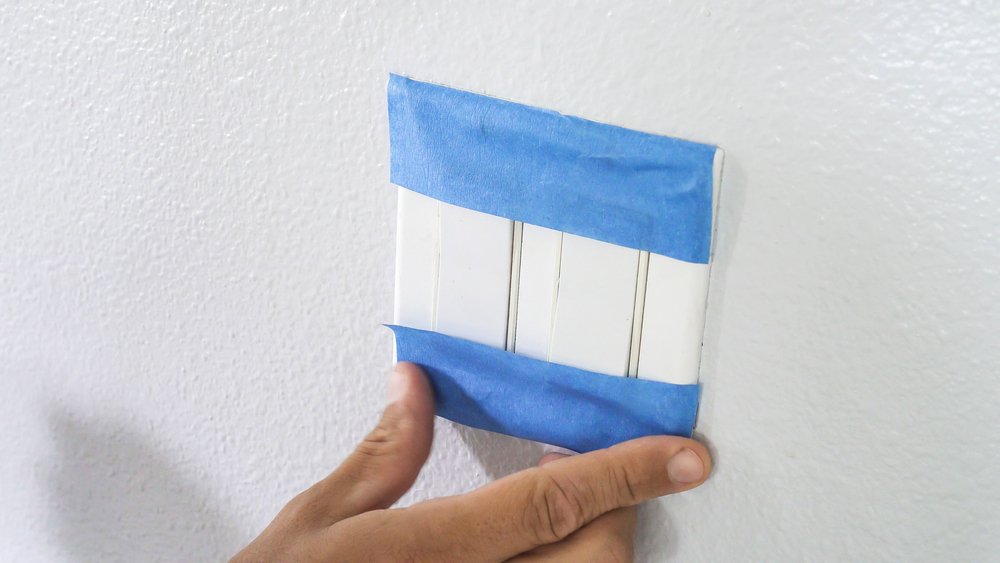
- Masking tape
- Dust sheets
Materials
- Emulsion paint
- Water
Health and Safety Measures
Emulsion paint is usually low in VOCs (Volatile Organic Compounds), so there are no issues there, but if you’re using a spray gun, you’ll need a face mask to avoid breathing in the fine droplets of paint.
Some emulsion paints can cause an allergic reaction, so consider this before starting and wear gloves to avoid contact with the skin.
Painting Breeze Blocks Like a Pro — Step-by-Step Instructions
Follow the steps below to paint breeze blocks like a pro!
Step A: Preparation and Cleaning
- Remove all removable objects from the room/garage
- Tape up any things that you cannot remove. If you also need to protect the floor, lay down some dust sheets.
- Wash the wall down using water and a stiff brush — a yard brush is suitable — or use a pressure washer to remove all the dust and cement. You might need a wire brush to remove any stubborn cement snots.
- Allow the wall to dry before continuing with the painting.
Pro Tip: You’ll find more painting preparation tips in our detailed guide to painting a room without the mess.
Step B: Seal the Wall

- Mix a solution of one part water to two parts paint for the first mist coat.
- Apply the mist coat liberally, starting at the top and working down.
- Work the paint into the surface, getting into all the little nooks and crannies.
- When the wall looks fully covered, use a paintbrush to cover the following hard-to-reach spots with undiluted paint:
- Around fittings
- Corners
- Where the floor and ceiling meet
- Along the joints and any other areas, the roller missed
- Allow the wall to dry out. Depending on the weather conditions, this could take two to four hours.
Pro Tip: Rather than clean your brush or roller after every use, wrap them in tin foil and make sure you seal the edges properly. If you can’t complete this job in one day, your brushes and rollers will stay moist until the following weekend.
Step C: Apply Further Coats of Paint

- The second and third coats must be applied undiluted. I.e. pour the paint from the tub into a paint tray, and off you go.
- Using your roller, go up & down, then left to right, to ensure you get an even coating on the wall.
- At this stage, you don’t need to wait until the paint dries between coats. So once you’ve applied the first coat, have a quick cup of tea and start again with the third coat.
Step D: Finishing Off
- Once the paint applied in Step C has dried, closely inspect the wall. If everything looks OK, jump to #4 below. However, if you spot poorly painted patches, apply a finishing coat by following the instructions in #2 and #3 below.
- Generously load the roller and apply the paint slowly to avoid spraying everywhere. Make sure you have entirely covered the wall before moving on.
- Use a paintbrush to cut in around fittings. Also, paint the junctions between the floor and ceiling.
- Remove the masking tape and pull any dust sheets away from the wall.
- Tidy up and return any removed objects to the room/garage.
- Clean your roller and brushes.
Final Thoughts
Painting breeze blocks is easy when you know what you’re doing. Hopefully, this guide has given you the know-how and the confidence to do this job yourself.
If you want to know more, below is a great video by Crafty Camel on how to paint a garage. It covers all the above points for those who prefer something more pictorial. This guy manages to do the whole job without getting covered in paint — impressive! The only thing I would do differently is the first coat, which I would water down.

For more painting tips, check out our guide to painting a room with no mess.