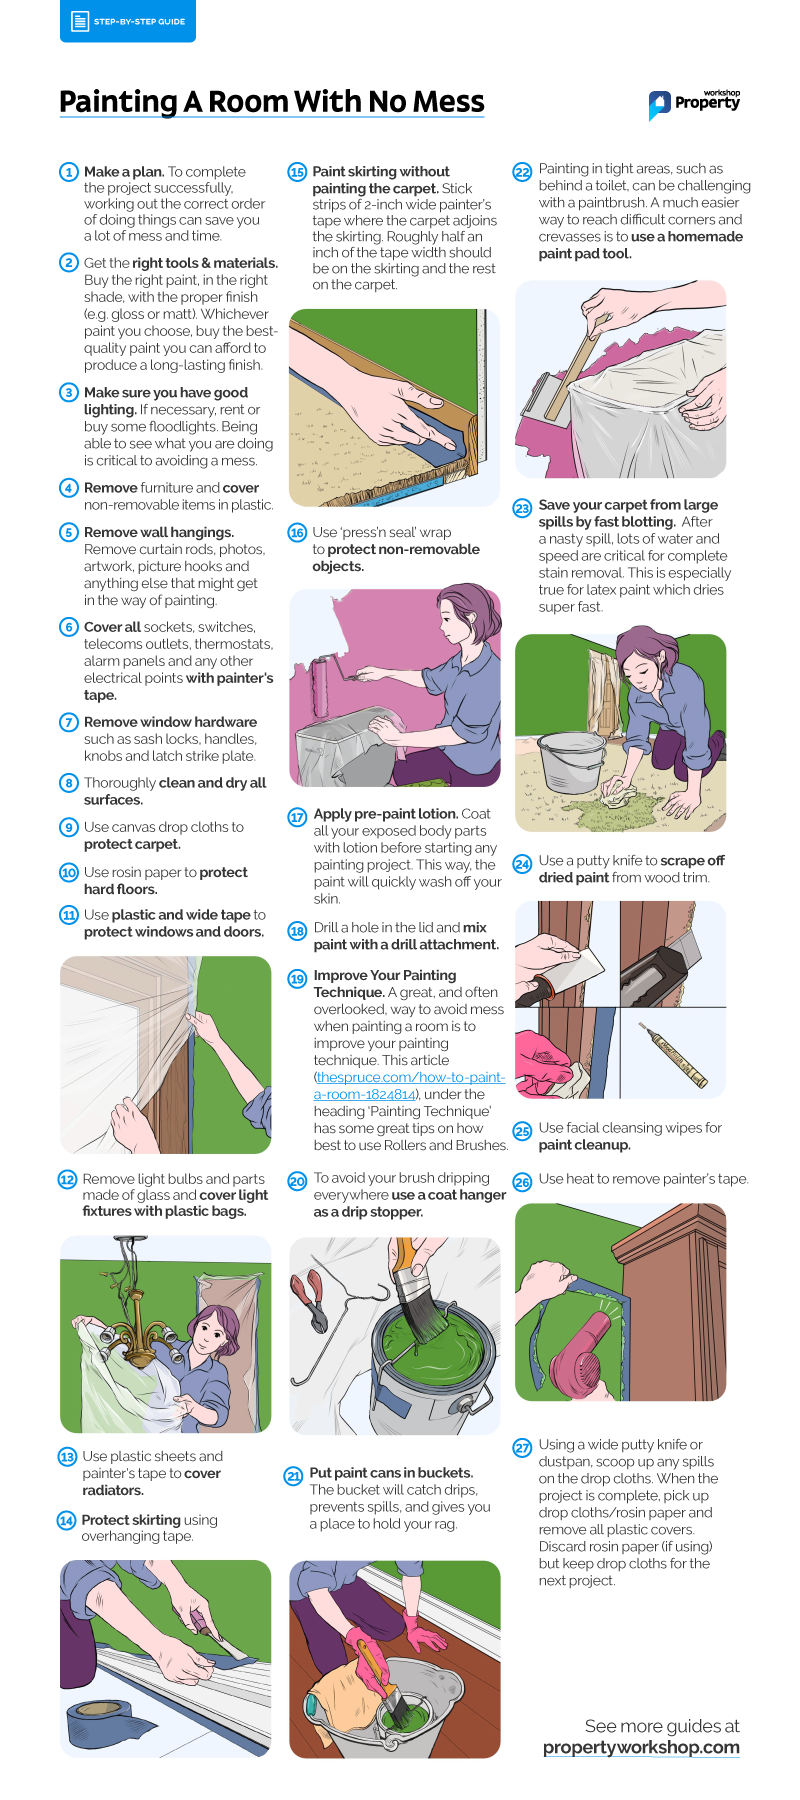
When painting a room, do you get more paint on the floor instead of the walls? If so, protect yourself from splatters, spills, dripping, staining and other messy disasters by following these 27 pro tips.
Table of Contents
Planning Tips
Being a project manager, I like this part of the process (geeky, I know), but sadly it’s a part many people neglect. Follow the tips below so you’re well-prepared for the painting process.
1. Make a Plan
Writing down what’s required to complete the project successfully and working out the correct order of things can save you a lot of mess and time. The result should be a clear checklist of ‘to-do’ tasks organised chronologically.
To help you get started with your plan, the example below outlines the order in which high-level tasks should be completed, along with some questions you should be asking yourself:
- Assess the room and work out how you will paint each area. For example, ask yourself the following questions:
- How tall are the ceilings?
- Are there any narrow peaks or sharp angles?
- Are there any tight spots/hard-to-reach areas?
- Will some areas require specialised equipment, such as the paint pad tool described in Tip #22?
- How do you plan on applying the paint? I.e. will it be via a paintbrush, a roller, a paint sprayer, or maybe a mixture of all three?
- Can you remove all the fixtures & furnishings from the room, or will some stay put?
- Gather the tools and materials.
- Prepare the room.
- Paint the room’s surfaces in this order:
- If applying primer, coat the ceiling. Next, do the walls, skirting and trim.
- Apply the finish paint to the ceiling.
- Apply the finish paint to the walls. If you use a paint roller for large areas and paintbrushes for edges (most common), apply the roller paint first. Cut in around woodwork, ceilings and skirting.
- Apply the finish paint to the skirting.
- Apply the finish paint to windows, door trim, and any other woodwork in the room.
- Remove windows and doors from their frames (if possible) and lay them flat on a workbench to paint them.
- Cleanup.
2. Gather Tools and Materials
Save yourself multiple trips to the DIY store by creating a list of supplies and buying them all in one trip.
Most importantly, you must buy the right type of paint in the right shade and finish (e.g. gloss or matt). Whichever paint you choose, buy the best quality paint you can afford to produce a long-lasting finish.
For any painting project, you’ll need at least the following tools and materials:
Tools
- Step Ladder
- Canvas drop cloths or sheets to cover the carpet
- Wire cutters
- Drill with a paint-mixing attachment
- Rollers and roller covers
- Roller trays to fit each size of roller
- A set of paintbrushes
- Buckets
- Utility knife
- Putty knife
- A hairdryer to remove the tape
Materials
- Cardboard or old linens to cover tables
- Plastic sheets
- Duct tape
- Painter’s tape (see suggested sizes in tips #14 and #15)
- Rosin paper to cover hard floors
- Plastic bags to cover hanging light fixtures
- Pre-paint lotion
- Finish paint
- Primer (if using)
- Wire coat hangers to use as paint tin drip stoppers (see tip #10)
- Sanding blocks and sandpaper
- Microfibre cloths
- Facial cleansing wipes
- Rubber gloves
Optional
Depending on the paint job, you may need these additional items:
- Floodlights
- All-purpose cling film
- Paint Pads or homemade edging pad tools (see tip #22)
- Stir stick
- Denatured alcohol
- Stain markers
Tips for Preparing a Room for Painting
As we’re often told, prevention is better than cure, so take your time and follow these steps before you start.
Remember, no matter how careful you are, paint splatter and drips are inevitable. We’re aiming to minimise them and make clean-up easier.
3. Light the Workspace
If necessary, rent or buy some floodlights. Seeing what you’re doing is critical to avoiding a mess.
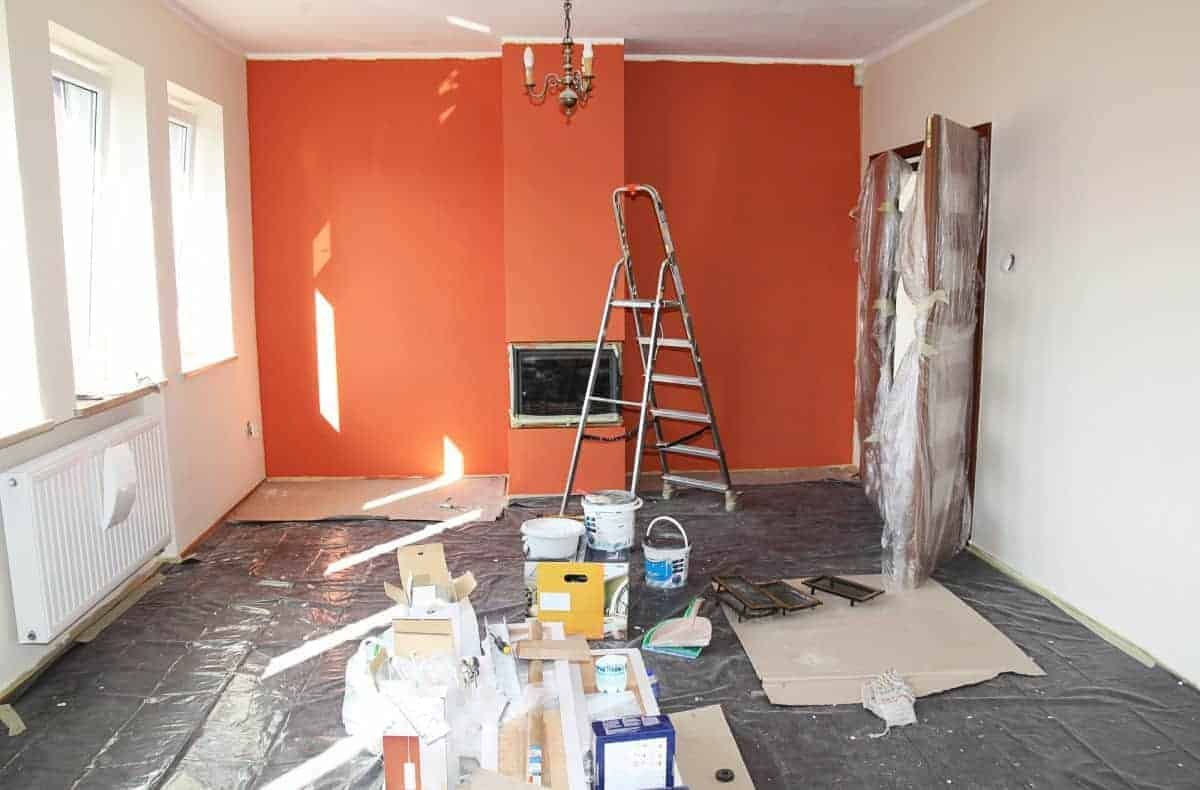
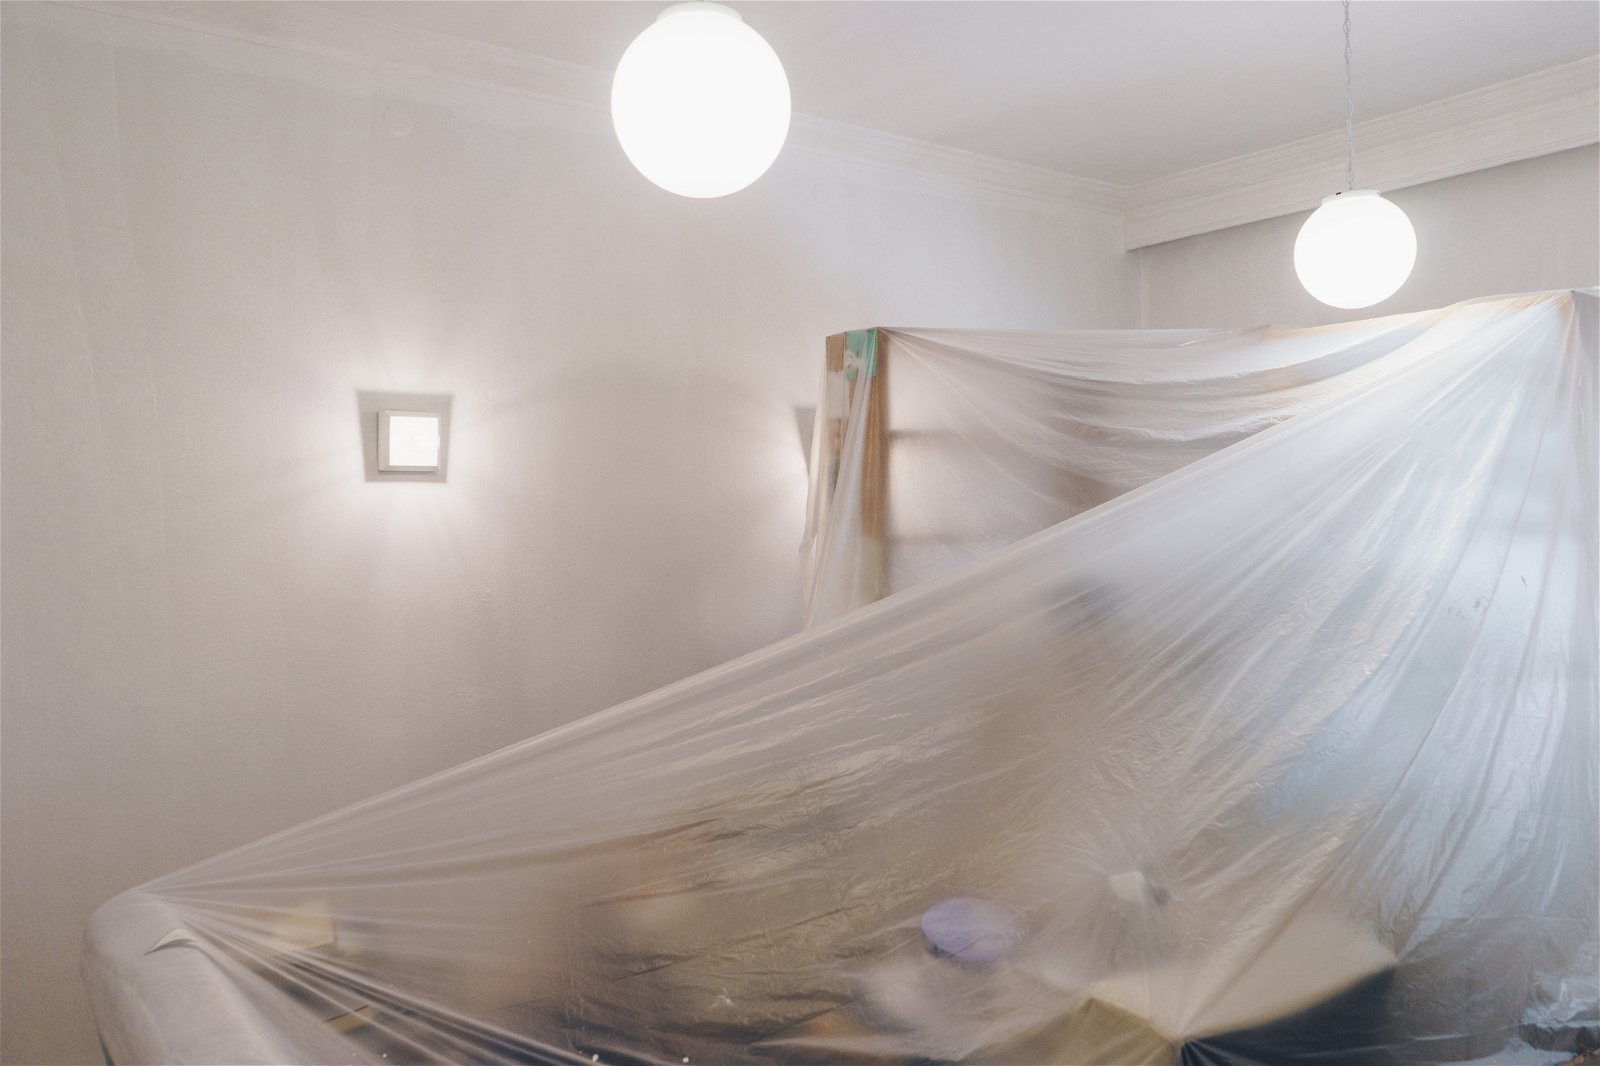
4. Remove Furniture and Cover Non-Removable items in Plastic
Ensure you have plenty of room to paint, as cramped conditions can lead to accidents. The ideal solution is to remove all the furniture from your room, but that’s not always feasible.
If you cannot remove all your furniture, create furniture stacks in the centre of the room. Cover tables with cardboard or old linens and stack chairs on top. Cover your furniture stack(s) with plastic and use duct tape to hold it together.
Ensure the furniture stack(s) don’t prevent you from getting to any part of the ceiling, walls or skirting. To test this, climb a step ladder with a roller in hand and check you can easily reach any part of your ceiling.
Cover all non-removable items in plastic sheets so no parts are exposed to stray paint.
5. Remove Wall Hangings
Remove curtain rods, photos, artwork, picture hooks and anything else that might get in the way of painting.
6. Cover Electrical Points with Tape
Cover all sockets, switches, telecom outlets, thermostats, alarm panels, and other electrical points with painter’s tape.
7. Remove Window and Door Hardware

Remove window hardware such as sash locks, handles/knobs and latch strike plates. Store hardware safely and tape off the lock.
8. Thoroughly Clean and Dry all Surfaces
As paint will not take to dirty surfaces, ensure all surfaces are spotless.
You can wipe off dry dirt, such as dust and sawdust, with a cloth, while stickier materials, such as grease, must be washed with a mixture of dish soap and water.
If, while cleaning, you find problem areas that need repairing, follow our patching plaster guide before you start painting.
9. Use Drop Cloths to Protect Your Carpet
Using canvas drop cloths is the best way to protect carpets from paint. There are three key benefits to using canvas instead of plastic:
- Canvas spreads out easily.
- Canvas doesn’t need taping to stay in place.
- Ladders don’t slip on canvas.
Lay the canvas on your carpet and bunch it up along the walls so it stays put. Note: Regular splatter and drips will not soak through the canvas, but large spills might.
Pro Tip: Look for canvas drop cloths with a plastic face bonded to a cloth layer that absorbs drips.
10. Use Rosin Paper to Protect Hard Floors
The best protection for hard floors is rosin paper. Plastic and canvas slip on hard floors like wood and tiles, but rosin paper stays put. However, one layer of rosin paper only protects against splatter and drips, so ensure you clean up large spillages before they soak through to your hard floor.
Before laying rosin paper, ensure your hard floor is clean, as trapped dirt can scratch the floor. Once the floor is clean, tape sheets of rosin paper to cover the entire area, leaving no part of your hard floor uncovered by rosin paper.
11. Use Plastic and Wide Tape to Protect Windows and Doors
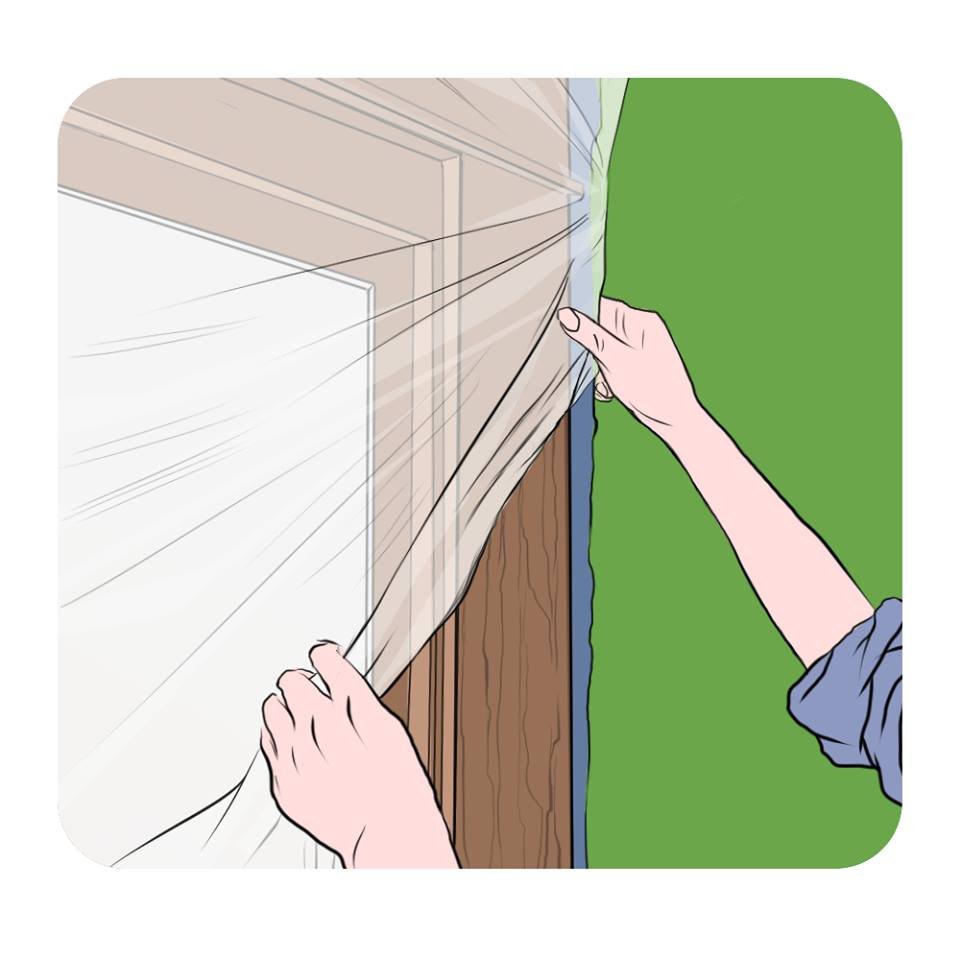
You’ll learn from experience that paint rollers produce a fog of paint that touches everything below, including windows and doors. To avoid this, follow these tips:
- When taping around windows and door trims, use wide tape that protrudes at least 15mm from your window/door trim.
- Attach light plastic sheets onto the protruding tape to cover areas that shouldn’t be painted.
- Cut door openings wrapped in plastic so you can pass through.
Check out this post for more info on how to use tape effectively.
12. Cover Light Fixtures with Plastic Bags
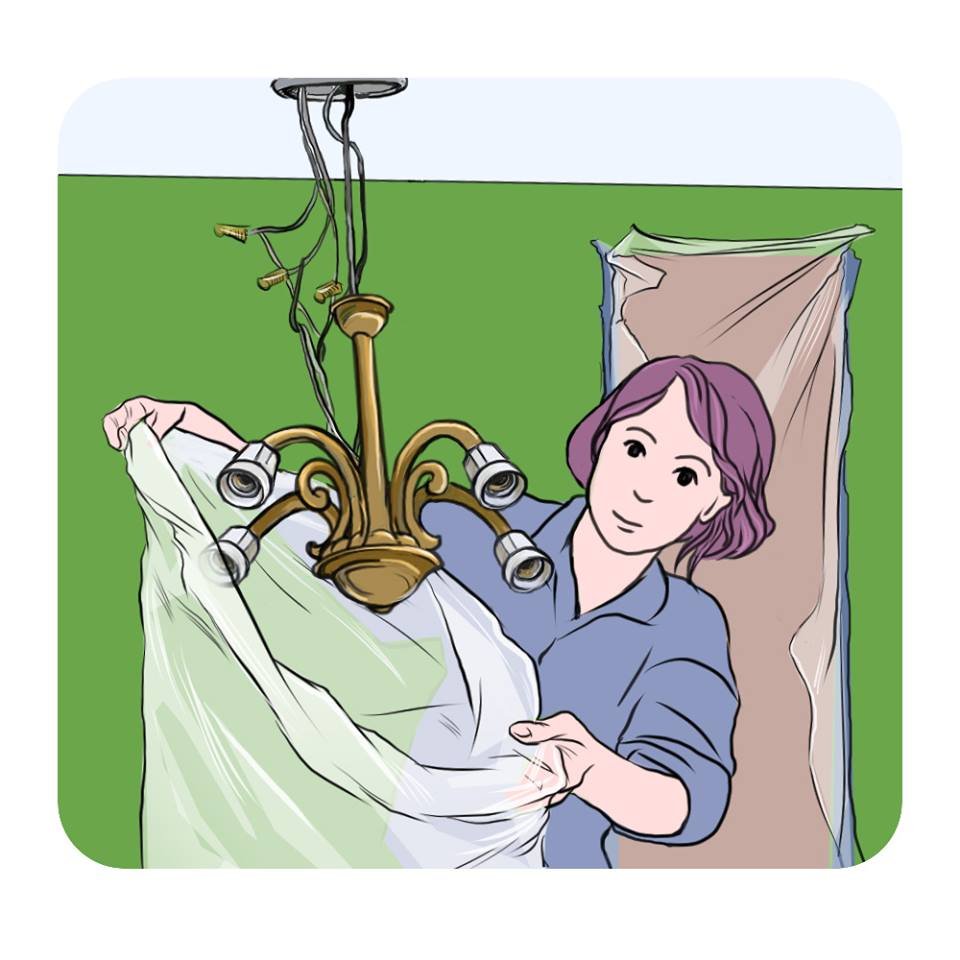
Here’s the best way to deal with light fixtures attached to your ceiling:
- Switch OFF the mains.
- Remove light bulbs and parts made of glass.
- Cut a spare piece of wire to make a ‘hanger wire’. The length depends on the size of your fixture.
- Unscrew the fixture.
- Tie your fixture to its junction box using the hanger wire and leave it dangling away from the ceiling by a few centimetres. Ensure the hanger wire supports the fixture, not one of the electrical wires.
- Use a plastic shopping bag to cover the dangling light fixture.
Note: The plate is typically attached to the ceiling via a ring nut for pendants and chandeliers. In this case, don’t use a hanger wire. Instead, unscrew the ring nut and slide it down the plate over the tube or chain.
13. Cover Radiators
Use plastic sheets and painter’s tape to cover the radiators. Alternatively, tape a rubbish bag around the radiator.
14. Protect Skirting with Overhanging Tape
You don’t need to completely cover skirting with tape when a single strip of overhanging painter’s tape will catch all roller and paintbrush splatters. Here are some key points to remember:
- Use 24mm or 36mm painter’s tape for narrow skirting and 48mm for wider skirting.
- Painter’s tape does NOT stick well to dirty surfaces, so ensure you clean your trim before applying the tape.
- Firmly push the tape down by running a metal putty knife over it. This approach minimizes paint seepage under the tape.
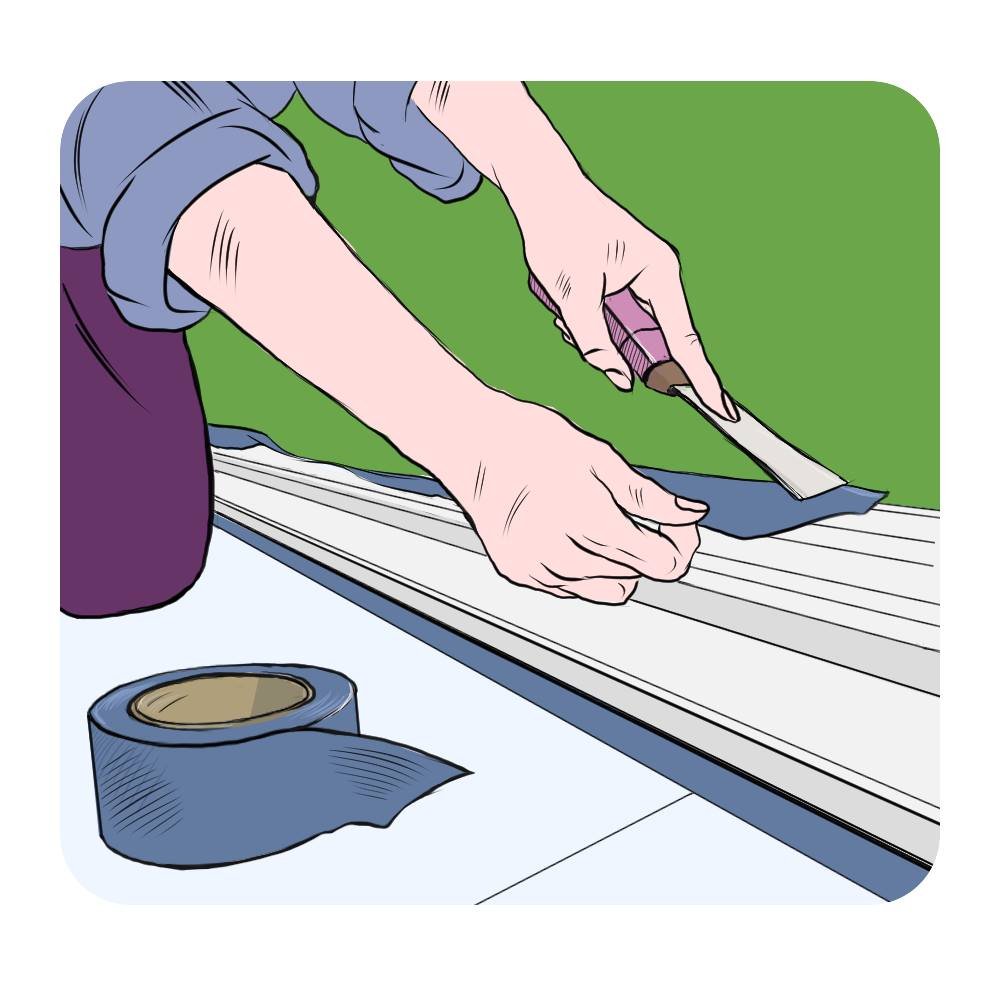
15. Protect Carpet when Painting Skirting
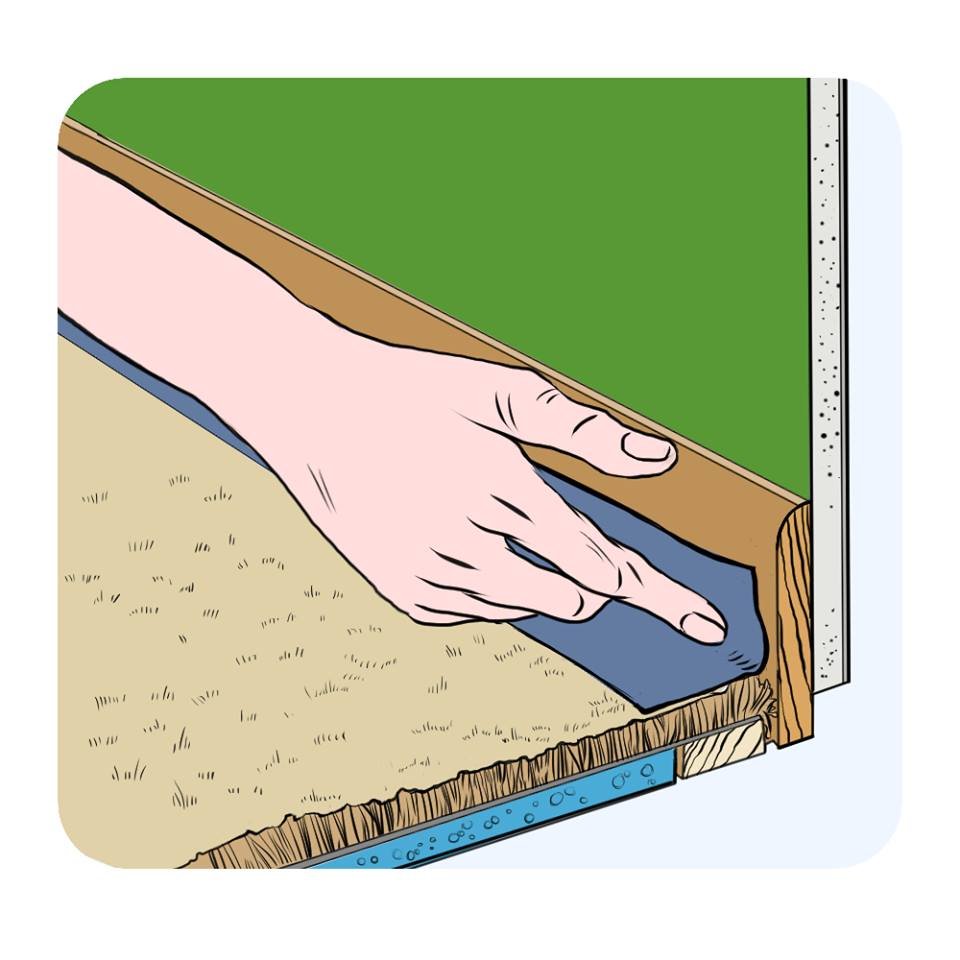
Painting skirting where it meets with carpet can be very difficult and messy. Follow the steps below and the image above to avoid getting paint on your carpet:
- Stick strips of 48mm wide painter’s tape where your carpet meets the skirting. Roughly 12mm of the tape width should be on the skirting and the rest on the carpet — see image above.
- Tuck the 12mm part between your skirting and carpet using a putty knife.
- Paint your skirting and leave it to dry. When your skirting is dry, pull the tape off.
16. Use the ‘Press’n Seal’ Wrap to Protect Non-Removable Objects
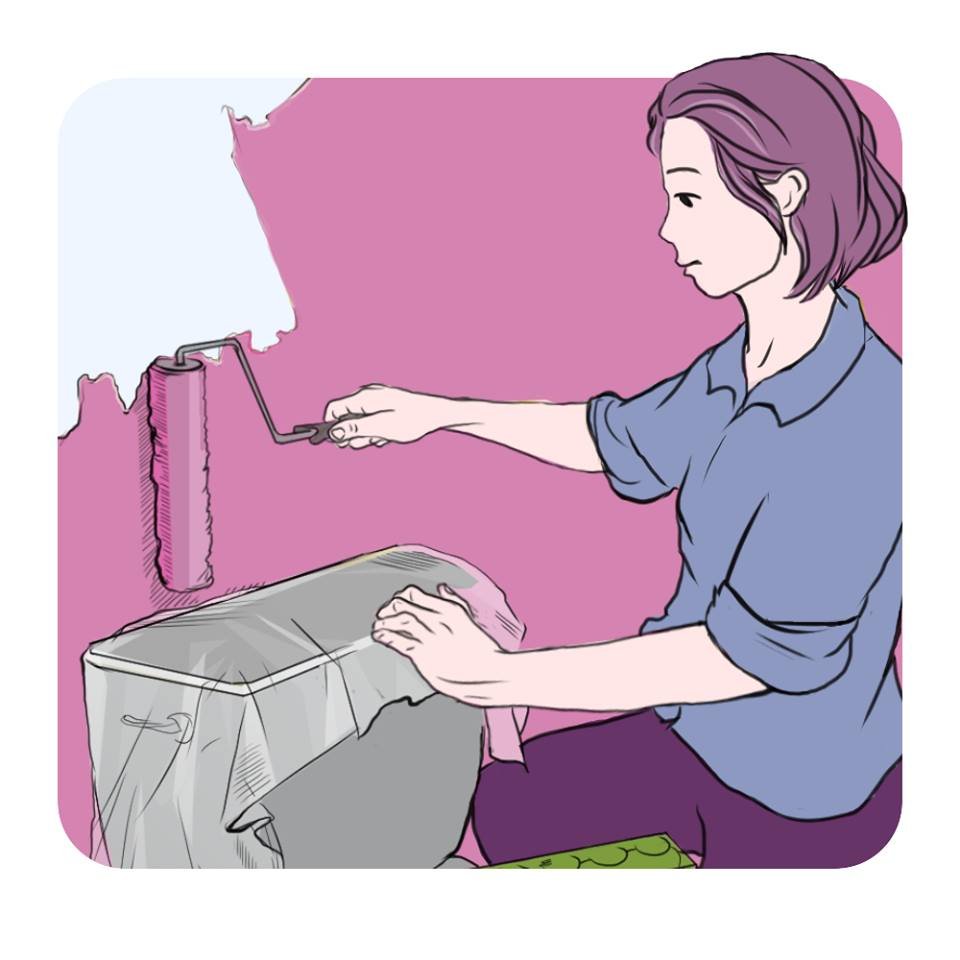
Certain spots are difficult to paint without getting paint on nearby objects. Painting behind a toilet is a good example of this problem.
To get around this, wrap nearby objects in cling film, as it quickly sticks where you want it while protecting objects from stray paint.
17. Apply Pre-Paint Lotion
Before starting any painting project, coat all your exposed body parts with lotion. This way, paint easily washes off your skin.
Tips for Painting a Room
Now comes the fun part — Painting!
18. Use a Special Drill Attachment for Mixing
Drill a hole in your paint tin lid and mix the paint with a drill attachment. Watch how Joe does it in this video.
19. Improve Your Painting Technique
Improving your painting technique is a great and often overlooked way to avoid mess while painting your room. This article, under the heading ‘Technique‘, has some great tips on how to use rollers and paintbrushes.
20. Use a Coat Hanger as a Drip Stopper
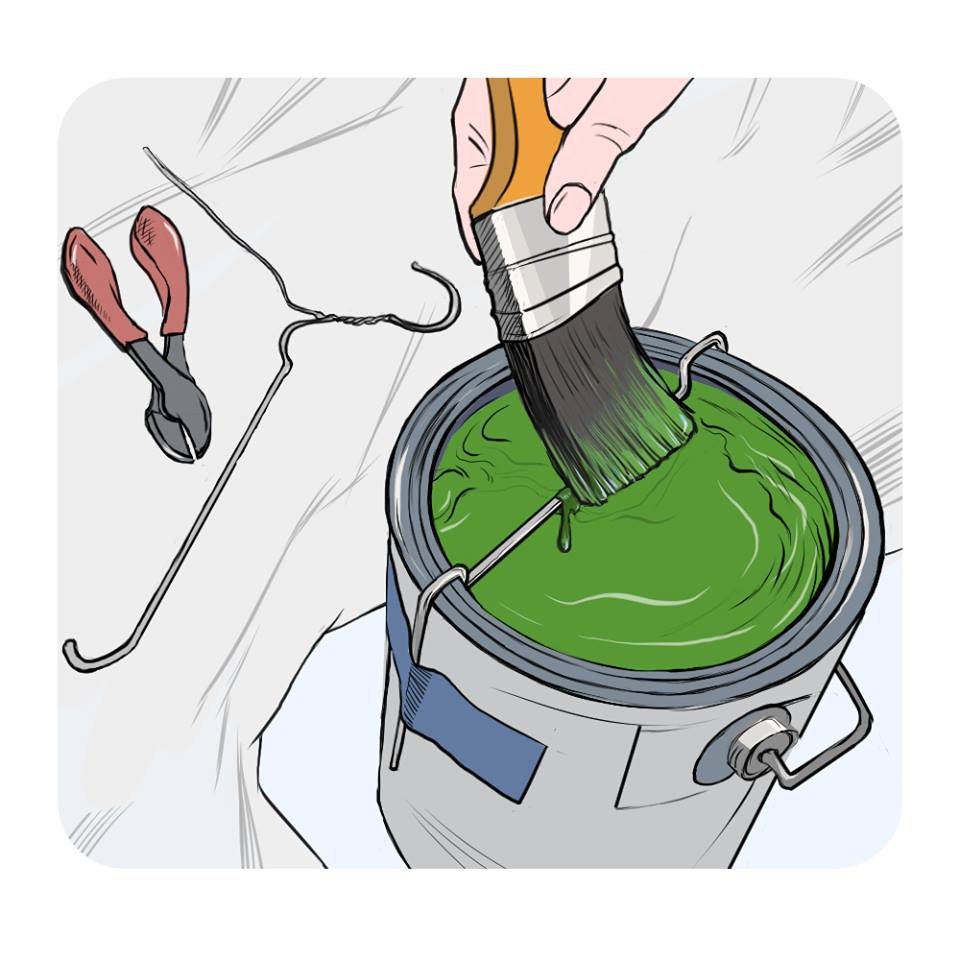
Adding a homemade drip stopper to your paint tin is a great way to avoid your paintbrush dripping everywhere. Here’s how to make one using a wire coat hanger:
- Using wire cutters, cut off the long bottom part of a coat hanger. I.e. the part the trousers hang on. Discard the top half.
- Bend the wire to wrap around your paint tin, as shown in the image above. This technique keeps the wire in place while you use it to remove excess paint.
- Once you’ve completed your painting project, remove the drip stopper from your paint tin and clean it.
21. Use a Paint Bucket
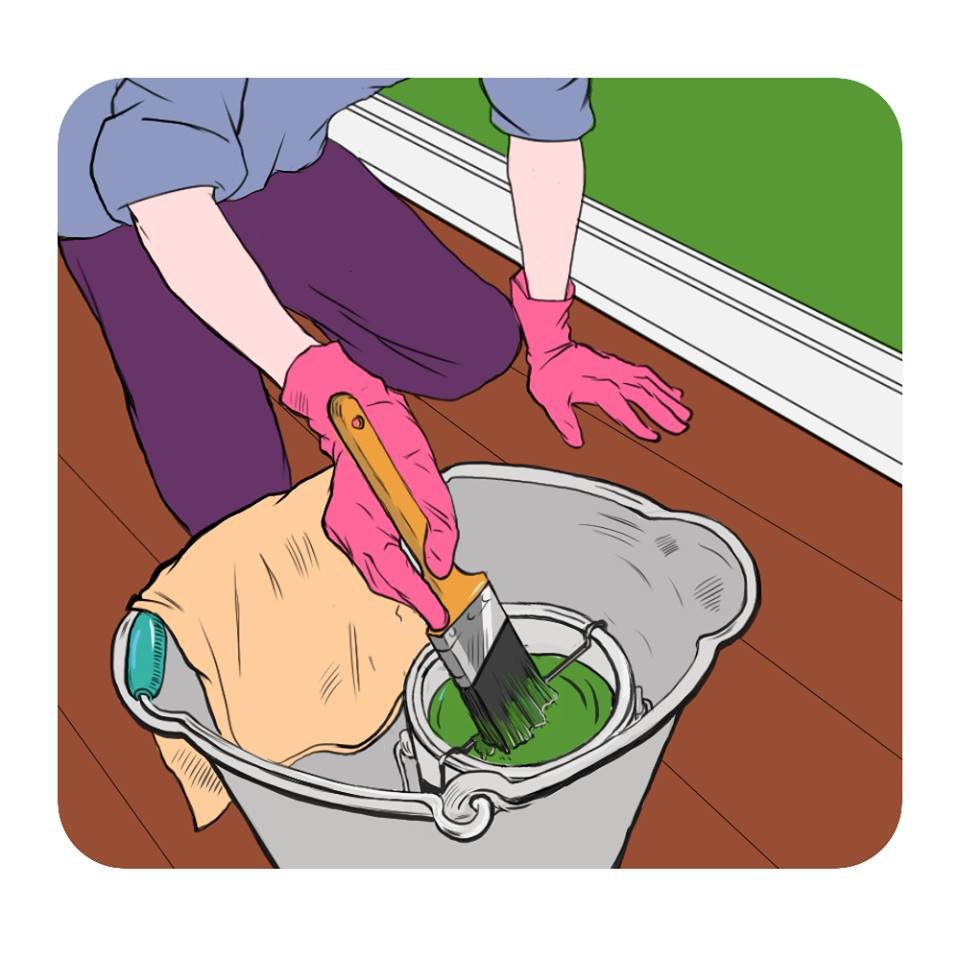
Put your paint tins in buckets. The bucket catches drips, prevents spills, and gives you a place to hold your rag.
22. Use Paint Pads for Tight Spots

Painting in tight areas, such as behind your toilet, can be challenging with a paintbrush. Paint pads are a much easier way to reach difficult corners and crevasses.
If you struggle to reach a particularly tight spot with standard paint pads, you may need to make a homemade tool. Here’s how to make and use one:
- Use a sharp utility knife to remove the pad from an edging pad tool.
- Stick the pad onto a sturdy stir stick. The size of the stick depends on the spot you’re trying to reach.
- Apply paint to the pad with a paintbrush.
- Paint the hard-to-reach areas with your homemade paint pad.
Paint Cleanup Tips
Congratulations, you’ve completed the project while following the 22 tips above! However, for some reason, you still have plenty of mess to clear up.
Remember, a mess is unavoidable and happens to the best of us, no matter how careful you are. Follow the steps below to clean up:
23. Save Your Carpet from Large Spills by Fast Blotting
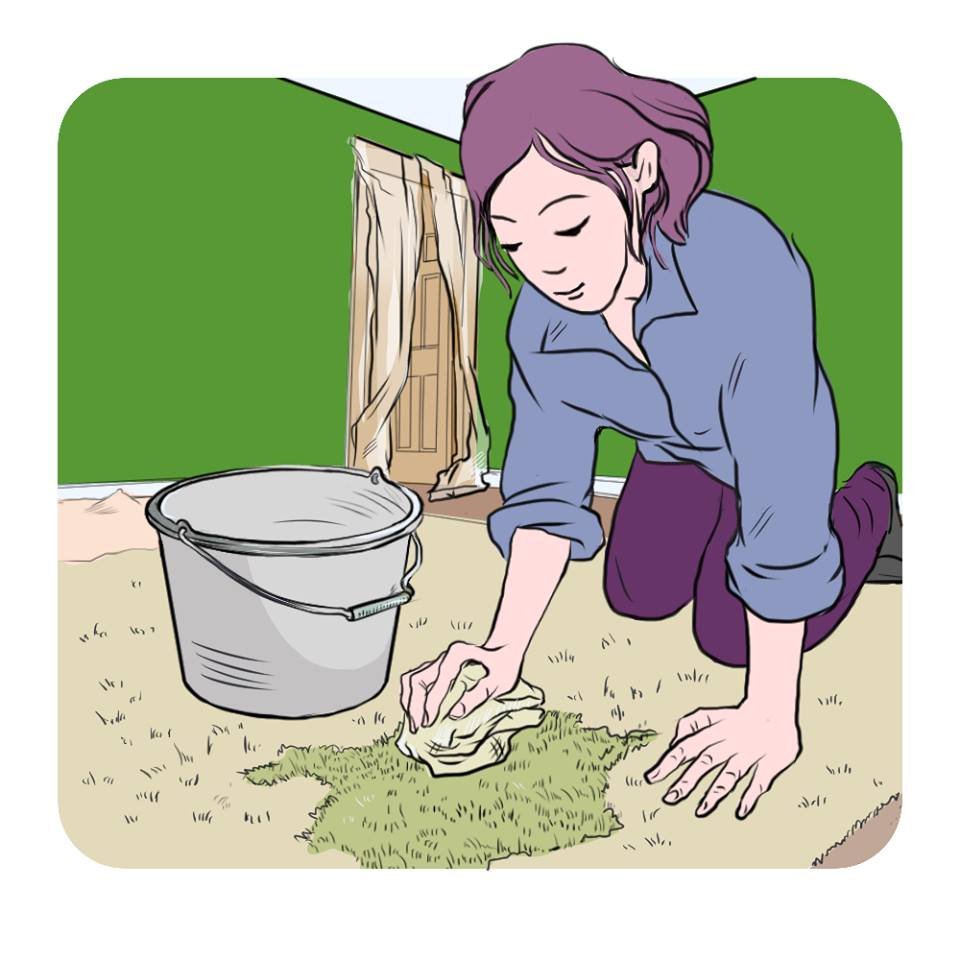
After a nasty spill, lots of water and speed are critical for complete stain removal, especially for latex paint, which dries fast.
Follow these steps to avoid permanent stains on your carpet:
- Immediately pick up as much of the spill as possible using a putty knife or whatever is nearby. Don’t attempt to wipe up the spill; you’ll only push the paint deeper into the carpet.
- Fill your bucket with clean water and soak a clean rag. Hopefully, somebody else can do this while you’re scooping up the spill in step 1.
- Use the wet rag to blot the spill and continue blotting until you run out of clean water.
- Refill your bucket and keep blotting until the paint is no longer visible.
- Run a fan to dry your soaked carpet when you’re done blotting.
24. Use a Putty Knife to Scrape off Dried Paint From Wood Trim
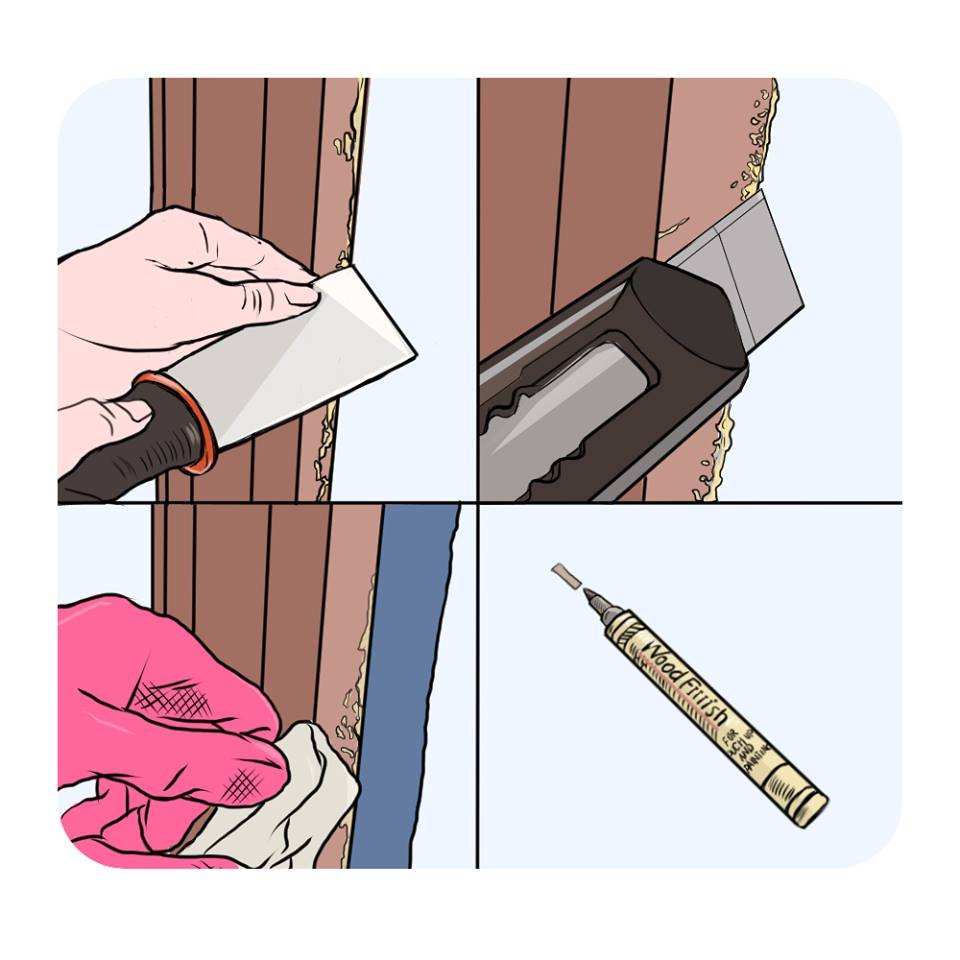
Drips of dried paint on wood trim can ruin a successful painting project. Remove these nasty drips without stripping your woodwork by following these steps:
- Scrape off dried paint using a putty knife, and remember to angle the blade so it doesn’t damage your wood.
- Use a utility knife for tight spots and corners.
- Use denatured alcohol to rub off any residue left on your wood trim.
- Use a matching stain to cover any bad spots.
25. Use Facial Cleansing Wipes
The alcohol in cleansing wipes softens latex paint and doesn’t harm most surfaces. Here’s how best to use them:
- Remove the wipe from its container and gently squeeze the remaining solution from the wipe back into the container.
- Dab the wipe onto your paint-smeared surface and remove the first layer of paint.
- Press down and move the wipe circularly to remove deeper paint layers.
- If required, use additional wipes to remove tougher paint smears.
26. Use Heat to Remove Painter’s Tape

Sometimes painter’s tape refuses to come off cleanly without a long struggle. Here’s a technique that helps:
- Ensure the surface has completely dried before attempting to remove any tape.
- Using a hairdryer, blow warm air onto the painter’s tape. Wait until the tape is warm but not hot.
- Gently remove the tape.
27. Scoop Up Spills and Pick Up Floor Covers
Scoop up any spills on your drop cloths using a wide putty knife or dustpan.
When the project is complete, pick up drop cloths/rosin paper and remove all plastic covers. Discard rosin paper (if used) but keep drop cloths for the next project.
Final Thoughts
So there you have it, 27 tips that help prevent painting and decorating mess. Even for the seasoned pro or experienced DIYer, there are bound to be some tips you’ve never considered.
If you have some more tips you’d like to share, please contact us, and we’ll consider adding them to the list and giving you a shout-out.
Bonus Tip: Check out our ultimate guide to painting a room for more great painting advice.