Over time, many homes build layers of paint on their walls, ceilings, floors and furniture. These built-up layers become messy and difficult to remove.
This guide shows you how to strip paint off wood and other common surfaces, such as masonry, metal and glass.
Let’s get stripping!
In a Hurry? Find top-rated painters & decorators in your area by clicking the button below:
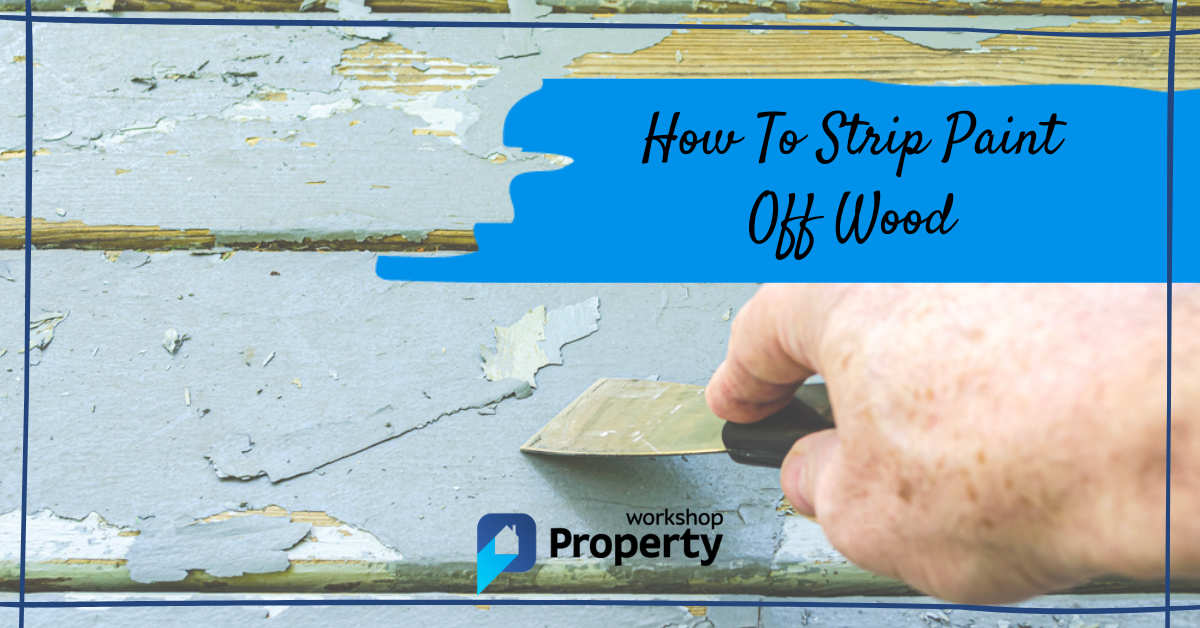
How To Strip Paint off Wood (and other materials) — 8 Methods
If you want to return an old painted item to its former self, you’ll need to follow this guide.
There isn’t just one method for stripping paint; there are 8! The method you choose will depend on the type of paint, the object to be stripped, and your budget.
This guide explains each of the eight paint-stripping methods to help you better determine which is best for your situation.
Lead Paint Warning
Paint that predates the 1970s may contain lead. If ingested, dust from lead paint can cause serious health problems, so always wear safety gear, remove children and pets from the area, and take precautions to control the dust created.
Test the paint for lead content before starting work and ensure the stripping method you choose is suitable for lead paint.
For more advice regarding lead paint, check out this UK government leaflet.
1. Chemical Strippers
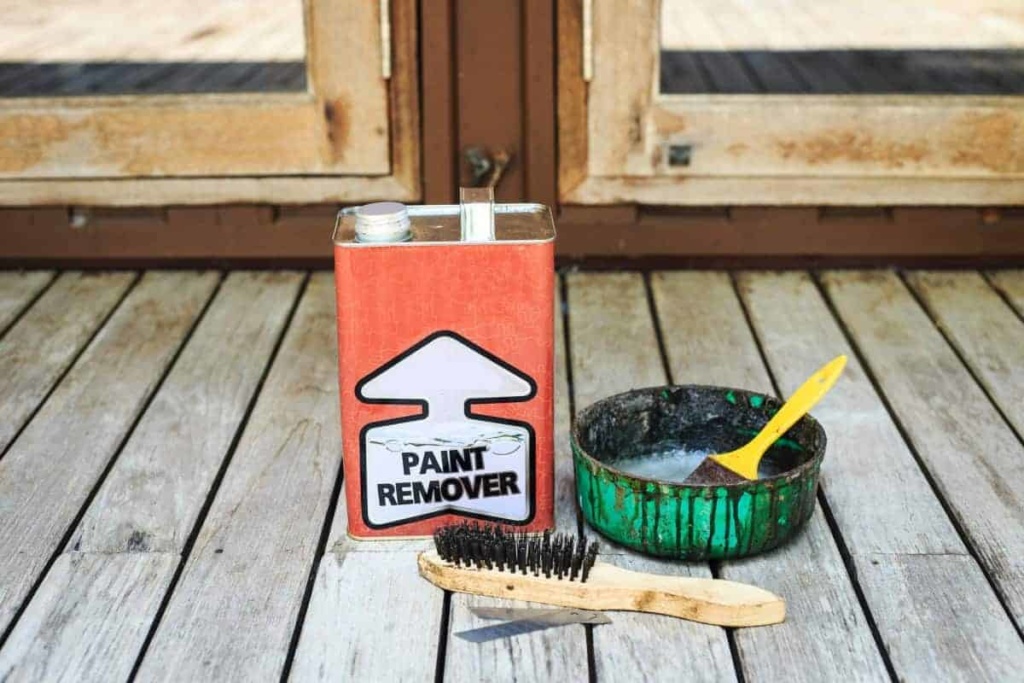
Chemical paint strippers are sold in gel, paste, or liquid form. They’re applied to the area you wish to strip paint from and work by either breaking down the paint or weakening the adhesion of the paint, depending on the type of chemical used. They can be applied to wood, metal, and masonry.
Pro Tip: Always do a test patch first to ensure it doesn’t damage/mark the surface.
| Pros | Cons |
|---|---|
| Chemical strippers are ideal for lead-based paint, as no dust is created. | It’s one of the more expensive methods of paint stripping. |
| It’s relatively simple to use and doesn’t require much DIY skill. | Proper protection and safety precautions must be used; you may not want to use this around children or animals. |
| It doesn’t take a lot of time to use. | Not the most environmentally friendly method. |
| It can be used to remove multiple layers of paint at once. | Chemical strippers only work on certain paint types and can mark/stain the surface. |
Tools & Materials
Tools:
- Protective Gloves
- Suitable Mask
- Eye protection
- Stripping Knife or Shave Hook
Materials:
- Protective Floor Covering
- Chemical Stripper
- Bin Bag
- Water/Neutraliser
Chemical Stripping — Step-by-Step Instructions
I. Prepare the Area
Protect floors and furniture from spillages by covering them with sheets. Open windows to properly ventilate the space. Wear a ventilation mask if necessary. Ensure there are no children or pets around.
II. Apply Stripper
Wearing gloves, apply a small test patch according to packet instructions. Once this is complete, apply a liberal and even amount of chemical paint stripper over the area you wish to strip.
Some paint strippers (like Peel Away) must be covered with specialist paper whilst they work their magic, while others don’t. The packet instructions will make this clear.
III. Wait
Leave the chemical stripper on for the manufacturer’s amount of time. The stripper may bubble or change colour, which means it’s working its magic.
IV. Remove
Once the time is up, remove the stripper with a stripping knife whilst wearing protective gloves and place it straight into a bin bag.
It may be fairly thick and quite ‘gunky’. If it’s worked correctly, the paint should lift off with this gunk. If any paint remains, you may need to apply a second course of chemical stripper.
Warning: Leaving the stripper on longer than recommended can damage the surface.
V. Clean and Neutralise
Once the gunk has been removed, clean away excess residue with water, then neutralise the area. Some strippers come with their neutraliser, while others may recommend white spirit.
This step ensures the item is ready for painting and that any chemical residue left behind will not affect the adhesion of new paint.
Watch the video below, where Sian Astley shows you how to use Peel Away.

2. Mechanical Sanding
Mechanical sanding is ideal for all types of wood, including flooring, skirting boards, doors and furniture. However, this method doesn’t suit metal or masonry.
Mechanical sanding creates a lot of dust, so it’s unsuitable for lead paint removal. There are 5 types of sander:
Floor Drum Sander: A floor drum sander is a powerful machine and, as its name suggests, is most suited to hard-wearing floors. It’s great at removing old tar-like floor paint and will speed up the process whilst saving your knees.
Pro Tip: Floor drum sanders cost over £1,000, so most people rent them.
Belt Sander: These powerful handheld sanders work by spinning a belt of sandpaper whilst vibrating simultaneously. They are ideal for large flat areas, like flooring, and are particularly good at removing tough paint and varnish.
Sheet Sander: Sheet sanders usually have a large, flat rectangular sanding pad that vibrates in a small circular motion. They’re more lightweight than a belt sander and ideal for flat areas such as skirting, furniture or vertical situations. They’re not quite as harsh as a belt sander and are good for getting into edges and corners.
Random Orbital Sander: A random orbital sander has a rounded sanding pad that spins while vibrating simultaneously. It’s suitable for skirting, furniture, and vertical areas. It provides slightly more vigorous sanding than a sheet sander, so it’s best for tougher paint.
Detail or Palm Sander: These are incredibly lightweight and are only suitable for detailed sanding areas, such as staircase spindles, architrave and details on furniture. They provide gentle sanding to avoid harming the surface beneath, which means more work when stripping multiple layers.
Pro Tip: Consider the voltage. A higher voltage power tool means more powerful and faster sanding. This is particularly important on tougher paint or if you have lots to do!
| Pros | Cons |
|---|---|
| Will leave a perfect finish for painting straight onto. | Not suitable for lead-based paint due to the dust created. |
| Ideal for tough paint, like varnish or old floor paint. | May damage the surface if over-sanded or the wrong grit is used. |
| You’ll be able to see instant results. | Sanding can be time-consuming and costly. |
| Only suitable for wood. |
Tools & Materials
Tools:
- Dust Mask
- Sander
- Lint-Free Cloth
Materials:
- Low-grit Sandpaper (to fit sander)
- High-grit Sandpaper (to fit sander)
- White Spirit
- Stripping Knife or Shave Hook
Mechanical Sanding — Step-by-Step Instructions
I. Prepare Surface
Prepare the surface you’re working on, ensuring there are no nails or screw heads that the sandpaper might catch.
II. Heavy Sanding (Low-Grit Paper)
Pro Tip: Sand along the grain (as opposed to against it); otherwise, you may damage the surface.
III. Smoothing (High-Grit Paper)
Once you’ve removed the bulk of the paint with the coarse sandpaper, change to a higher grit (less coarse, 120 grit is ideal) to smooth over what you’ve already sanded. This will also remove any smaller bits of paint left behind. Removing scratch marks left behind by the coarse sandpaper prevents them from becoming visible when applying paint or oil.
Pro Tip: If you have a Heavy Duty or DIY Vacuum, you can usually attach the hose to the sander to considerably reduce the amount of dust.
IV. Apply White Spirit
Apply white spirit on a lint-free cloth to clean the area from dust.
Pro Tip: If you’re planning on sanding paint or varnish from floorboards and have multiple rooms, it may be worth hiring a large professional drum floor sanding machine, which will halve your time and save your knees!
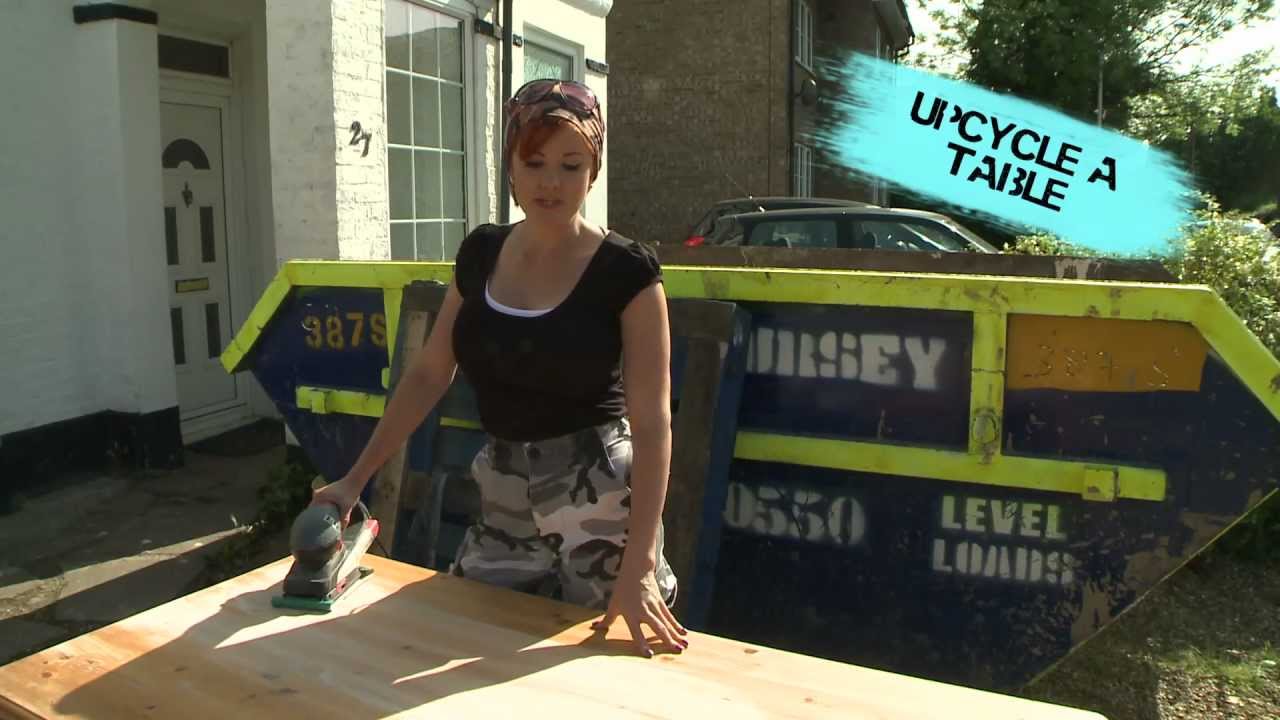
Watch the video below where Charis Williams sands back a varnished table.
3. Hand Sanding
Sometimes, mechanical sanding isn’t suitable for paint stripping. Often, it can be too rough for the surface you want to work on, or it might be because the area you want to strip paint from is too small for a mechanical sander to fit.
It might not be practical to use a power tool in certain areas (on a ladder sanding a window sill). In these cases, hand sanding might be the better way to go.
Hand sanding is far gentler than mechanical sanding and particularly favoured for detailed areas.
| Pros | Cons |
|---|---|
| Less powerful than mechanical sanding means a lot less dust. | It will require more effort and elbow grease than mechanical sanding. |
| Hand sanding is ideal for delicate areas of detail which you don’t want to over-sand. | It may be painfully slow, and you may not see instant results. |
| It can be used in awkward areas where you wouldn’t otherwise be able to use a power tool. | Not ideal for multiple layers of paint or tough paint. |
Tools & Materials
Tools:
- Dust Mask
- Protective Gloves
- Hand Sanding Block
- Lint-Free Cloth
Materials:
- Low-Grit Sandpaper
- High-Grit Sandpaper
- White Spirit
Hand Sanding — Step-by-Step Instructions
I. Heavy Sanding (Low-Grit Paper)
Wearing a dust mask and gloves, start with low-grit sandpaper and apply pressure to the paper with your hand, moving it back and forth. We recommend using a sanding block tool for flat areas. You can buy specialist sanding blocks with curved or rounded edges to get into more awkward spaces.
Pro Tip: The Family Handyman recommends sticking the sandpaper to a filling knife to reach into tight corners.
II. Smoothing (High-Grit Paper)
Once you’ve removed most of the paint, switch to higher-grit sandpaper (something like 120) to smooth over any sanding marks and remove any fine paint left behind.
III. Apply White Spirit
Using a lint-free cloth, wipe over the area with white spirit to remove any dust. You’re now ready to apply a paint or oil finish.
Pro Tip: Try using wet and dry sandpaper to reduce the dust from hand sanding.
Here are some top tips from the Family Handyman for using hand sandpaper.
4. Hand Scrapers
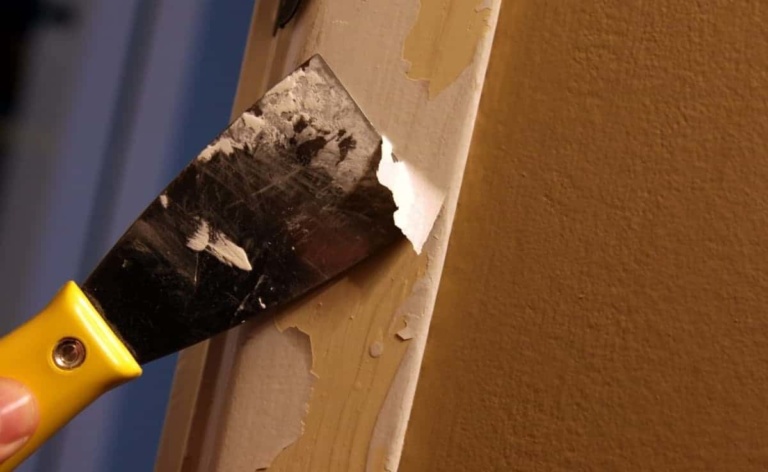
Hand Scrapers are useful when the paint is already peeling and flaking away from its surface. They’re also useful on harder materials like brickwork and masonry, where you can get rougher with the tool without worrying about damaging the surface.
Hand scrapers come in all shapes and sizes. You can buy large flat ones for bigger surface areas, pointy triangular ones, called shave hooks, for corners and crevices, and specialist window scrapers for removing the paint around glass.
| Pros | Cons |
|---|---|
| Best suited for already peeling or cracked paint. | Won’t be beneficial on tougher paints. |
| Ideal for removing paint from glass. | May gouge the surface beneath it if you’re not careful. |
| It can be used on masonry and brickwork too. | May not remove every single ounce of paint. |
Tools & Materials
Tools:
- Scraping Tool
- File or Sharpening Stone
- Shave Hook
Materials:
- Protective Gloves
Hand Scrapers — Step-by-Step Instructions
I. Sharpen Scraper
Make sure your hand scraper is sharp enough to work with. You can sharpen it up with a file or sharpening stone if it isn’t. You may need to sharpen it a few times whilst stripping paint depending on the surface you’re working on and how aggressive you need to be with the tool. We also recommend using safety gloves when working with blades.
II. Scrape
When using a scraping tool or shave hook on wood, be sure to work with the grain moving the scraper in one direction only. Unlike sanding, where you would go back and forth, you should only go up or down, not both ways. Depending on how many layers of paint there are, you may need to do this a few times before you reach the surface.
Try using a shave hook or a contour tool to remove paint in crevices. The finer, detailed areas are the most tricky and prone to damage, so taking your time and handling the scraper with great care is important!
Pro Tip: You may use a scraping attachment with a multi-tool for a more vigorous scrape for hard surfaces.
III. Scrape Crevices
Check out the video below to learn more about paint scraping:

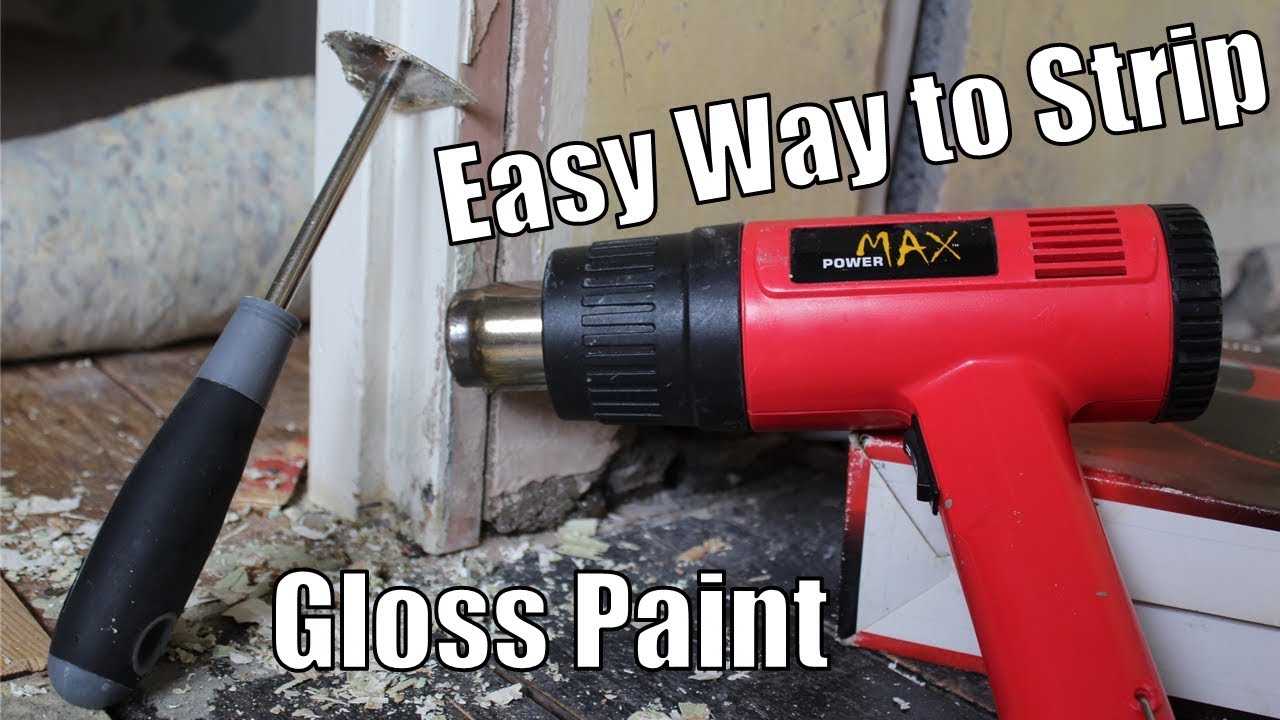
5. Heat Gun
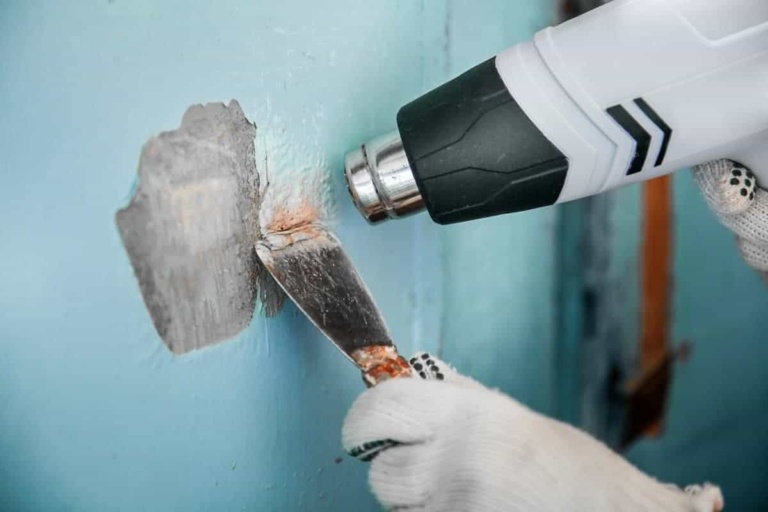
Heat guns are a well-known tool for stripping paint. They produce a high temperature, enabling the paint to melt off the surface. They’re inexpensive and work particularly well with glossy paints.
This paint stripping method can be used for lead paint, but you should be careful not to burn the paint as this will release toxic lead fumes.
| Pros | Cons |
|---|---|
| Very easy to use. | Easy to burn the wood beneath. |
| Inexpensive. | Doesn’t work on all paints. |
| Works well on gloss paint. | It can be messy. |
| You can use it in large and more intricate areas. |
Tools & Material
Tools:
- Protective Gloves
- Heat Gun
- Scraping Tool or Shave Hook
Materials:
- Protective Floor Covering
- Bin Bag
Heat Gun — Step-by-Step Instructions
I. Preparation
Ventilate the room and protect the floor with a covering. We recommend wearing gloves to avoid burning skin.
II. Heat gun
Hold the gun 5–10cm above the surface you want to strip and turn it on. It’ll take a while to heat up, but you’ll soon notice the paint bubble, indicating it’s starting to lift from the surface.
If it’s not working that well, try a higher heat setting, but it’s important not to burn the wood beneath the paint. In the beginning, seeing how well the paint responds is a bit of a trial-and-error process.
III. Scrape
As the paint bubbles, remove the heat from the area and use a scraper or shave hook to lift the paint from the surface. The melted paint should be put directly into a bin bag so it doesn’t re-stick to your surfaces.
IV. Repeat and Clean
Repeat the above steps until all paint is removed, then clean the area ready for your chosen finish.
Watch the video below for an excellent example of paint stripping with a heat gun.
6. Dipping & Stripping
Some UK companies offer a dipping and stripping service in which your materials are submerged into a tank of caustic peel, jet-washed, and returned to you paint-free!
The cost of dipping and stripping pays off when you have many things that need stripping. Most commonly, this is used for doors and radiators, where you would usually have several to deal with.
Dipping can cost as little as £15 per door (depending on the local services available), and the hard work is done for you, freeing up your time for other areas in your home.
It’s worth noting that this option isn’t always successful, and it’s a very harsh method of stripping, which means the item you send off is at some risk.
| Pros | Cons |
|---|---|
| Collection and delivery are usually available. | Water-based paint cannot be stripped via this method. |
| Cost-effective when large amounts need stripping. | It can be risky, as you cannot do a test patch beforehand. |
| Frees up your time. | Dipping is only available for items that can be removed from the home. |
| Not suitable for glazed doors. |
Dipping & Stripping — Step-by-Step Instructions
Send your items to the paint stripping service and then sit back and relax.
7. Infrared Paint Stripping
Infrared paint stripping technology works like a heat gun but uses an infrared bulb and lower temperatures, making it a more gentle process. It can even be used on glass surfaces! It’s also safe for lead-based paint.
Unfortunately, an infrared paint stripper will set you back a few hundred pounds!
| Pros | Cons |
|---|---|
| Considered a gentle method of paint removal. | A very expensive tool to buy. |
| Low temperatures mean there’s no need to worry about burning wood. | Large size means it may not get into small spaces. |
| Safe for use with lead-based paint. | |
| It can be used on glass. |
Tools & Materials
Tools:
- Infrared Stripper
- Scraping Tool or Shave Hook
Materials:
- Protective Floor Coverings
- Protective gloves
- Bin Bag
Infrared Paint Stripping — Step-by-Step Instructions
I. Protection
Cover the floor and furniture, and wear protective gloves to protect you from the high temperatures.
II. Heat Paint
Switch on the Infrared heating tool and hold it directly over the paint, around 5-10cm above. You’ll only need to hold it there for a few seconds before the paint begins to bubble.
III. Scrape Paint
As soon as the paint begins to bubble, move the infrared heater away and use a scraper or shave hook to pull the paint off the surface, taking care not to gouge it. The melted paint should be put into a bin bag immediately.
IV. Repeat and Clean
If any paint is left behind, go over it with the infrared stripper and repeat the above steps. Otherwise, a quick surface clean will have it ready for finishing.
Watch the video below to see an infrared paint stripper doing its magic.

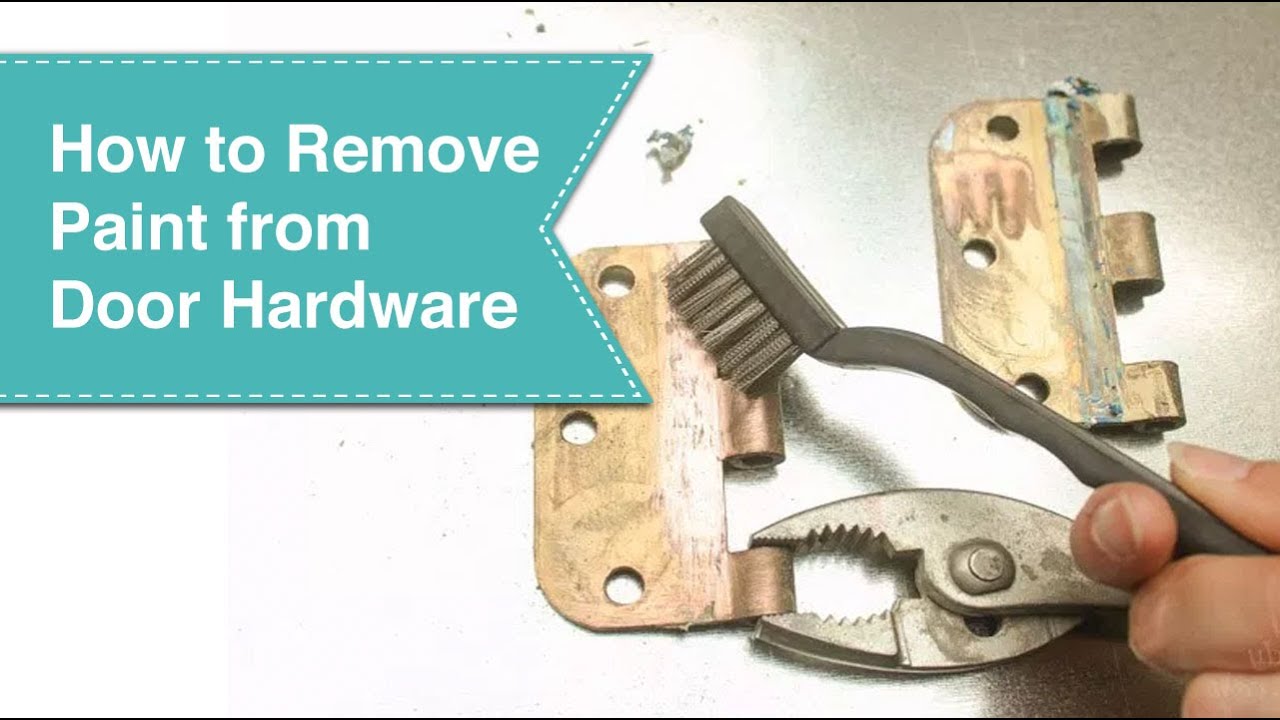
8. Boiling Paint
You can boil paint off smaller hardware, such as door hinges or handles, by submerging them in hot water.
| Pros | Cons |
|---|---|
| Very easy to do. | Only suitable for items small enough to be put into a pan. |
| Inexpensive. | Hardware must be removed from the door first. |
| It will not work with wood or porous materials. | |
| Unable to do a sample test first. |
Tools & Materials
Tools:
- Old Saucepan
- Tongs
- Scraper
- Wire Wool
Materials:
- Hob
- Water
- WD40
- Cloth
Boiling Paint — Step-by-Step Instructions
I. Fill Saucepan
Fill an old saucepan with water (ideally one you will never use again) and add the objects you wish to remove paint from.
II. Boil Water
Turn the hob on and allow the water to boil, leaving it for 15-20 minutes.
III. Remove Objects
Carefully remove the objects from the pan with tongs and pull the paint away from the metal hardware using a scraper or shave hook.
For any small areas, like screw holes, use some wire wool. If paint’s still left on it, pop it back into the pan for another 15-20 minutes.
IV. Clean
Clean up your hardware with some WD40 and a cloth. They should now be ready for use.
In the video below, Pretty Handy Girl shows you how to boil paint away:
Pro Tip: For extra tough paint, add some TSP Cleaner (Trisodium Phosphate) to the boiling water and let soak for 30 minutes.
Don’t fancy doing this job yourself? Find top-rated painters & decorators in your area by clicking the button below:
Final Thoughts
So there you have it — how to strip paint off wood and other commonly used materials. I hope this guide has helped you determine the best method for your situation.
Pro Tip: If you want to purchase a sander to help with this job, check out our reviews of the best sanders in 2024.
When it comes time to paint your freshly stripped wooden surfaces, follow our guide to preparing and painting woodwork.