Lining Paper is a quick & easy way to create a flat and smooth base on walls and ceilings, ready for either painting or wallpapering. Lining paper is a very effective and budget-friendly way to create a professional finish without the cost of hiring a professional. This guide will teach you how to hang lining paper yourself.
This lining paper guide will cover the following:
- Why you should use lining paper
- When to use lining paper
- How to choose the correct type of lining paper
- How to calculate how much lining paper you will need
- How to hang lining paper
Why Should You Use Lining Paper?
You might wonder whether lining paper is worth the extra effort, but once you see the difference in the finish it can make, you’ll want to use it throughout your home.
1. Creating a Superior Base for Painting
Unless your walls and ceilings are recently re-plastered, you may find they’re not in the best condition. Your walls may be uneven in places and have dings, dents, hairline cracks and countless holes from general wear and tear over the years.
Every tiny imperfection would appear if you painted straight onto your damaged walls. Lining paper smooths over all of this and will give you a smooth surface without an expensive and time-consuming re-plastering job.
Using lining paper is much more DIY-friendly than plastering. Lining paper also costs a lot less, and unlike going back and forth between patching, poly-filling and sanding, it will provide a perfect finish the first time around.
Lining paper also has additional benefits, such as preventing stains from showing through and providing more insulation.
2. Produces a Professional Finish when Wallpapering
You may think you can skip lining paper if you’re using decorative wallpaper, but lining paper is still very important.
Not only does lining paper create a better base, but it also prevents your decorative wallpaper from shrinking while drying. Shrinking often causes a gap between the joins and produces a far less professional finish.
Lining paper also makes wallpaper more durable and is the best way to get a perfect finish.
Tools and Materials
Tools
- Step Ladder or Platform
- Spirit Level
- Pencil
- Tape Measure
- Scissors
- Bucket
- Pasting Table or Similar
- Pasting Brush
- Paperhanging Brush
- Sponge
- Sharp Knife
- Metal Guide
- Seam Roller
Materials
- Sugar Soap
- Wallpaper Paste
- Water
- Lining Paper. We highly recommend this lining paper from SupaDec.
Choosing the Right Grade of Lining Paper
Lining Paper has several sizes (length and width) and different grades. Each grade determines how thick the Paper is. A lower number relates to a thinner paper; a higher number means a much thicker paper.
If you have freshly plastered walls but have some hairline cracks, use a thin grade of paper, e.g. 800.
If your walls are particularly old and you have much more to cover up, a higher grade would be more suitable, e.g. 2000.
Generally speaking, though, if your walls are “middle of the road”, 1400 is a good grade to use.
Calculating how much Lining Paper you will need
Simply measure each wall’s height and width, then multiply them together.
For example:
Wall 1: 2.4m Height x 4.8m Width = 11.52m2
Wall 2: 2.4m Height x 3.2m Width = 7.68m2
Then add each wall area measurement together.
11.52m2 + 7.68m 2= 19.2m2
Finally, divide this number by square-area coverage (usually found on the packaging otherwise, multiply the length of the roll by the width).
19.2m2 ÷ 11.2m2 (coverage of example roll only) = 1.71 rolls.
This number means you need to buy 2 rolls, and you would have some paper to spare.
To Hang Horizontally or Vertically?
If you plan on using decorative wallpaper on top of the lining paper, it’s better to hang the lining paper horizontally. This technique is called ‘cross-lining’.
Cross-lining guarantees no chance of the joins between the top layer (wallpaper) and bottom layer (lining paper) meeting along the same line, which is important as it can cause the wallpaper to lift off.
However, cross-lining demands a bit more skill (it’s much trickier to do!), and it also requires a platform to walk across (basically, so you don’t have to move the ladders every 2 seconds!).
That said, you can hang lining paper vertically, ensuring the joins between the top layer of wallpaper and the bottom layer of lining paper always overlap. If this is your first time using lining paper, this is probably the better option – and it’s how I’ve done it too.
Lining paper and wallpaper are often sold in different widths, so the chance of the joins meeting at the same spot is relatively low.
If you plan on simply painting over the lining paper, you don’t need to worry about cross-lining, and you can hang the Paper vertically.
How To Hang Lining Paper — Step-by-Step Instructions
Follow the steps below to hang lining paper like a pro!
1. Prepare Walls
While lining paper hides most imperfections, more significant issues (much bigger holes or cracks) must be fixed first. Fill any problematic areas with some all-purpose filler and sandpaper, and remove any existing wallpaper, as well as nails, screws and wall plugs.
Removing dust is essential because it will affect how well the wallpaper adhesive works. Use a sugar soap solution to clean the walls, and let them completely dry before moving on to the next step.
According to Wallpaper-Direct, if you have newly plastered walls, you should also ‘size’ the walls by mixing up some watered-down wallpaper paste, apply to the walls and allow to dry.
For more info on repairing walls, please check out our guide to Patching Plaster.
2. Mark Up Walls
Plan where you will hang your first drop of paper. Edges and corners of a room are never perfectly straight or square, so those aren’t great starting points, as you’ll soon find your Paper going off wonky.
The middle of a wall is usually a good place to begin. However, you’ll also want to check there will be a minimum of 10-15cm of Paper left at the inner corners of the room to fold onto the next wall.
Draw a guideline to ensure your lining paper goes on straight. You can draw a guideline by placing a large spirit level onto the wall, ensuring it’s straight and then drawing a line across or down the wall, depending on which way you hang the paper.
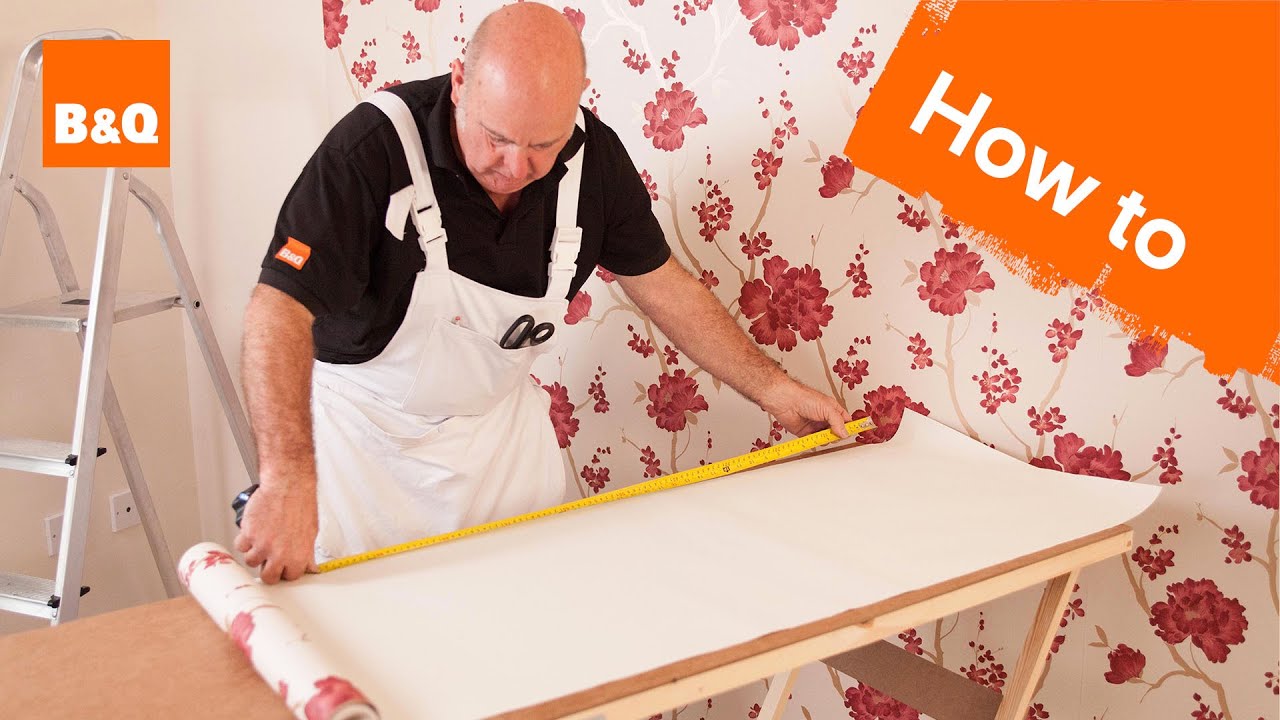
3. Cut Lining Paper to Length
To make your life easier, I recommend pre-cutting a few lengths of lining paper to size. Measure up the wall, add an extra 10-15cm for overhang, and cut with scissors. The more lengths you pre-cut, the quicker you can work.
4. Mix Wallpaper Paste
Now you’re ready to mix some wallpaper paste and start pasting!
Each bag of paste will have guidelines on how much water you need to use in the mix, so following these instructions is important to get the right consistency. Make sure to mix well so that there aren’t any lumps.
5. Apply Paste to Lining Paper
You’ll need a good working station, so I recommend using a pasting table to lay your lining paper onto. Don’t worry if the table isn’t long enough; you’ll be folding the paper as you paste.
Starting at one end, use a pasting brush to apply a good amount of paste onto the back of the lining paper. Make sure you don’t miss any areas, particularly at the edges.
Use a concertina fold to bunch up the Paper as you go. Essentially, this is folding the paper back and forth. The video below demonstrates this technique.
The lining paper should then be left to soak for the recommended time, which you’ll find on the packaging.
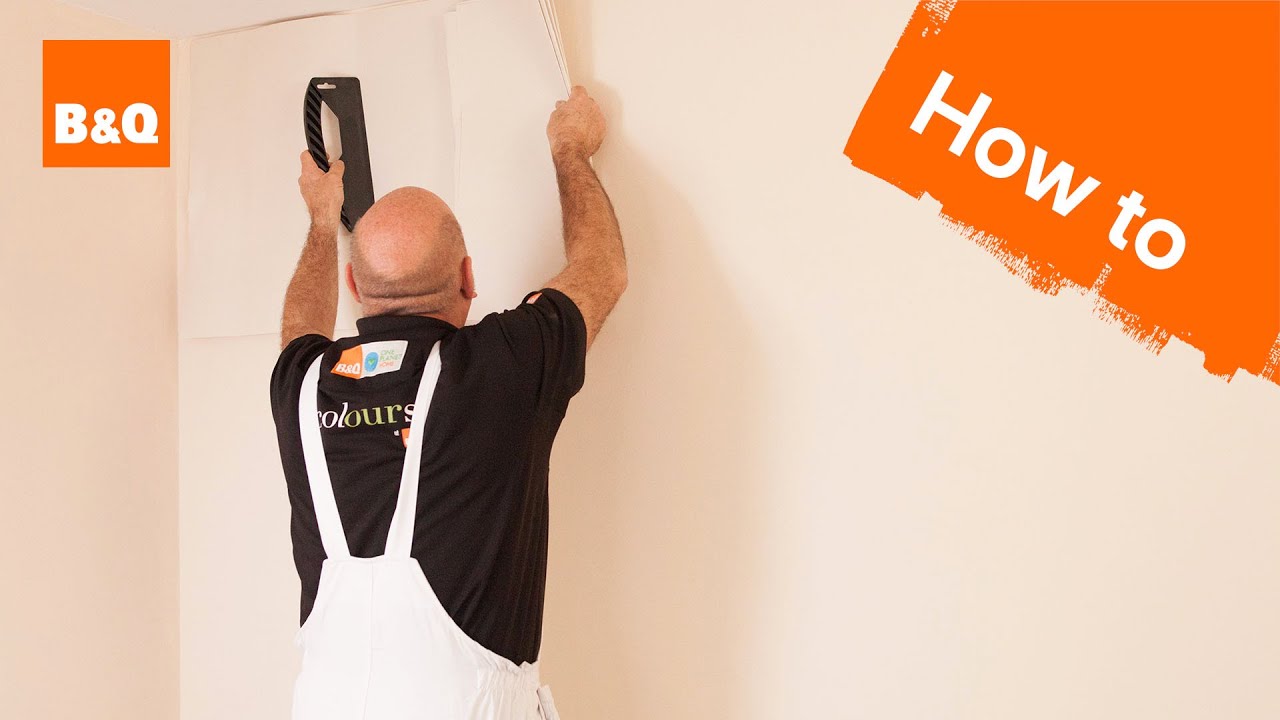
6. Hang the First Sheet of Lining Paper
Using your line as a guide, you should start at the top of the wall (or one side, if hanging horizontally) and gently press the Paper onto the wall, matching it up against the guide. If it doesn’t match, lift off and push back down.
If hanging vertically, you want to be careful not to drop the rest of the wallpaper in one go, as this may cause it to tear.
Next, use a dry paper-hanging brush to press the Paper firmly onto the wall, starting in the middle of the lining paper and then pushing outwards.
Ensure there aren’t any air bubbles (these can usually be felt as you rub your hand over the Paper), and then work your way down (or across!) the rest of the lining paper.
If you find edges of the paper that don’t have enough adhesive, lift them off and use a small brush to apply more. Wipe away any excess adhesive with a damp sponge.
7. Cut Lining Paper to Size
You’ll need to cut the lining paper to size when you get to the bottom. Make a crease in the lining paper where the paper meets the skirting, fold it back, and cut it with scissors.
Alternatively, you can use a sharp knife (the sharper, the better) with a metal guide. Go slow and steady with your cut, as wet paper tears easily.
8. Hang Repeat Lengths
You can go ahead and hang the next length of wallpaper using the same steps as above. However, instead of using a pencil line to guide you, use the edge of the previous Paper you’ve just hung.
Make sure each length of lining paper sits side-by-side and as close as possible without overlapping. You can use a seam roller along the join to give a seamless finish.
9. Fit Lining Paper Around Obstacles
No room is perfectly square and obstacle-free, so you will undoubtedly have switches, sockets, doors, windows and radiators to paper around. These areas can be tricky, but they are reasonably straightforward if you take your time.
I recommend removing the top cover for switches and sockets so you can apply the lining paper underneath. Cut an X shape into the paper where the socket goes, and cut away each flap before re-attaching the top cover.
For door frames and windows, you’ll need to cut into the Paper diagonally where it meets the top corner of the door/window. If you have a recess, you can fold the cut section into it. Otherwise, you can just cut the Paper away and neaten it up around the frame.
If your radiators cannot be removed, apply the lining paper as far down into the back of the radiator as possible, using a small paint roller to smooth it down.
Check out this video for a great demonstration:
10. Leave to Dry
Once you’ve finished, the lining paper must dry before painting or hanging decorative wallpaper over the top.
It’s very important not to rush into the next decorating stage, or you may find bubbles occurring underneath – usually, 24 hours should do it!
11. Ready to Decorate!
If any of the joins have slightly separated (shrunk) as they’ve dried and left a small gap, you can use some filler to smooth them over and create a seamless finish. Otherwise, you should be able to move on to the next decorating stage and either paint directly onto the lining paper or add decorative wallpaper.
Final Thoughts
The more you use lining paper, the easier it will become. Also, hanging lining paper gives you plenty of practice should you want to use a more expensive and decorative wallpaper as your top layer.
Alternatively, if you paint straight onto the lining paper, you’ll thank yourself once you see the seamless and flawless result. Moreover, think about the money you’ll save on not re-plastering!
Pro Tip: If you want to see a quick version of this process in action, check out the video tutorial below:
