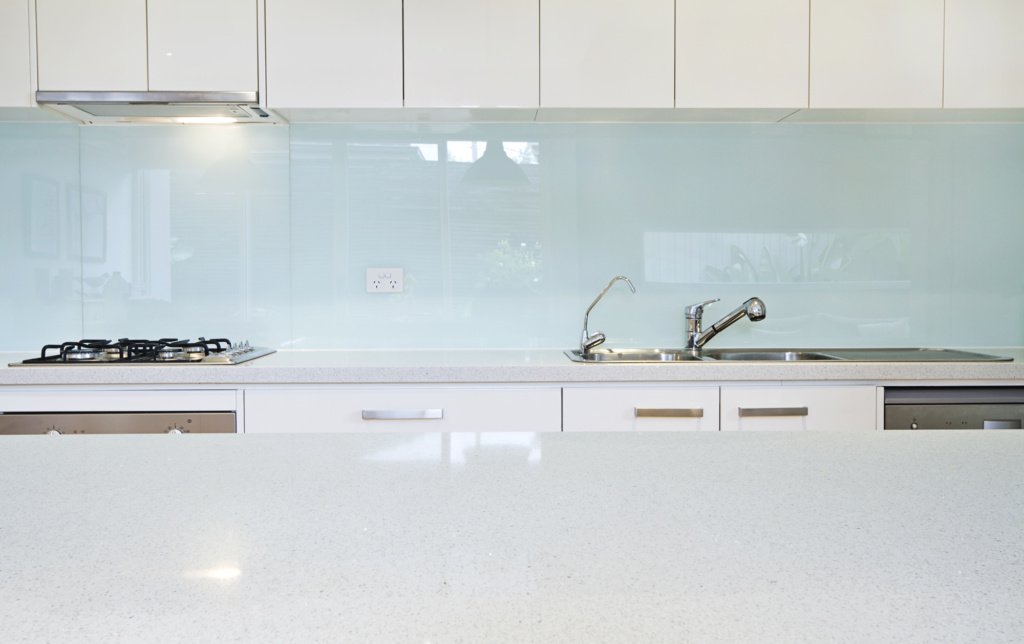
Practical and visually pleasing, acrylic splashbacks are hugely popular in kitchens. They provide an inexpensive backdrop against the wall, are durable, easy to maintain, and protect walls from grease and grime.
This guide will show you how to fit acrylic splashback step-by-step.
In a Hurry? Find top-rated kitchen tilers in your area by clicking the button below:
What is Acrylic?
Acrylic is a type of plastic that mimics the same visual appearance as glass. It’s sometimes also known as perspex, and you can buy it in various thicknesses, colours, patterns and transparencies.
Why Choose an Acrylic Splashback?
Whilst acrylic mimics the appearance of glass, it is arguably a more favourable material to use when it comes to splashbacks. Not only is it inexpensive, but it doesn’t require any special cutting tools for installation either. It means it’s relatively straightforward to fit.
Acrylic is also much lighter and tougher than glass, making it less likely to break.
Other splashback alternatives include stainless steel and tiles. Stainless steel doesn’t suit everybody’s taste, and tiles require more time, materials and work to install.
Here’s a quick summary of the pros and cons of using acrylic as a splashback:
| Pros | Cons |
| Inexpensive. | It may scratch if the wrong cleaning material is used. |
| Half the weight of glass. | Not all acrylics are suitable for use near a hob. |
| It can be installed DIY-style. | |
| It can be purchased in a variety of colours and patterns. | |
| Toughened, unlikely to break. | |
| Easy to clean. |
Pro Tip: Acrylic Supplier Cut Plastic Sheeting recommends a minimum of 3mm thick acrylic for smaller splashbacks and a minimum of 5mm thick acrylic for larger panels over 600mm in width.
Installation: Adhesive or Screws?
When it comes to fitting an acrylic splashback, two methods are available: adhesive or screws. If you have chosen a clear or translucent splashback, then, needless to say, the glue would be visible through it. In this case, you should definitely use screws.
Some people may also opt for screws if they foresee themselves changing the splashback in the future (ie, it’s only being installed as a temporary solution), as this will make it easier to remove and replace without damaging the walls.
Unless either of the above applies to you, the simplest and easiest method is adhesive. Regardless of which you choose, we’ll take you through each method in this guide.
So, if you’ve decided an acrylic splashback is for you, read on.
How To Fit Acrylic Splashback — Step-by-Step Instructions
If you carefully follow the steps below, especially when measuring and cutting, fitting an acrylic splashback is a relatively simple DIY job.
Tools & Materials
Tools:
- Cloth
- Tape Measure
- Pencil
- Long Ruler
- Saw (Jigsaw or Circular Saw are ideal)
- Drill
- Multi-Purpose Drill-Bit
- Sanding Block
- Metal Saw
Materials:
- Sugar Soap
- PVA and Water (If required)
- Acrylic Splashback
- Masking Tape
- Wooden Batten
- Wet and Dry Sandpaper (180–600 grit)
- Splashback Joint Bar
- Construction Adhesive
- Double-Sided Fixing Tape
- Wall Plugs
- Mirror Screws
- Silicone Sealant
1. Prepare Walls
Before you begin, you’ll need to prepare your walls properly. Any previous tiles, wallpaper or wall coverings must be removed, and any large areas with blown plaster must be repaired first.
For the acrylic splashback to fit flush against the wall and be properly secured, the wall must be flat without any raised imperfections or large dips.
Hold a long spirit level against the wall and move it around to find any dips. You’ll see these dips when there’s a gap between the spirit level and the wall. Fill in any dips with a pre-mixed plaster skim and leave it to dry before sanding flat.
If your walls are particularly uneven, it may be worth re-plastering first. A few dips won’t cause much of a problem, but like tiling, a level base makes a big difference to the finish.
2. Clean and Seal the Walls
Thoroughly clean the wall with a cloth and sugar soap first to remove any grease and dirt. If the surface is dusty or dirty, the adhesive may not set properly, and you’ll have to redo the entire process.
If you have freshly plastered walls or raw plasterboard, you must seal the wall before fitting the acrylic. Both fresh plaster and plasterboard are porous, which means they will suck the moisture from the adhesive before it can properly stick.
To seal a wall, mix up some PVA and water in a 50/50 ratio and apply it to the wall. Make sure to leave it to dry before moving on to the next step.
3. Measure the Wall
Using a tape measure, measure the height and width of the wall area where you wish to install the splashback. Depending on the length of your wall, you may have to fit two pieces of splashback with a join. In this case, take measurements for installing two separate pieces.
4. Mark Measurements on the Acrylic and Apply Masking Tape
Keeping the protective film on the acrylic, transfer your measurements onto the acrylic sheet using a pencil line and a long ruler. Apply some masking tape over the top of this line and then re-draw it onto the masking tape. The masking tape will ensure that it won’t chip or splinter when you cut the acrylic.
5. Preparation Before Cutting
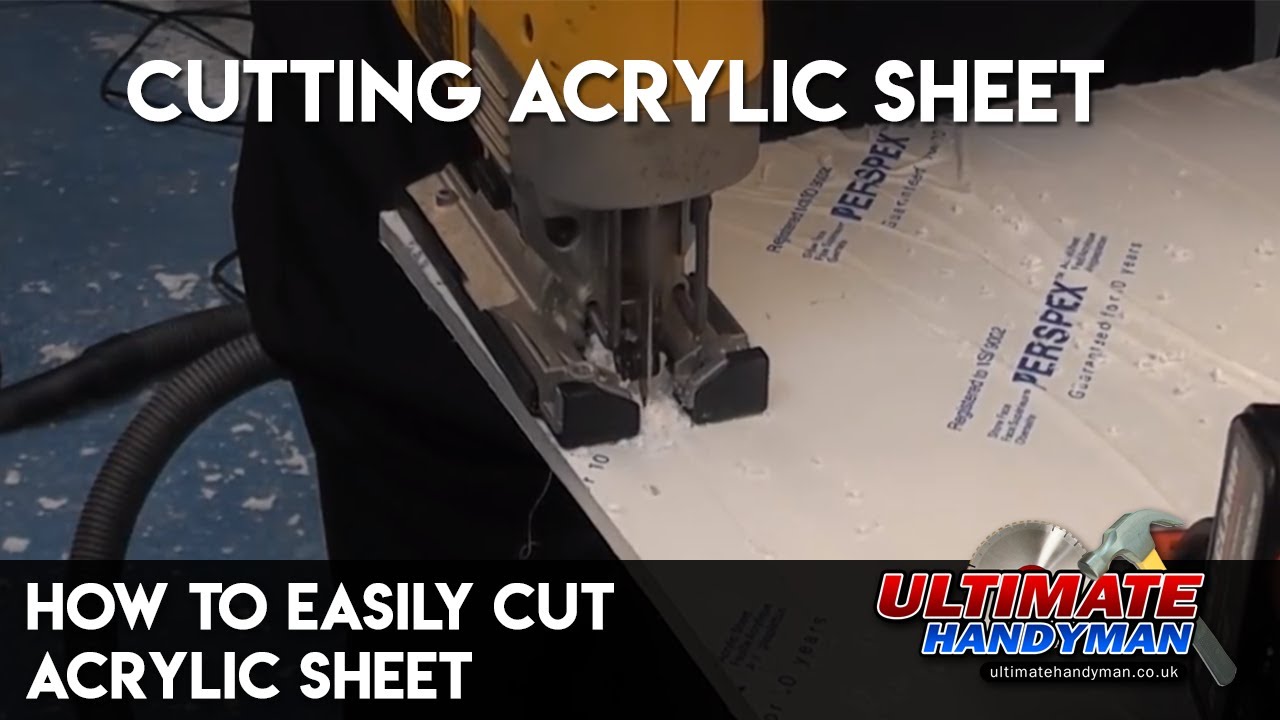
You can use various saws to cut through acrylic, including a jigsaw, circular, or table saw. Whichever saw you choose, ensure you use a blade suitable for acrylic, which ideally is a fine and closely spaced tooth blade. According to Cut Plastic Sheeting, wide space teeth will cause the acrylic to chip.
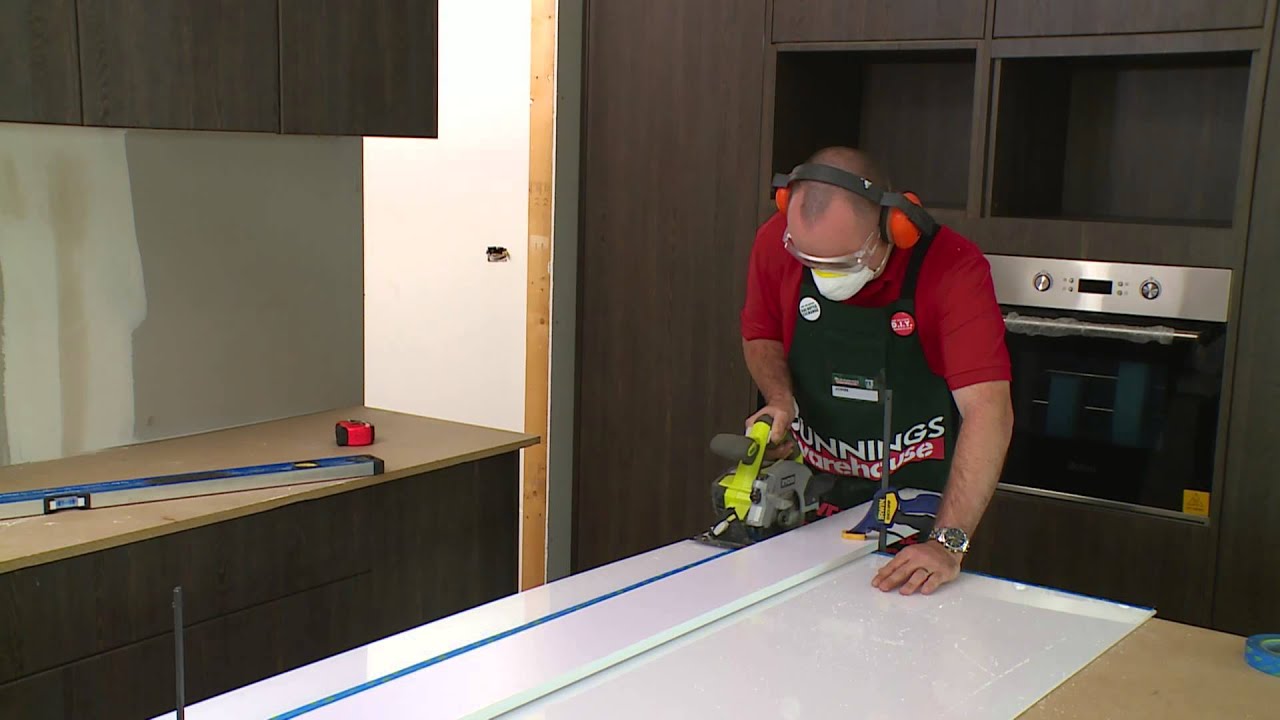
To cut the acrylic, it’s important to have a proper work table set up where you can securely clamp the whole length of acrylic into position. This will prevent excess vibrations, which may otherwise cause the acrylic to crack whilst cutting.
You’ll also want to clamp a wooden batten onto the acrylic so that when you run your saw against it, it will cut directly along the line. The batten will ensure the cut is perfectly straight, and there’s no chance of “going off” at an angle with your saw.
6. Cutting the Acrylic
You can now cut the acrylic’s height and length to the correct size. Whichever saw you use, ensure you start it up before it touches the acrylic. Otherwise, this may cause the edge to chip.
When cutting, try not to force the saw through the acrylic. Let it run at its own pace and gently push through. We also recommend doing a test cut on the acrylic beforehand to see how the blade cuts and ensure it doesn’t leave much of a rough edge.
The video below demonstrates cutting acrylic perfectly with different saws. The video includes a score-and-snap technique, although this is only suitable for acrylic less than 5mm thick and not recommended for large sheets.
7. Measuring Sockets and Switches
One obstacle you’ll almost certainly encounter when fitting an acrylic splashback is cutting around sockets and switches. However, this is much easier than you might think!
- Measure from the bottom of the worktop to the bottom of the socket and add these measurements to the acrylic.
- Do the same for the side of the socket and draw the entire rectangular outline onto the acrylic.
- Add masking tape over the line and redraw as you did earlier. We recommend reducing the rectangle by around 5 mm on each edge for a perfect fit. The cover of the socket/switch will fit over the top of the acrylic, making the cut slightly smaller in size and guaranteeing no gaps.
8. Cutting Around Sockets and Switches
Using a drill and a suitable drill bit for acrylic, drill four holes into the inner corners of the rectangle you drew. Place a piece of wood underneath each hole as you drill to prevent splintering. Remember not to force the drill through. Let it run through at its own pace!
Once you’ve drilled four holes, slot a jigsaw into one hole at a time and cut along the straight lines to remove the rest of the rectangular outline.
9. Smooth Cut Edges
If any edges are a little rough or splintery, follow the steps below:
- You’ll need some wet and dry sandpaper with a sanding block and a bit of water too.
- Dampen the acrylic edge, and using 180-grit sandpaper around a sanding block, rub back and forth over the edge until the bulk of the roughness is removed.
- Keep the edge slightly damp at all times but not too wet.
Once you’ve removed most of the roughness with the 180-grit paper, you can go back over and repeat the process with slightly finer sandpaper (320-grit) before eventually finishing with the finest grit (600-grit) to give it a fully polished finish. Take time with this step, and don’t rush moving between sandpapers too soon.
10. Creating Joins
If you have to join two separate lengths of acrylic, you have two options. The first is to butt the two pieces of acrylic together, and providing you’ve cut two perfect edges, they should meet up against one another to provide a seamless finish. If cut correctly, you shouldn’t even notice the join.
If your acrylic cutting has been less than perfect, use a straight aluminium splashback joint between the joins. This joint slots between the two acrylic pieces and covers each cut edge. It creates a visible join but often provides a neater finish if your cuts aren’t perfect. Use a metal saw to cut the aluminium joint to the same height as your acrylic.
11. Fixing the Acrylic into Position
We have two options available for this step: glue or screws. As mentioned previously, the method you choose depends on how transparent your acrylic is and whether you wish to change it later.
Whichever method you pick, you should do a dry fit first to ensure everything fits perfectly into place before you go ahead and properly secure it.
Method 1: Using Glue
Using an all-purpose construction adhesive with a cartridge gun, apply a liberal amount of adhesive onto the back of the splashback in an up-and-down V-motion so the back of the acrylic is covered with several different points of contact.
We recommend using double-sided tape with the adhesive so the splashback is held firmly in place whilst the adhesive sets. To do this, affix several lengths of tape along the back of the splashback and peel back the top layer.
Once you’re ready to install the splashback, lift it up and push it firmly onto the wall along the entire length of the splashback. Ensure the adhesive has made contact with the wall throughout the whole length of the splashback.
If you need to use an aluminium joint, fit this simultaneously. Simply apply some adhesive to the back of the jointing bar and slot it into the edge between the splashback. If any adhesive pushes out from the back of the splashback, wipe this away.
Method 2: Using Screws
If you’re using screws to affix your splashback, drill four holes in each corner of the acrylic as you did earlier for the socket. If your splashback is particularly long, you may also wish to add two in the middle.
Once you’ve drilled these holes, hold the splashback in position and mark the same holes onto the wall. Drill these holes into the wall and place wall plugs into them.
To affix the acrylic splashback, we recommend using mirror screws because they have caps that slot over the screw for a more visually pleasing appearance. Screw through the front of the acrylic into each wall plug and tighten it. Add the caps for a sleek finish.
Pro Tip: Before Installation, ensure your acrylic splashback is suitable for use behind a hob, as not all acrylics are heat resistant.
12. Remove the Plastic Cover
If you’ve used an adhesive, leave it to dry for a minimum of 24 hours and remove the plastic cover from the acrylic splashback. Removing earlier than this may cause the acrylic to separate from the glue.
13. Sealant Between Splashback and Worktop
Finally, the last step is to apply a bead of silicone sealant to the gap between the splashback and the worktop, so no food or water can get through this gap.
For a full tutorial, check out our guide on using silicone sealant. Once this step is done and the sealant has dried, you’re all done!
If you want to see the whole process of installing your acrylic splashback, watch the video below by Bunnings:
Don’t fancy doing this job yourself? Find top-rated kitchen tilers in your area by clicking the button below:
Final Thoughts
So that’s it! Installing an acrylic splashback is much easier than you might think. It’s also inexpensive and provides a sleek and modern finish to any kitchen.
For more cost-effective kitchen renovation tips, check out our guide to painting kitchen cabinets.